Getting Started
The purpose of this document is to assist new or existing customers in the setup and initial configuration of their NEONNOW solution.
Further assistance can be requested if required by emailing sales@cloudwave.com.au.
The installation process can be done as quick as 10 minutes, however if this is your first time, allow at least an hour to work systematically through this guide.
Audience
This guide requires general AWS Console familiarity, and some level of experience with Amazon Connect will speed up the onboarding. Specific links have been provided in this guide to existing Amazon Connect help documentation. There is no specific coding, AWS SDK, AWS CLI or other skills required.
An understanding of the principles of a Contact Centre is assumed.
Prerequisites
The Quick Start guide assumes that you have already established the following:
- AWS account signed-up and established
- This is the account that houses the Amazon Connect instance that NEONNOW will be integrated with.
- AWS Console Access
- The AWS Console user used for integration must have the following permissions:
- cloudformation:CreateStack
- iam:CreateRole
- iam:AttachUserPolicy
- However, to manage Connect and other standard configuration, other IAM permissions will be reqiured, but are covered by standard AWS documentation here
- Note: we strongly recommend you not to use AWS root credentials for this installation, as part of good AWS security practice.
- The AWS Console user used for integration must have the following permissions:
- An Amazon Connect instance setup, following An Amazon Connect instance setup here, in the above AWS account and configured with:
- A working contact flow - For more information visit: Create a flow here
- A claimed phone number is associated with the contact flow. For more information visit: Assign the contact flow to the phone number
- An agent already setup and configured with a routing profile
- For more info visit: Set up routing here, Set up agents here
- Customer Profiles either NOT enabled (NEONNOW will enable), OR if enabled, ensure you have set a domain name of
amazon-connect-connect-instancealias, for exampleamazon-connect-myinstance123 - To support NEONNOW MFA, a valid email address and/or phone number must be set against user in Amazon Connect

If your customer profiles domain does not match the above, you may receive an error when trying to create your NEONNOW contact centre.
-
Add Agent Statuses in Amazon Connect
- Add custom agent status here
-
Are your agents making outbound calls? Outbound requirements:
- Default Outbound Queue - The routing profile of the agent MUST have a default outbound queue configured. In addition, the outbound queue must have a phone number assigned.
- Security Permissions per below (Note these two permissions are included in the default Agent and Admin security profiles in Amazon Connect.)
- CCP: Access CCP
- CCP: Outbound permissions
-
Using queue/agent transfers? - The following default transfer Contact Flows must exist: (Without these Contact Flows, agent/queue transfers will fail, and an error will be shown to your agents)
- Default queue transfer
- Default agent transfer
- Amazon Connect Service Quotas
- Quick Connects - NEONNOW uses dynamic quick connects to facilitate agent and queue transfers. Each transfer between an agent and another agent/queue uses a single quick connect to form a reusable transfer. Because of this, we recommend increasing your quick connect limit to the number of agents + number of queues.
-
Single Sign On (Optional): If you are planning on signing in to your contact centre with a single sign on (such as using Azure Active Directory), you will need to have created your Amazon Connect instance with it enabled. When you have created your NEONNOW contact centre, you will need to go into customisation and enable SSO with the login URL. For additional information on configuring SSO visit Configuring Single Sign On
-
End User and Network Pre-Requisites.
-
Please read and understand the FAQs located here - specifically:
-
Understand all Billable Services within your AWS account. Please see here for a complete breakdown of this information.
AWS Customer Account Resources
To integrate NEONNOW with your Amazon Connect AWS account, the onboarding wizard will create an AWS IAM role, that will be used call Amazon Connect APIs and setup service orchestration. The role will be named uniqueID-client-apiExeRole.
The role will be set up with the following policy by default:
- connect:* (Connect) - used to manage Amazon Connect APIs, such as users, Queue Metrics, quick connects etc.
- profile:*  (Connect customer profiles) - used to manage Amazon Connect customer profiles
- quicksight:* (Amazon Quicksight) - used to integrate with the Quicksight for Reporting embedding
- ses:* (Amazon SES) - used to orchestration SES for the <ProductName /> Email platform
- s3:* (Amazon S3) - used for storage of emails content
- kms:* (AWS Key Management Service) - used for securing Customer profiles with custom keys
- bedrock:* (Bedrock) - used for generative AI features of <ProductName />.
It is possible to restrict this policy further down to individual actions & resources, however this will differ, depending on the features you have enabled in your NEONNOW instance.
Please refer to the Admin FAQs here for a sample role policy that can be used.
The role grants the NEONNOW AWS SaaS account access to assume this role and orchestrate those services. The role is secured by AWS accont ID and also used an External ID.
Here is a specific list of resources deployed to your AWS account, broken down by Feature:
-
NEONNOW Base build
- IAM role, as detailed above
- NEONNOW URL will be added as new Amazon Connect origin
- Customer Profiles domain and KMS cert (if required)
-
NEONNOW Email Feature
- AWS SES, including domain & email verifications, email rule sets
- AWS S3 for emails and attachments
-
NEONNOW Insights (reporting)
- Kinesis Data Streams (utilised but NEONNOW will not orchestrate creation)
- AWS Lambda for Amazon Connect real-time metrics
- S3 bucket for real-time for Amazon Connect real-time metrics results
- S3 Buckets for Athena query Storage
- S3 Buckets for CTR and Agent Stream records
- AWS Glue Tables
- AWS Athena for S3/Glue queries
- Amazon Quicksight for BI, including service users for report embedding.
Deployment Options
NEONNOW can be deployed to a number of regions, including:
- Sydney, Australia (ap-southeast-2)
- Oregon, United States of America (us-west-2)
- North Virginia, United States of America (us-east-1)
- London, United Kingdom (eu-west-2)
Region selection is chosen within the onboarding wizard. Note there is currently no provision for multi-region capability.
All services used within the solution utilise multi-AZ capability. This occurs out of the box due to the nature of the AWS Services used. This provides protection against localised data-centre and Availability Zone failures within AWS.
Architecture
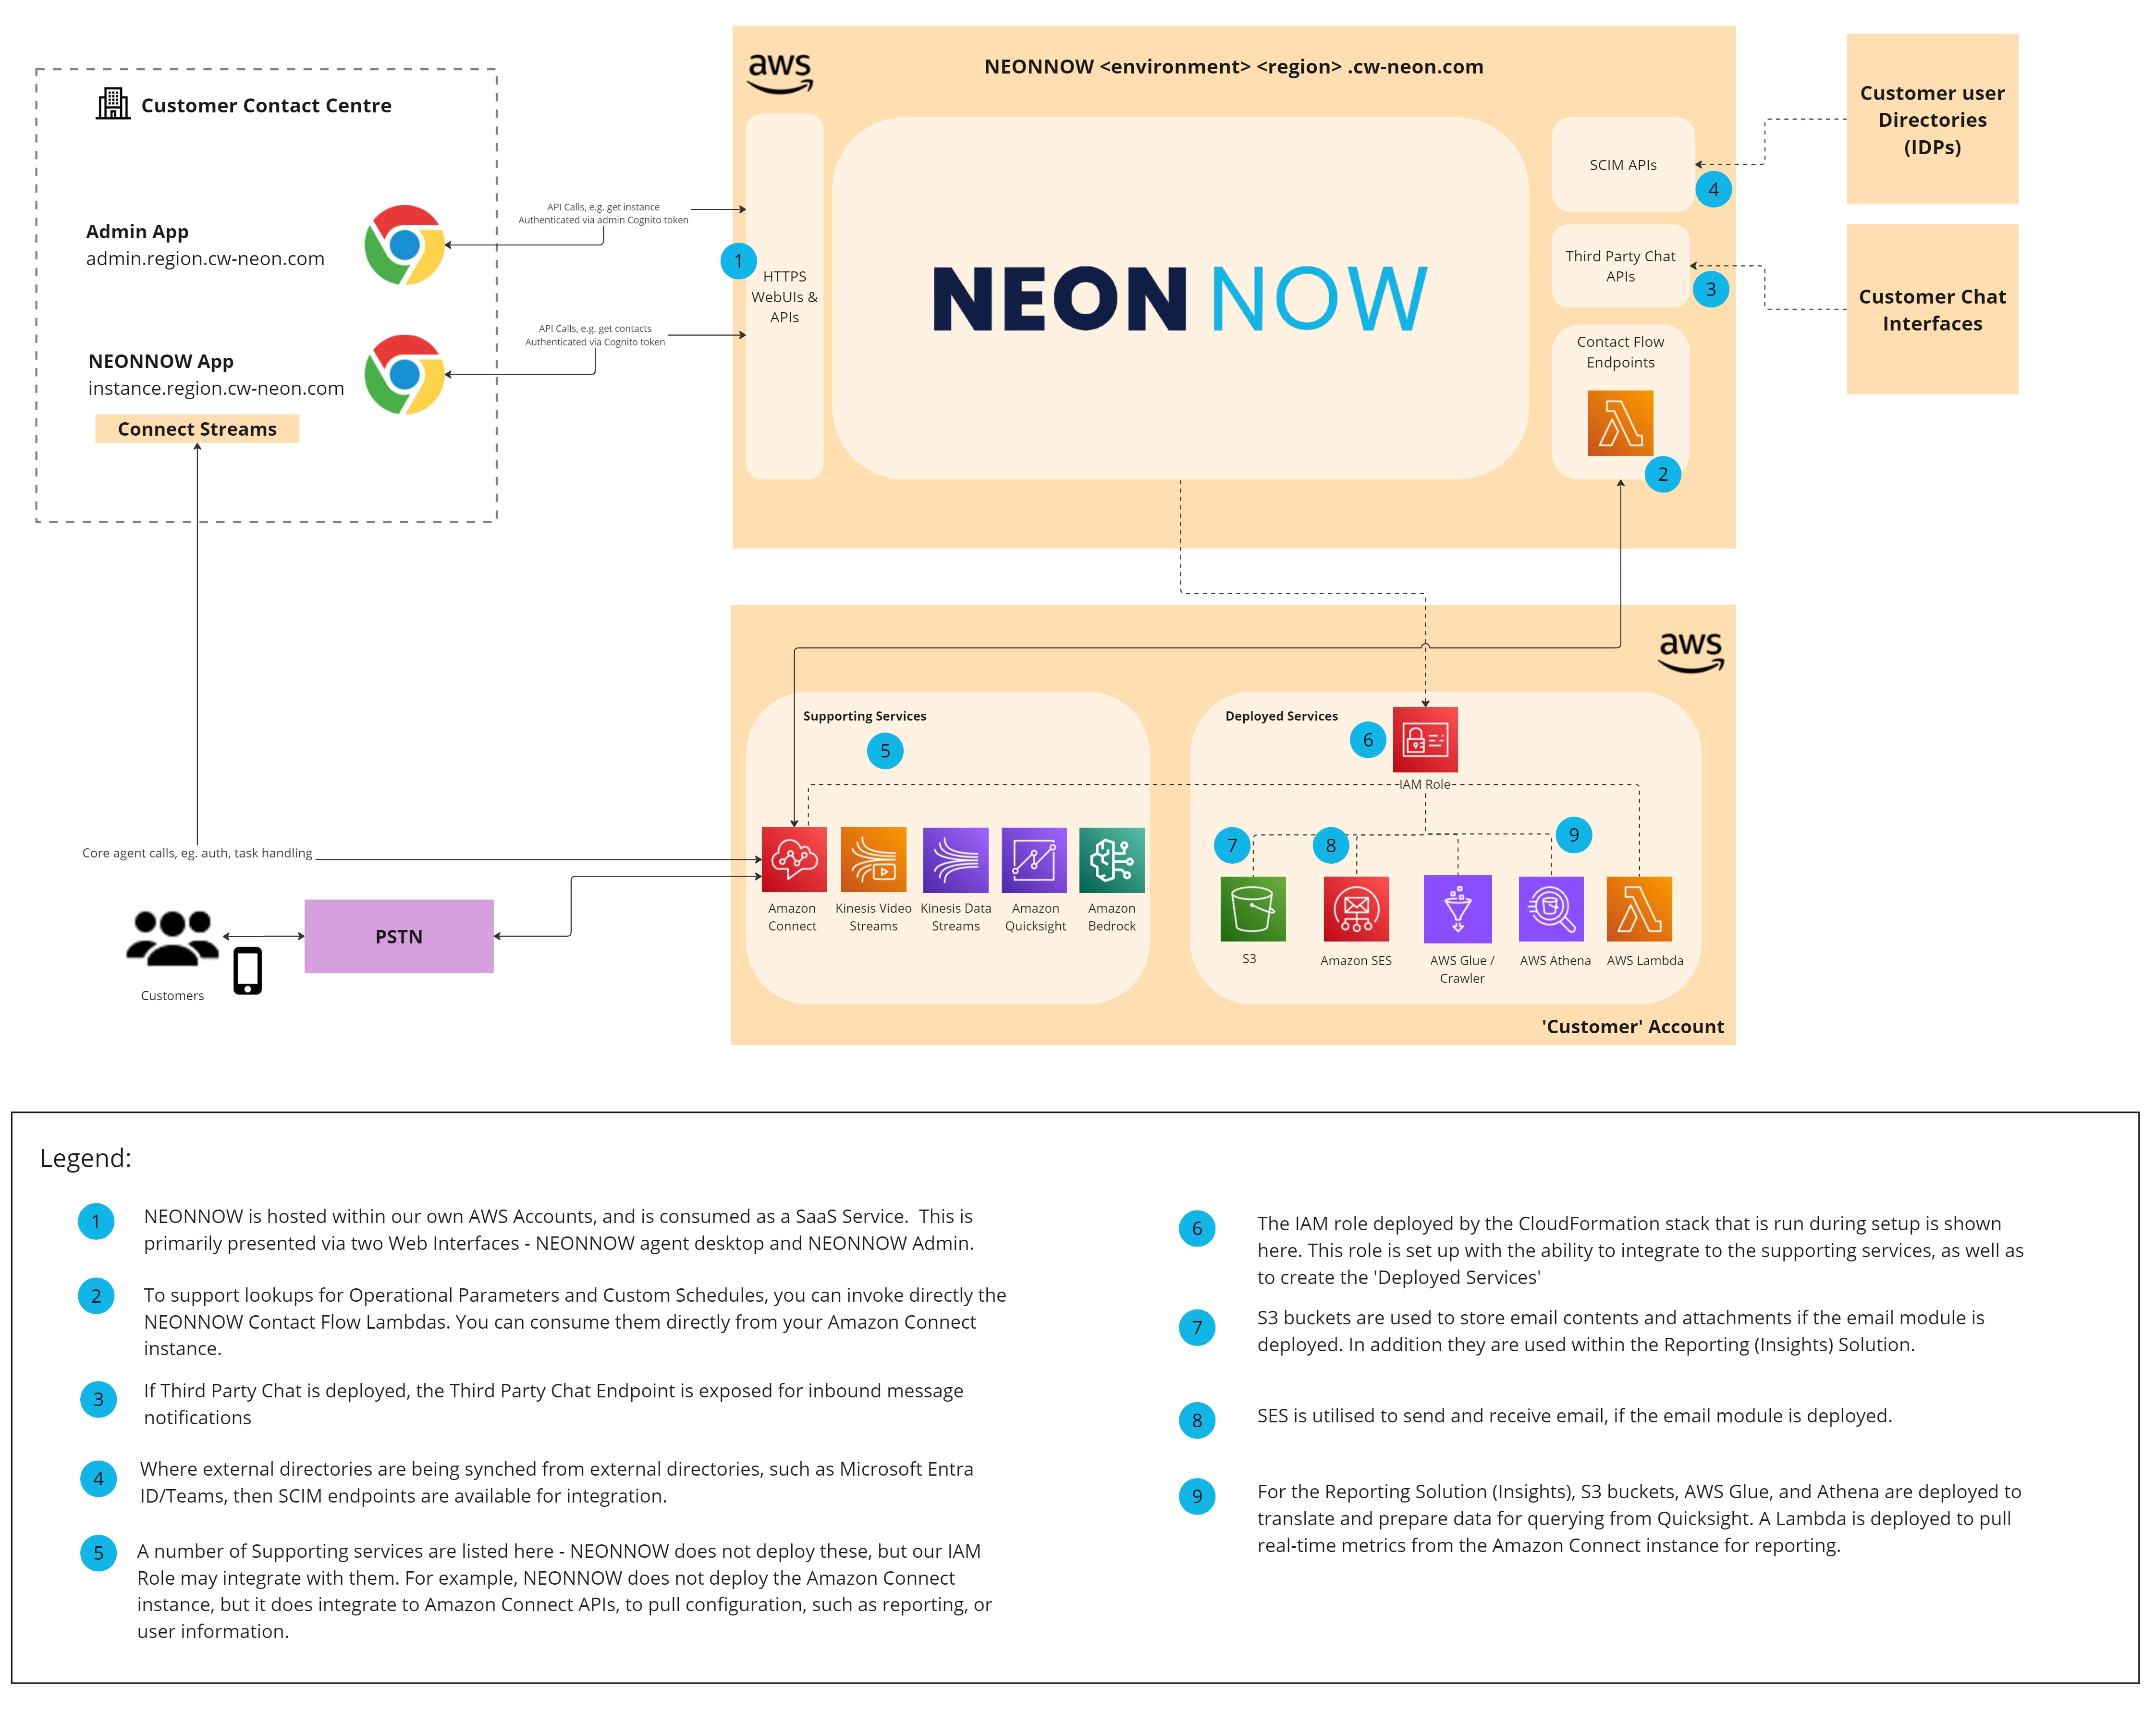
The following diagram shows how NEONNOW integrates with your AWS account and your Amazon Connect instance.
(To expand the image, right click, 'Open image in new tab').
AWS Marketplace
NEONNOW is a flexible and convenient pay-as-you-go service that charges customers based on the number of minutes that their agents are logged in. To subscribe to NEONNOW, customers can purchase it through the AWS Marketplace, and the usage will appear as a line-item on their AWS invoice
Follow the steps to subscribe to NEONNOW:
- Customers should log in to the AWS Console for the AWS Account where their Amazon Connect instance (or instances) resides.
- Click on the Services dropdown menu on the top left of the console.
- Select AWS Marketplace Subscriptions or search for "Marketplace" in the Search box.

- Select Discover Products from the left menu, then search “NEONNOW”.
- Select View purchase options.

- Customers can subscribe to NEONNOW via the subscribe button. After Subscribing from the AWS Marketplace, click “Set up your account “ on the top right of the screen to start the NEONNOW Sign-up Wizard.
If you previously signed in to the NEONNOW admin app with a different account, you need to sign out first.
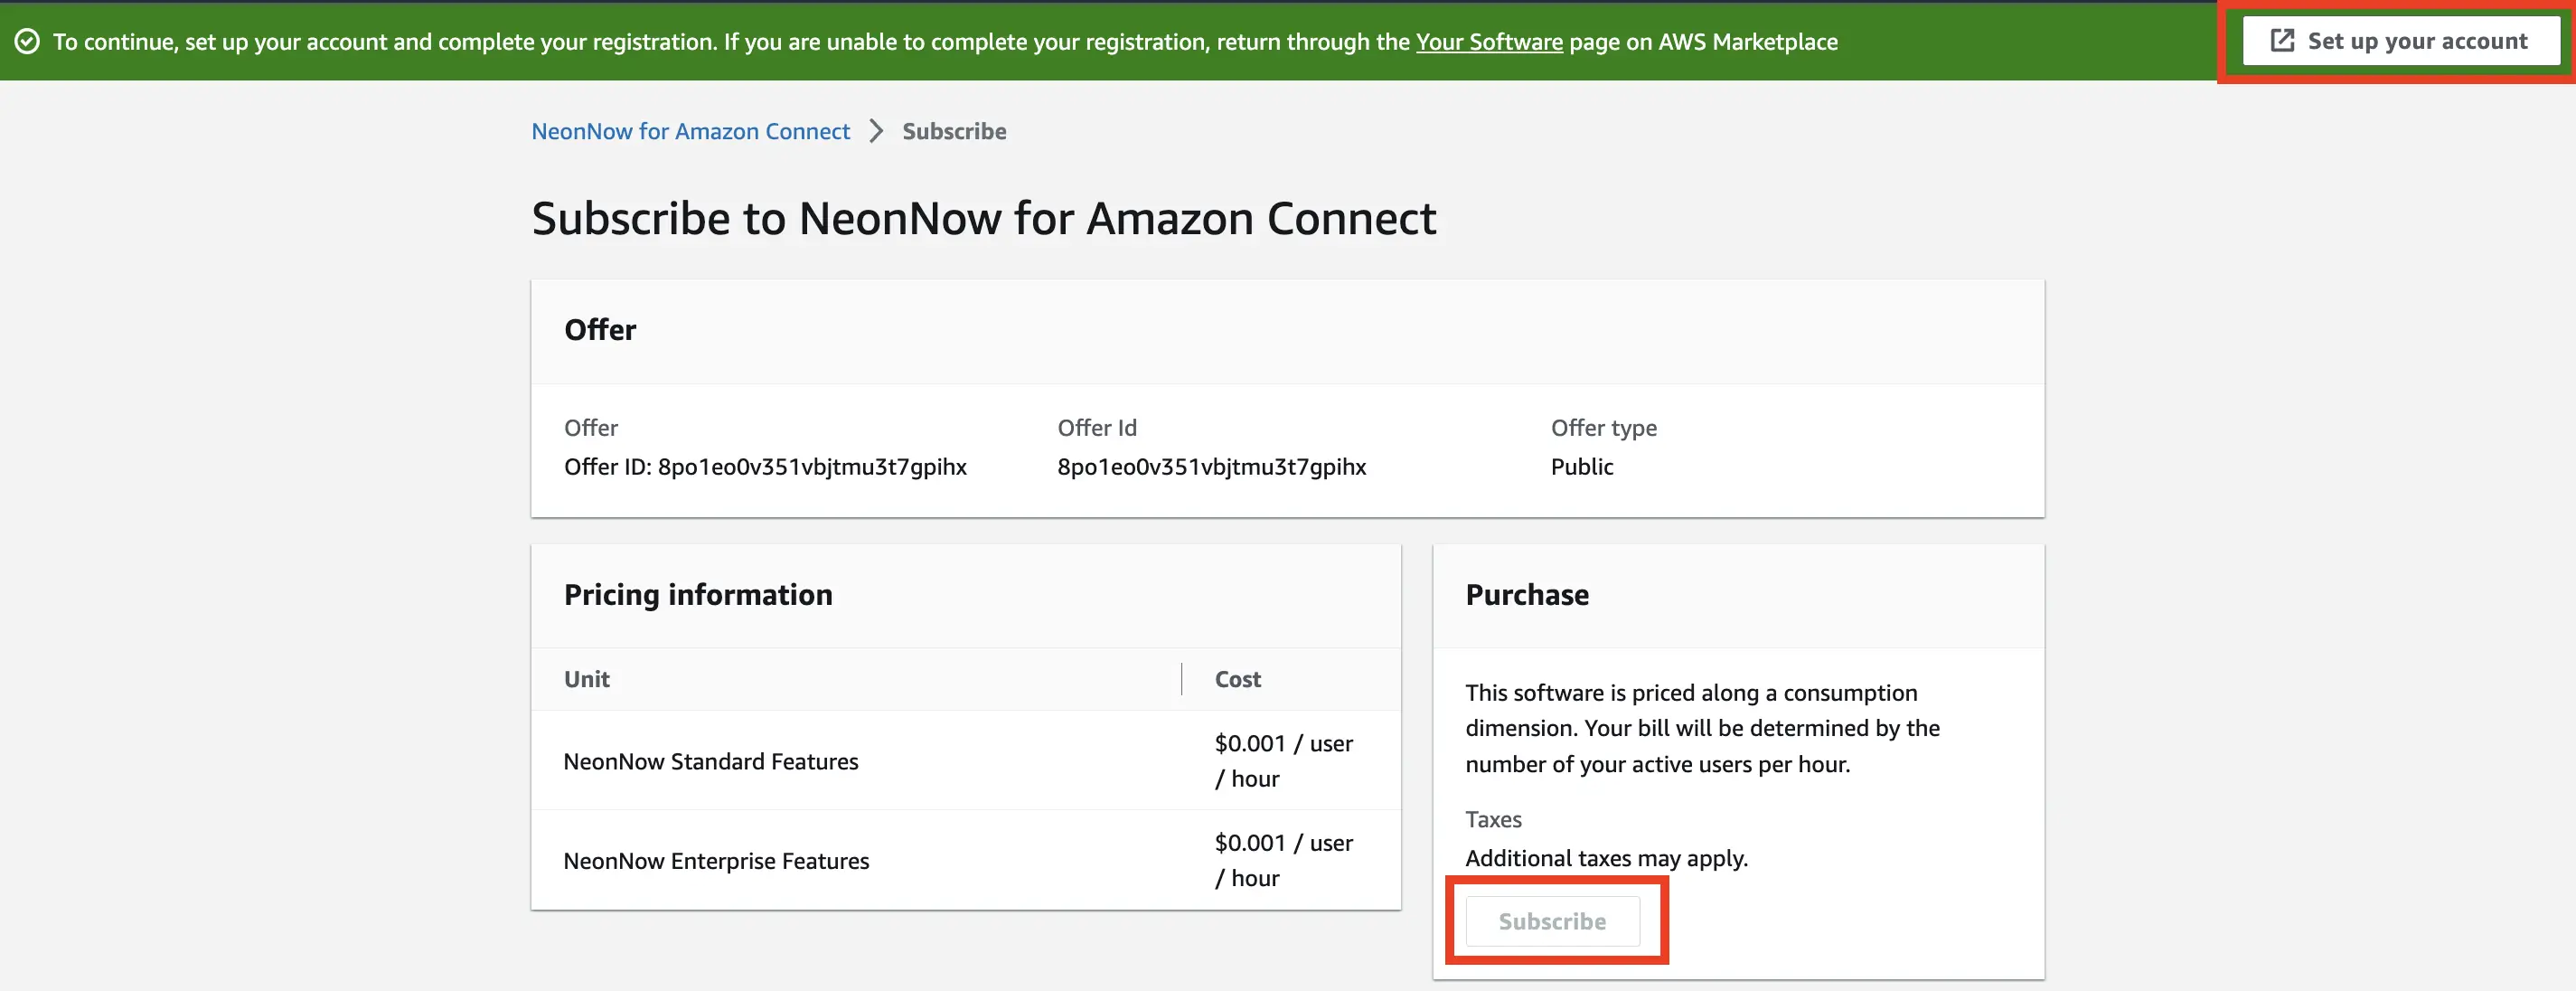
** When you subscribe to NEONNOW via the AWS Marketplace, a new organisation is provisioned for each subscription.**
Multiple NEONNOW instances can exist in a single AWS Account, with the caveat of at max one instance with Enterprise Reporting/Insights configured per region.
Here are some valid configuration examples:
- Single AWS account, with the following:
- 1 ap-southeast-2 instance of Amazon Connect, configured against a NEONNOW instance in ap-southeast-2
- 1 us-west-2 instance of Amazon Connect, configured against a NEONNOW instance in us-west-2
Here are some invalid configuration examples:
- Single AWS account, with the following:
- 2 ap-southeast-2 instances of Amazon Connect, configured against two NEONNOW instance in ap-southeast-2 both of which configured with Enterprise Reporting – only a single instance may be configured per region
NEONNOW Signup Wizard
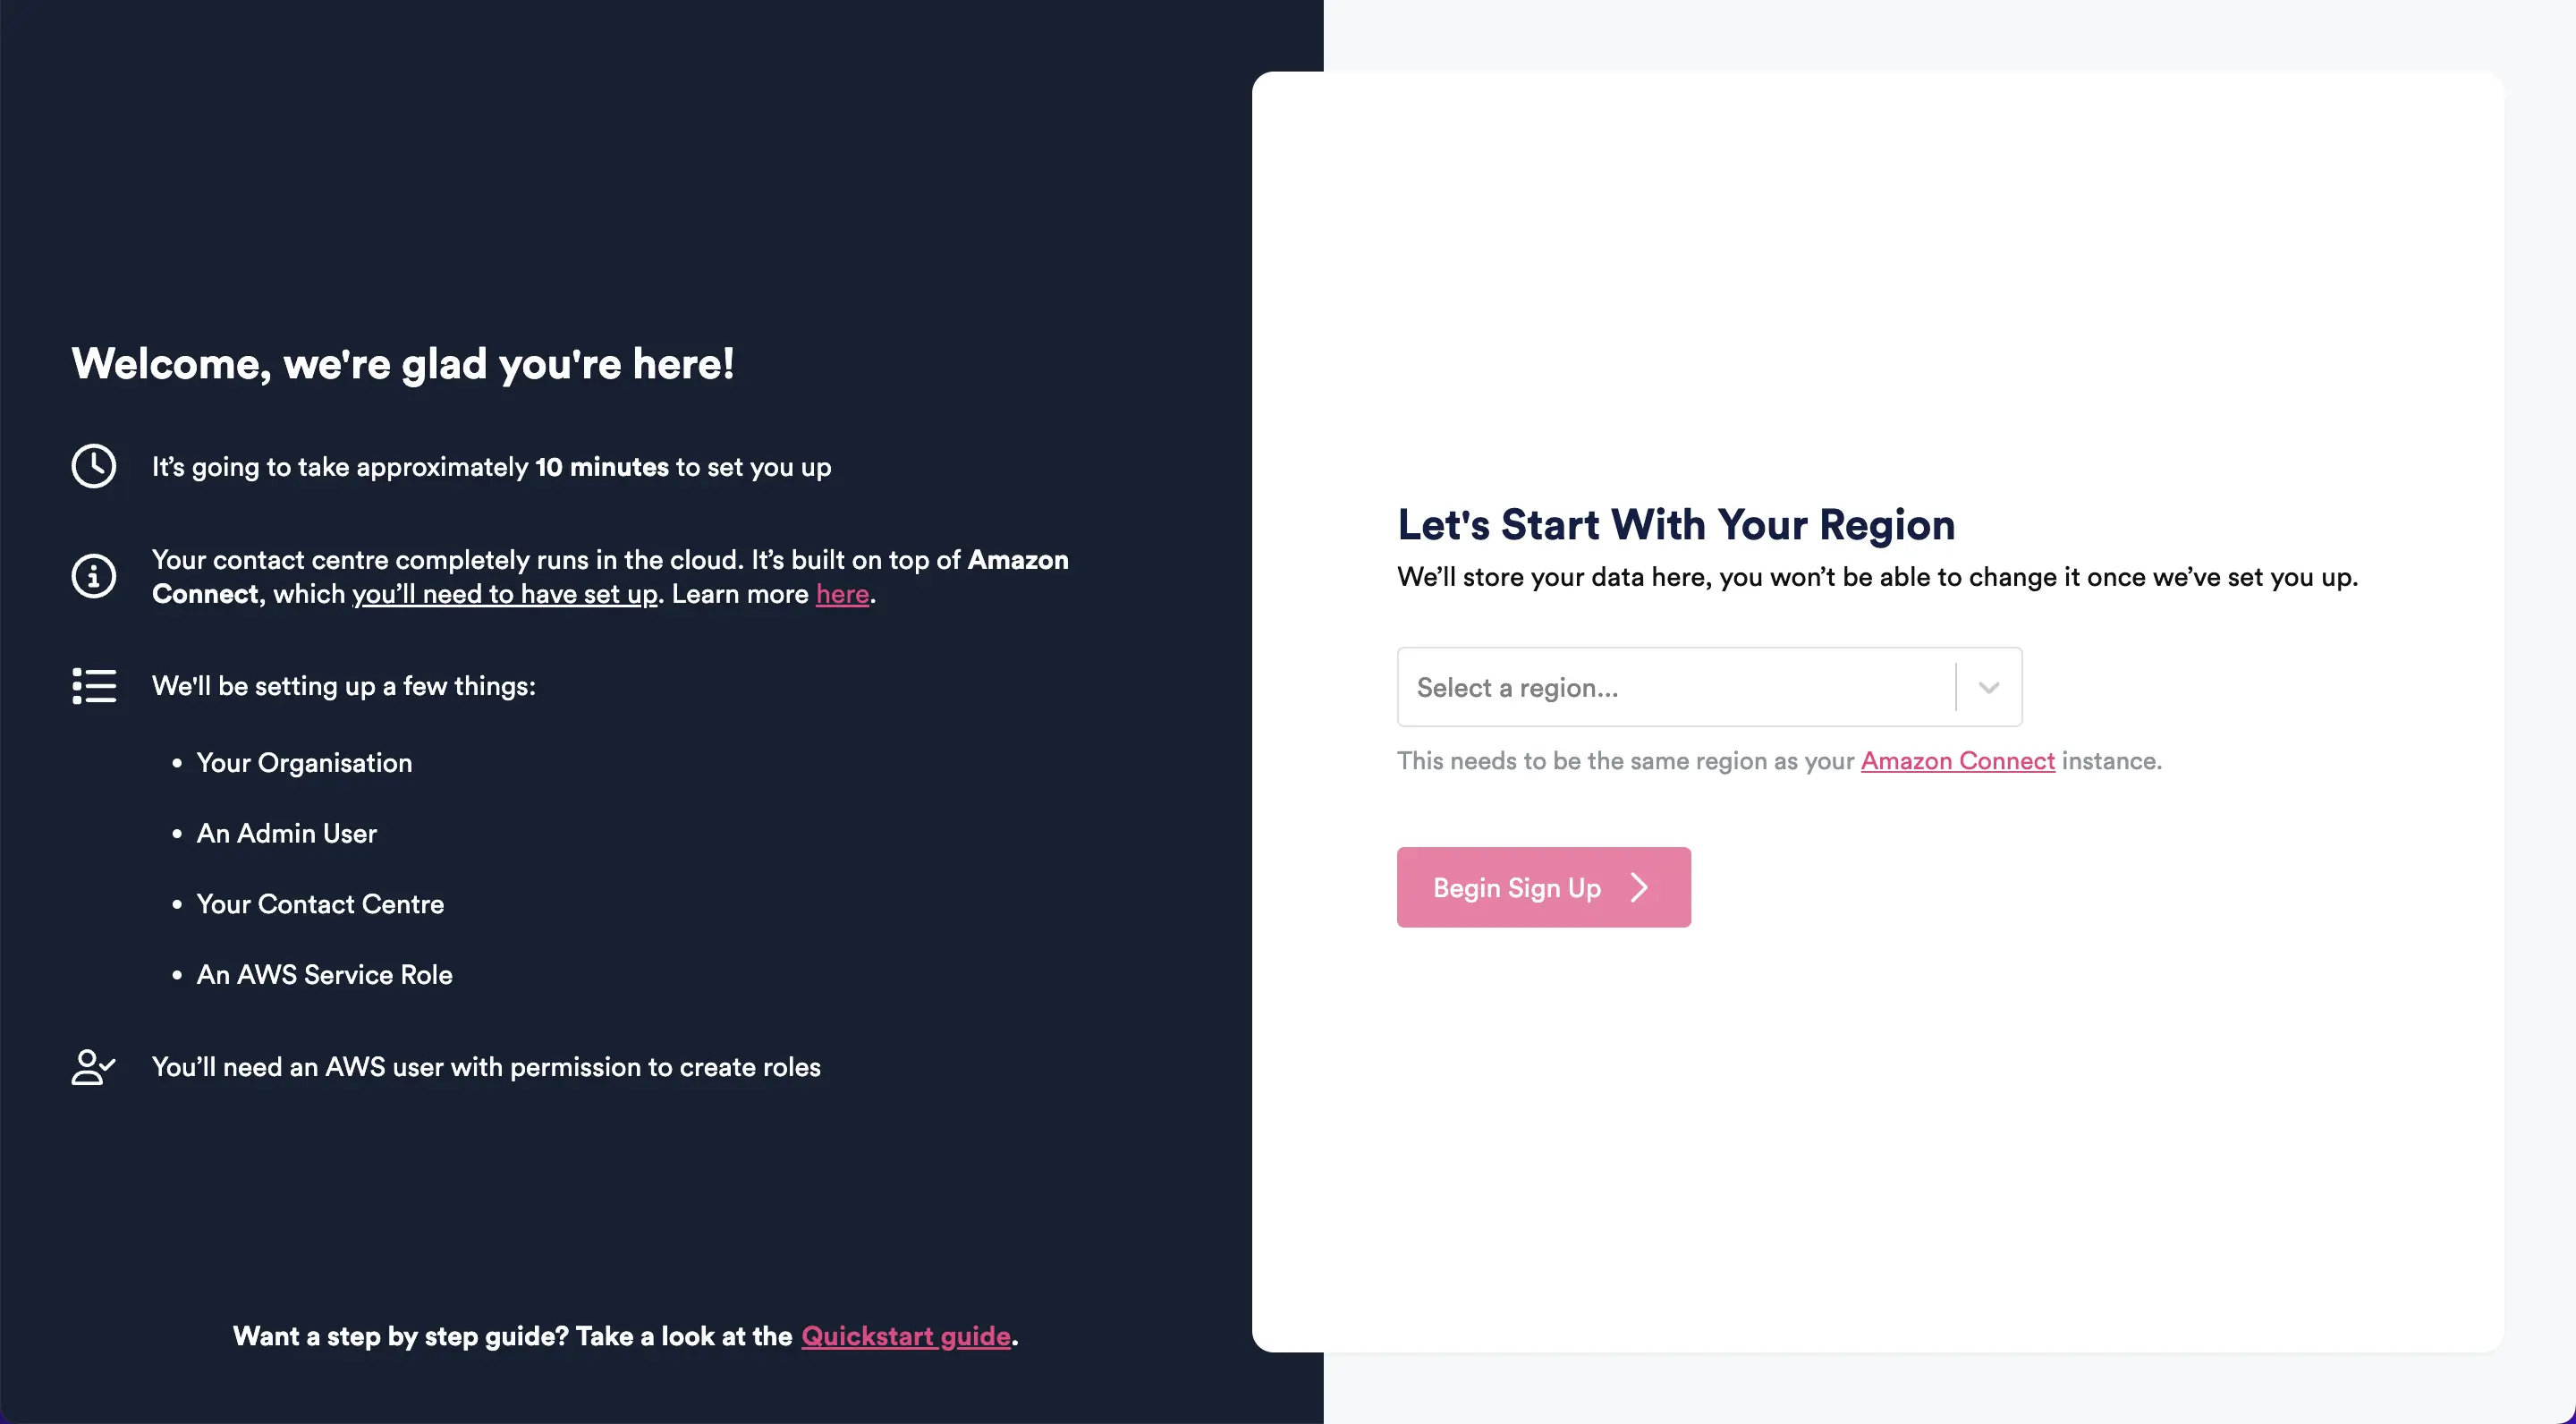
The first step is to choose a region where you want us to store your data. You will not be able to change it once we have set you up.
Select region, then click “Begin Sign Up”
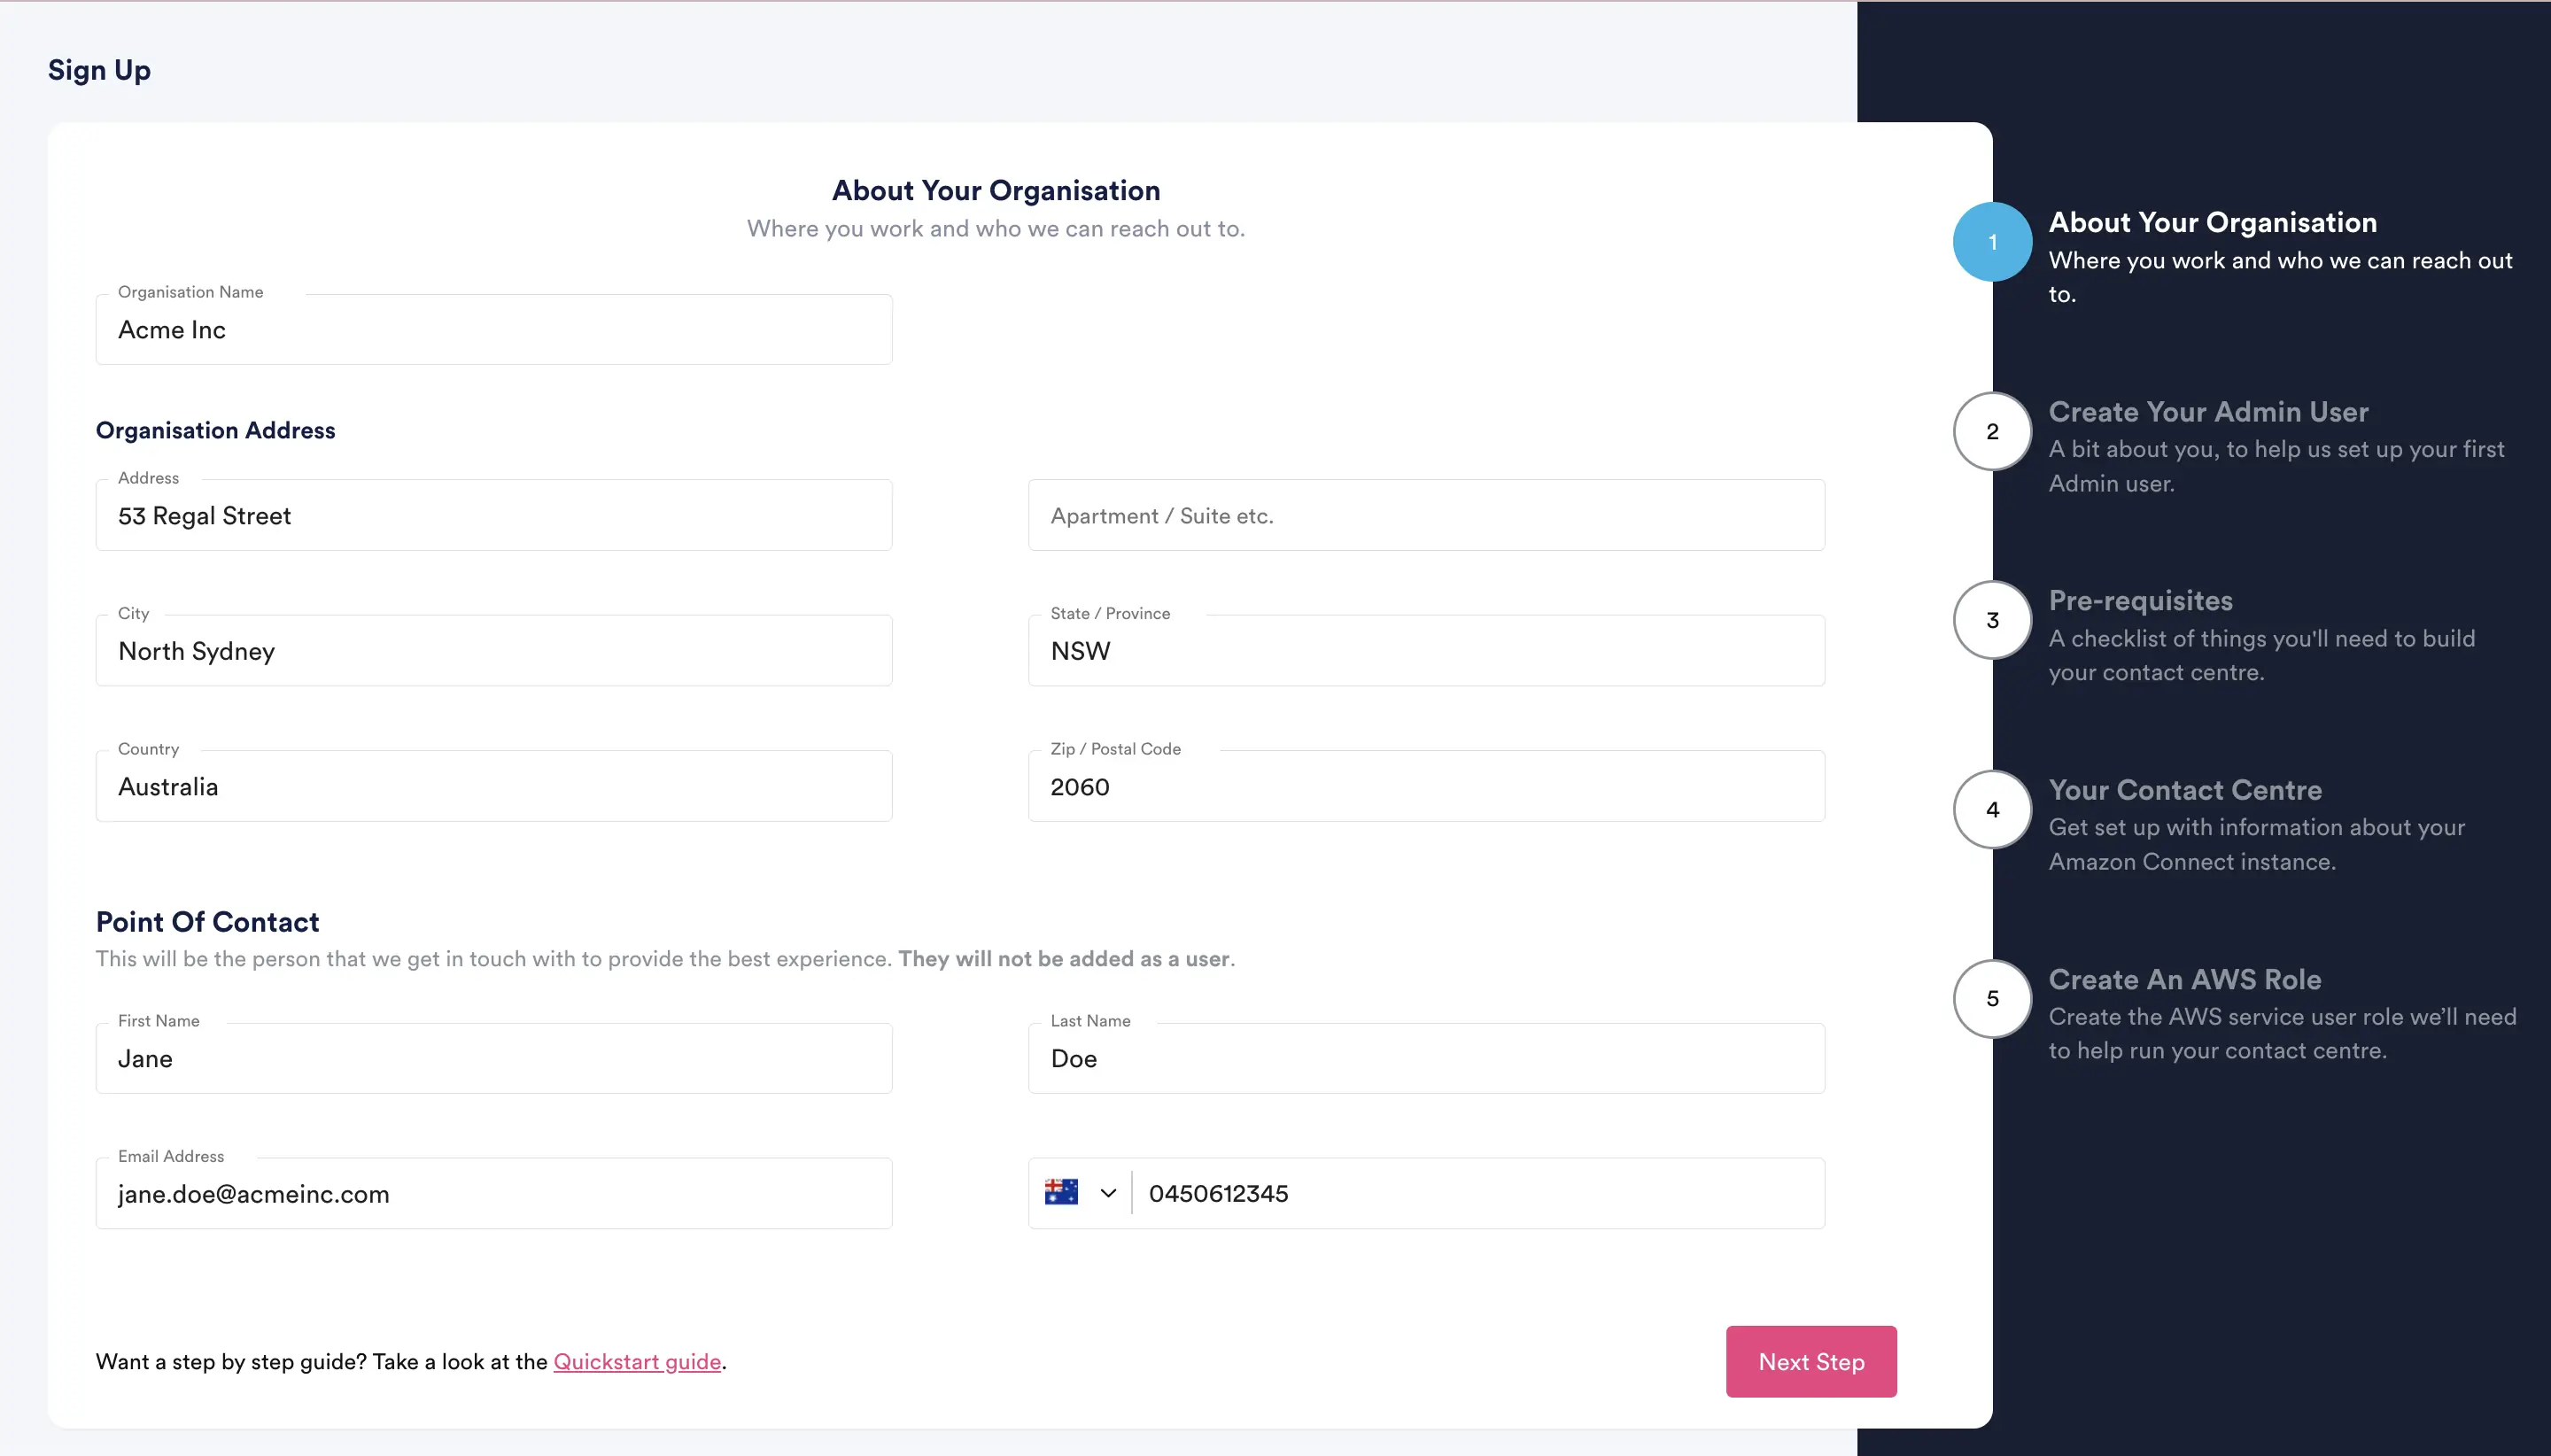
Next, fill in the information about your organisation, including where you work and who we can reach out to.
Click “Next Step”
On the next screen, fill in the information to create your first NEONNOW Admin user.
Click “Next Step“
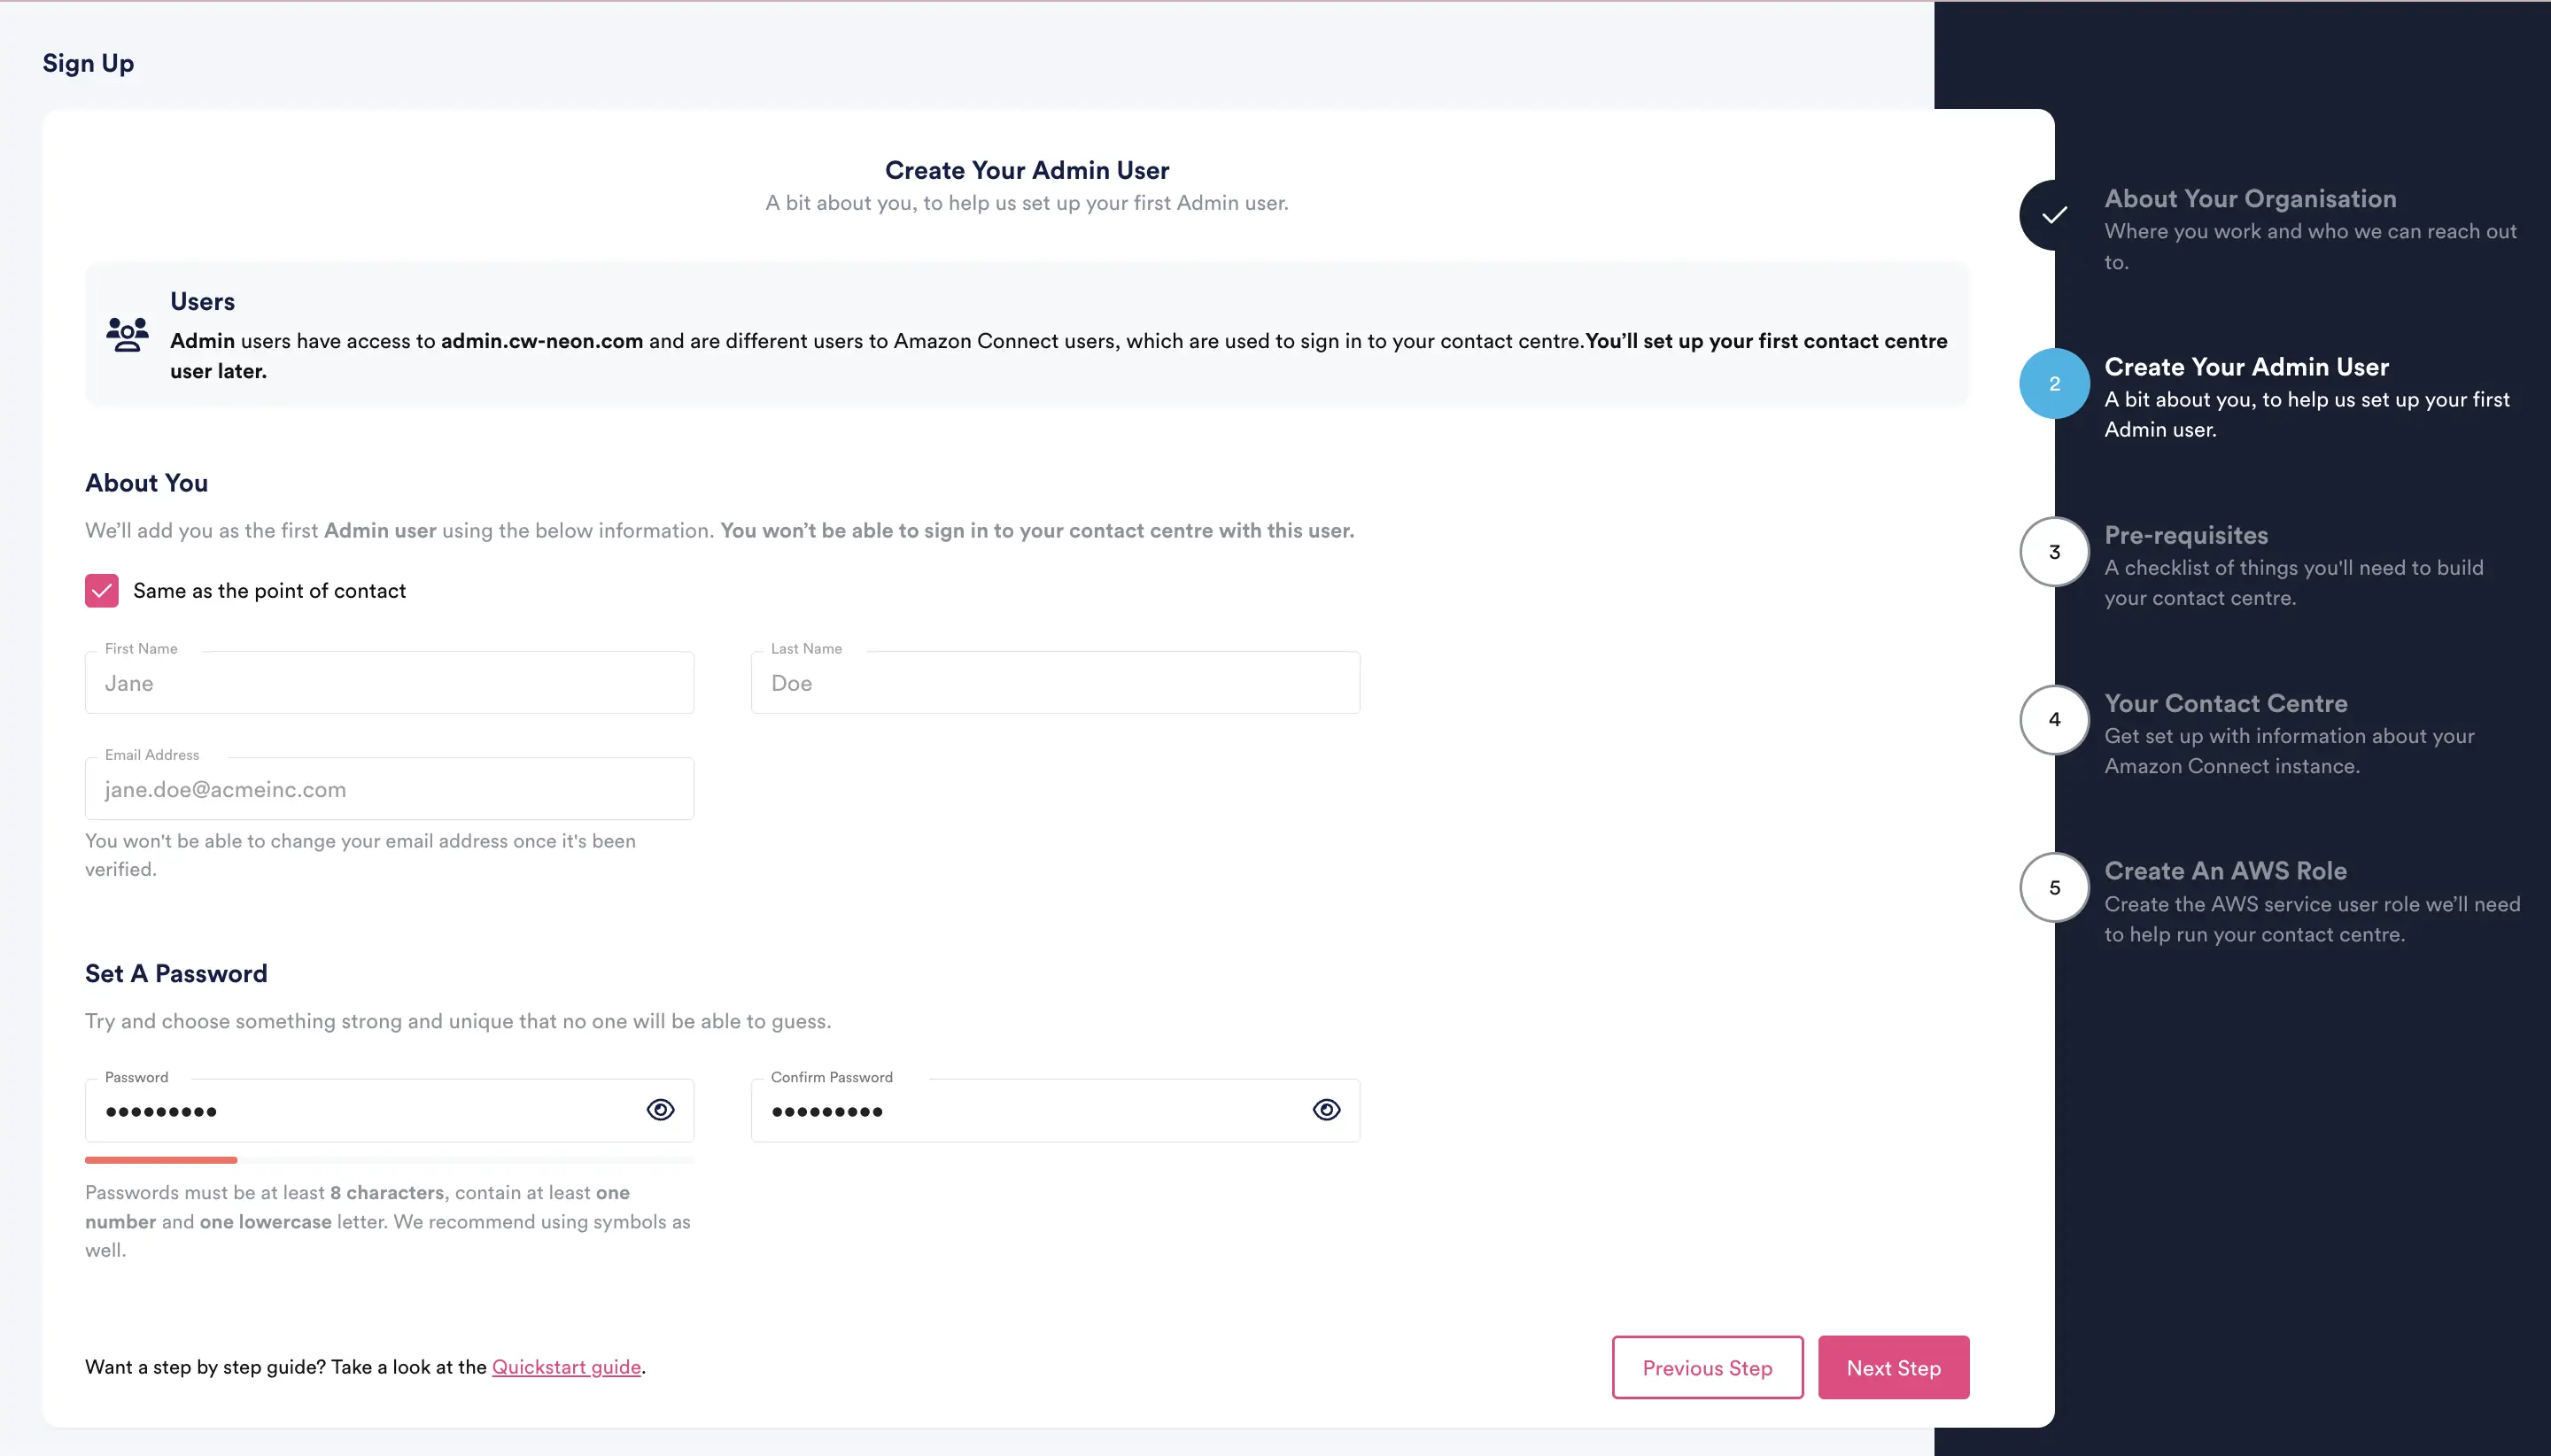
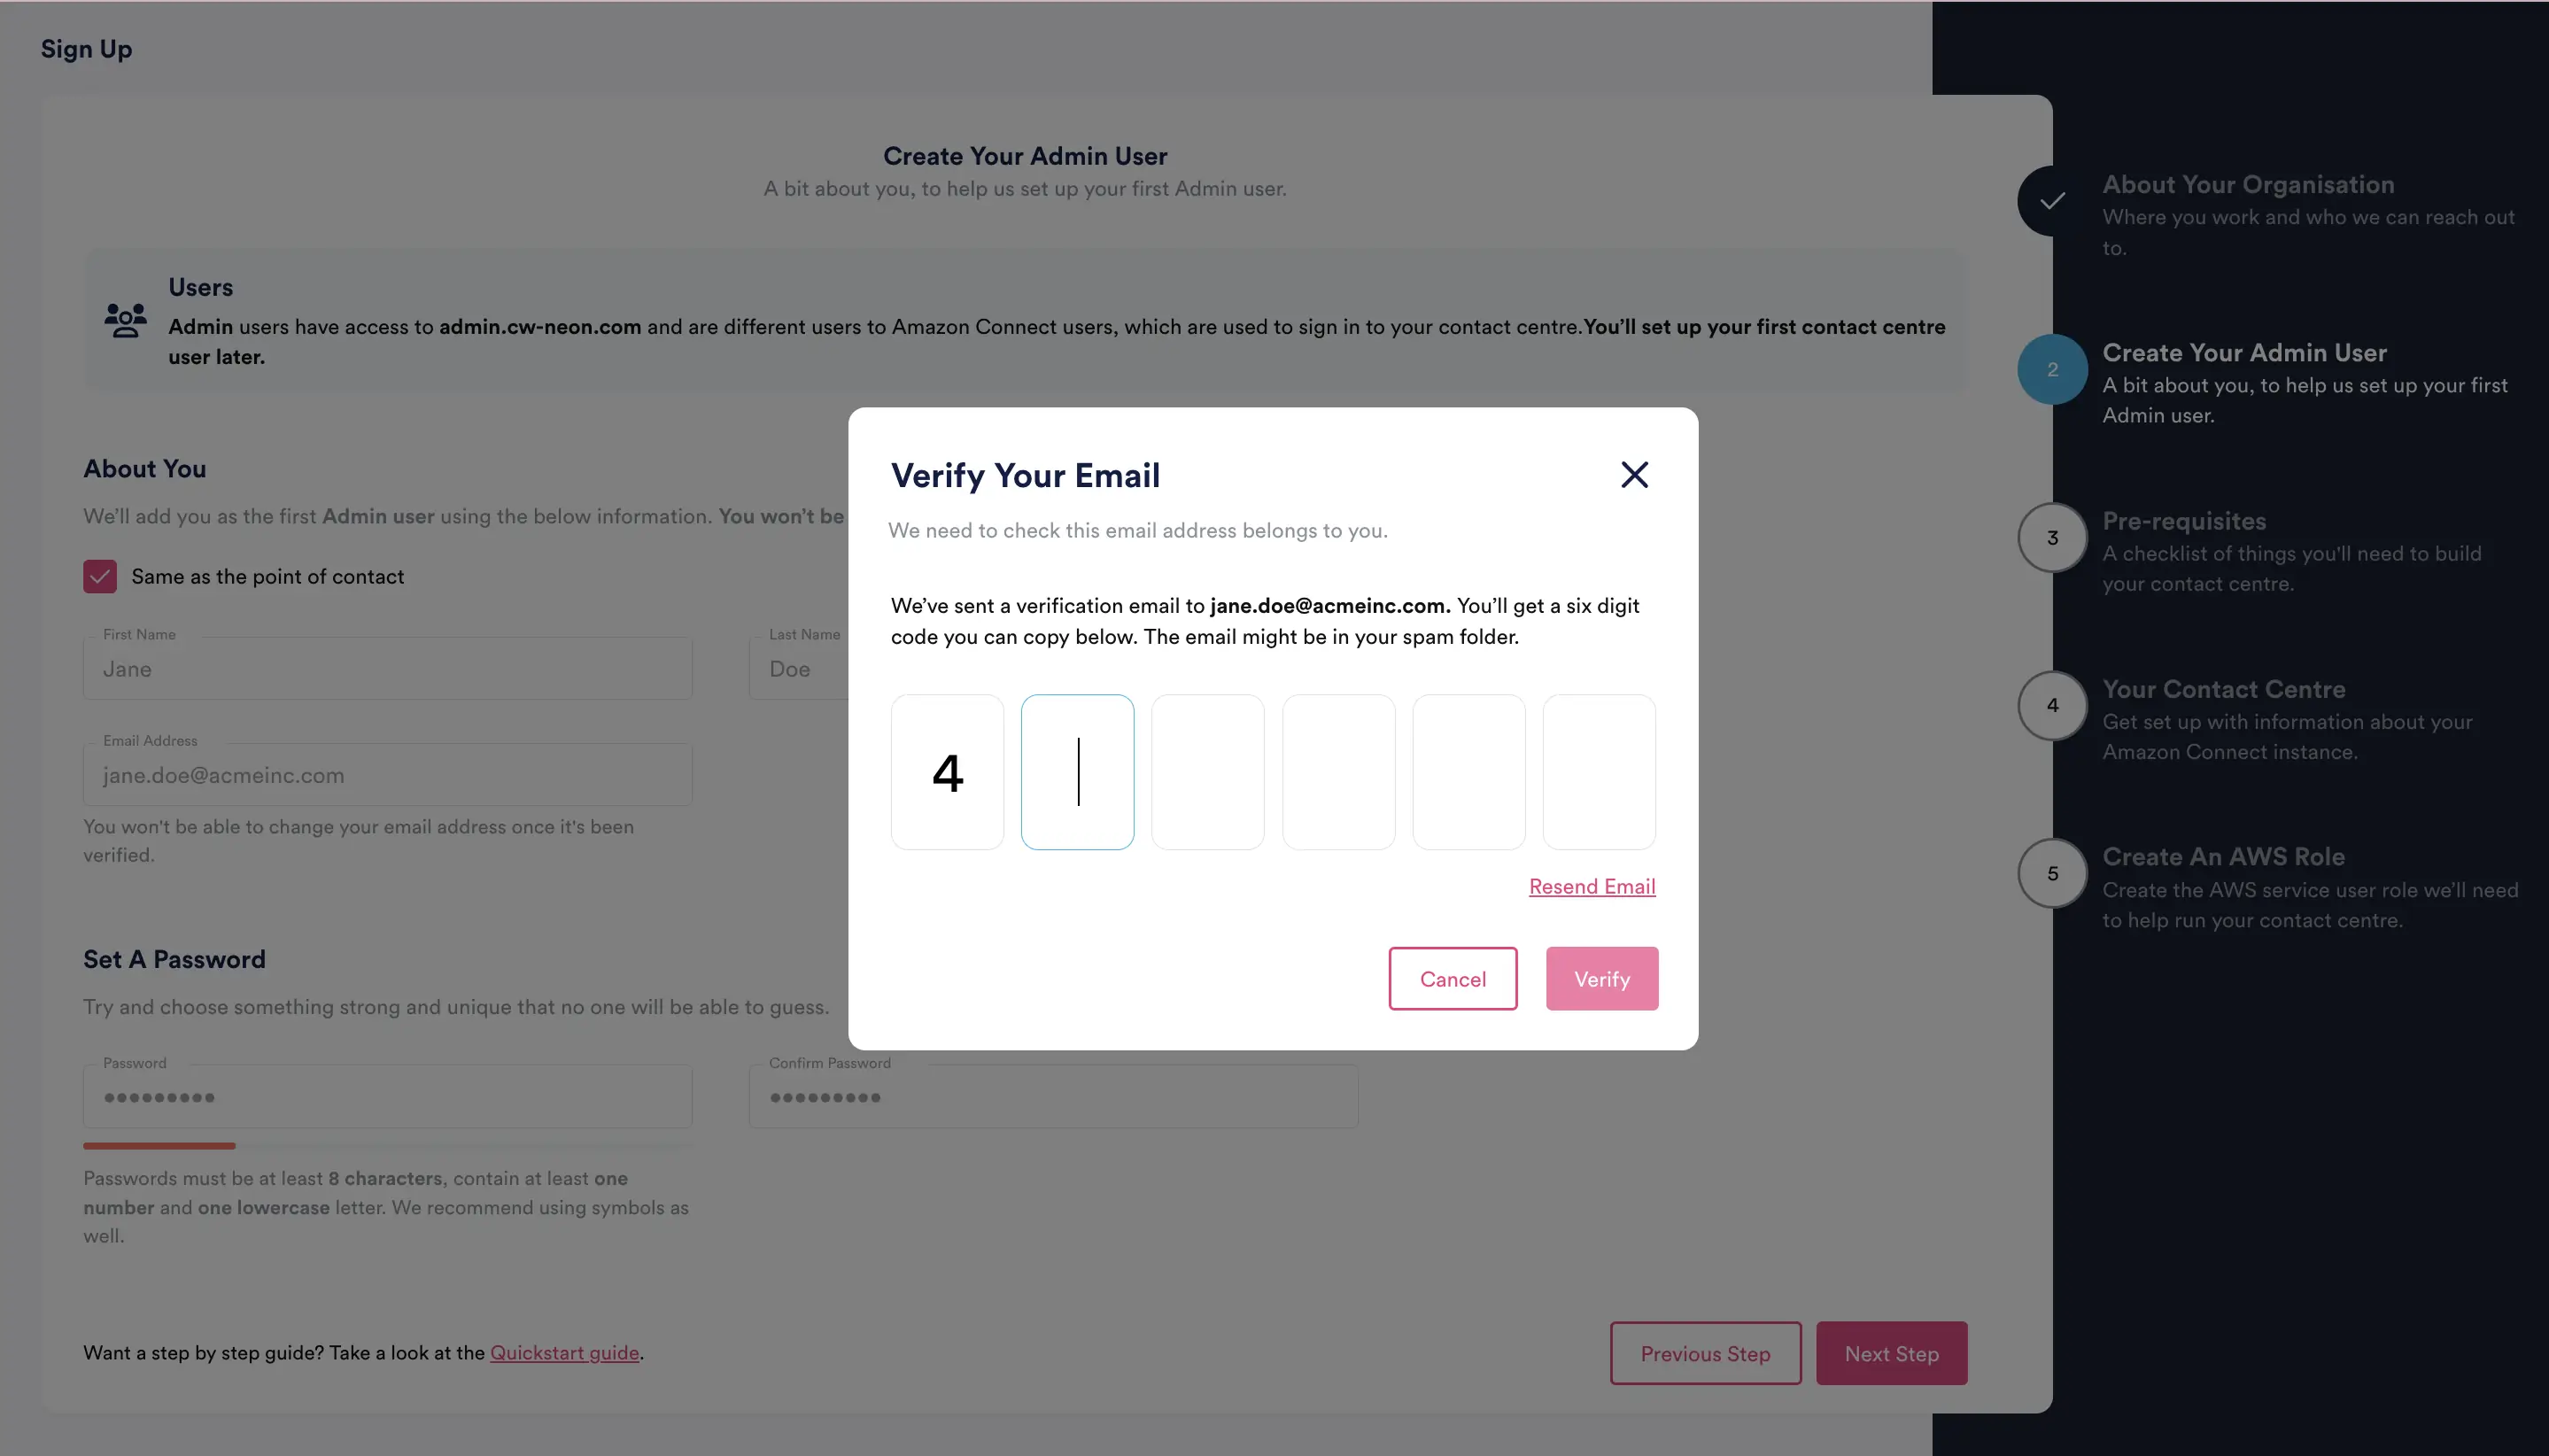
Check the inbox for the email you provided for the Admin user, where you should have received a verification email with a 6-digit code. The email might be in your spam folder.
Enter the 6-digit code in the signup wizard on the “Verify Your Email“ screen, as shown below.
Click “Verify“.
Next, get set up with information about your Amazon Connect instance.
We need the following information from you on this screen:
- Contact Centre Link: This will be used by your users to access your contact centre. Only letters, numbers and dashes are allowed, with a length between 4 and 10.
- Your Product: Enable additional paid features for your contact centre. Some of these may require us to get in touch to help you get setup or turn them off.
- Basic: Standard features to run your contact centre.
- Enterprise: All the basic features plus Enterprise reporting.
- Add-ons
- Concierge
- Conversations
- Workforce Management
- Amazon Connect
- ARN: The unique ARN identifier for your Amazon Connect instance. Use ‘copy to clipboard’ button within Amazon Connect instance in AWS console
- Instance Alias: The Alias associated with th econnect instance
- User Login: The case-sensitive login of an existing Amazon Connect user. This will be the first user in your contact centre and will be required to add others.
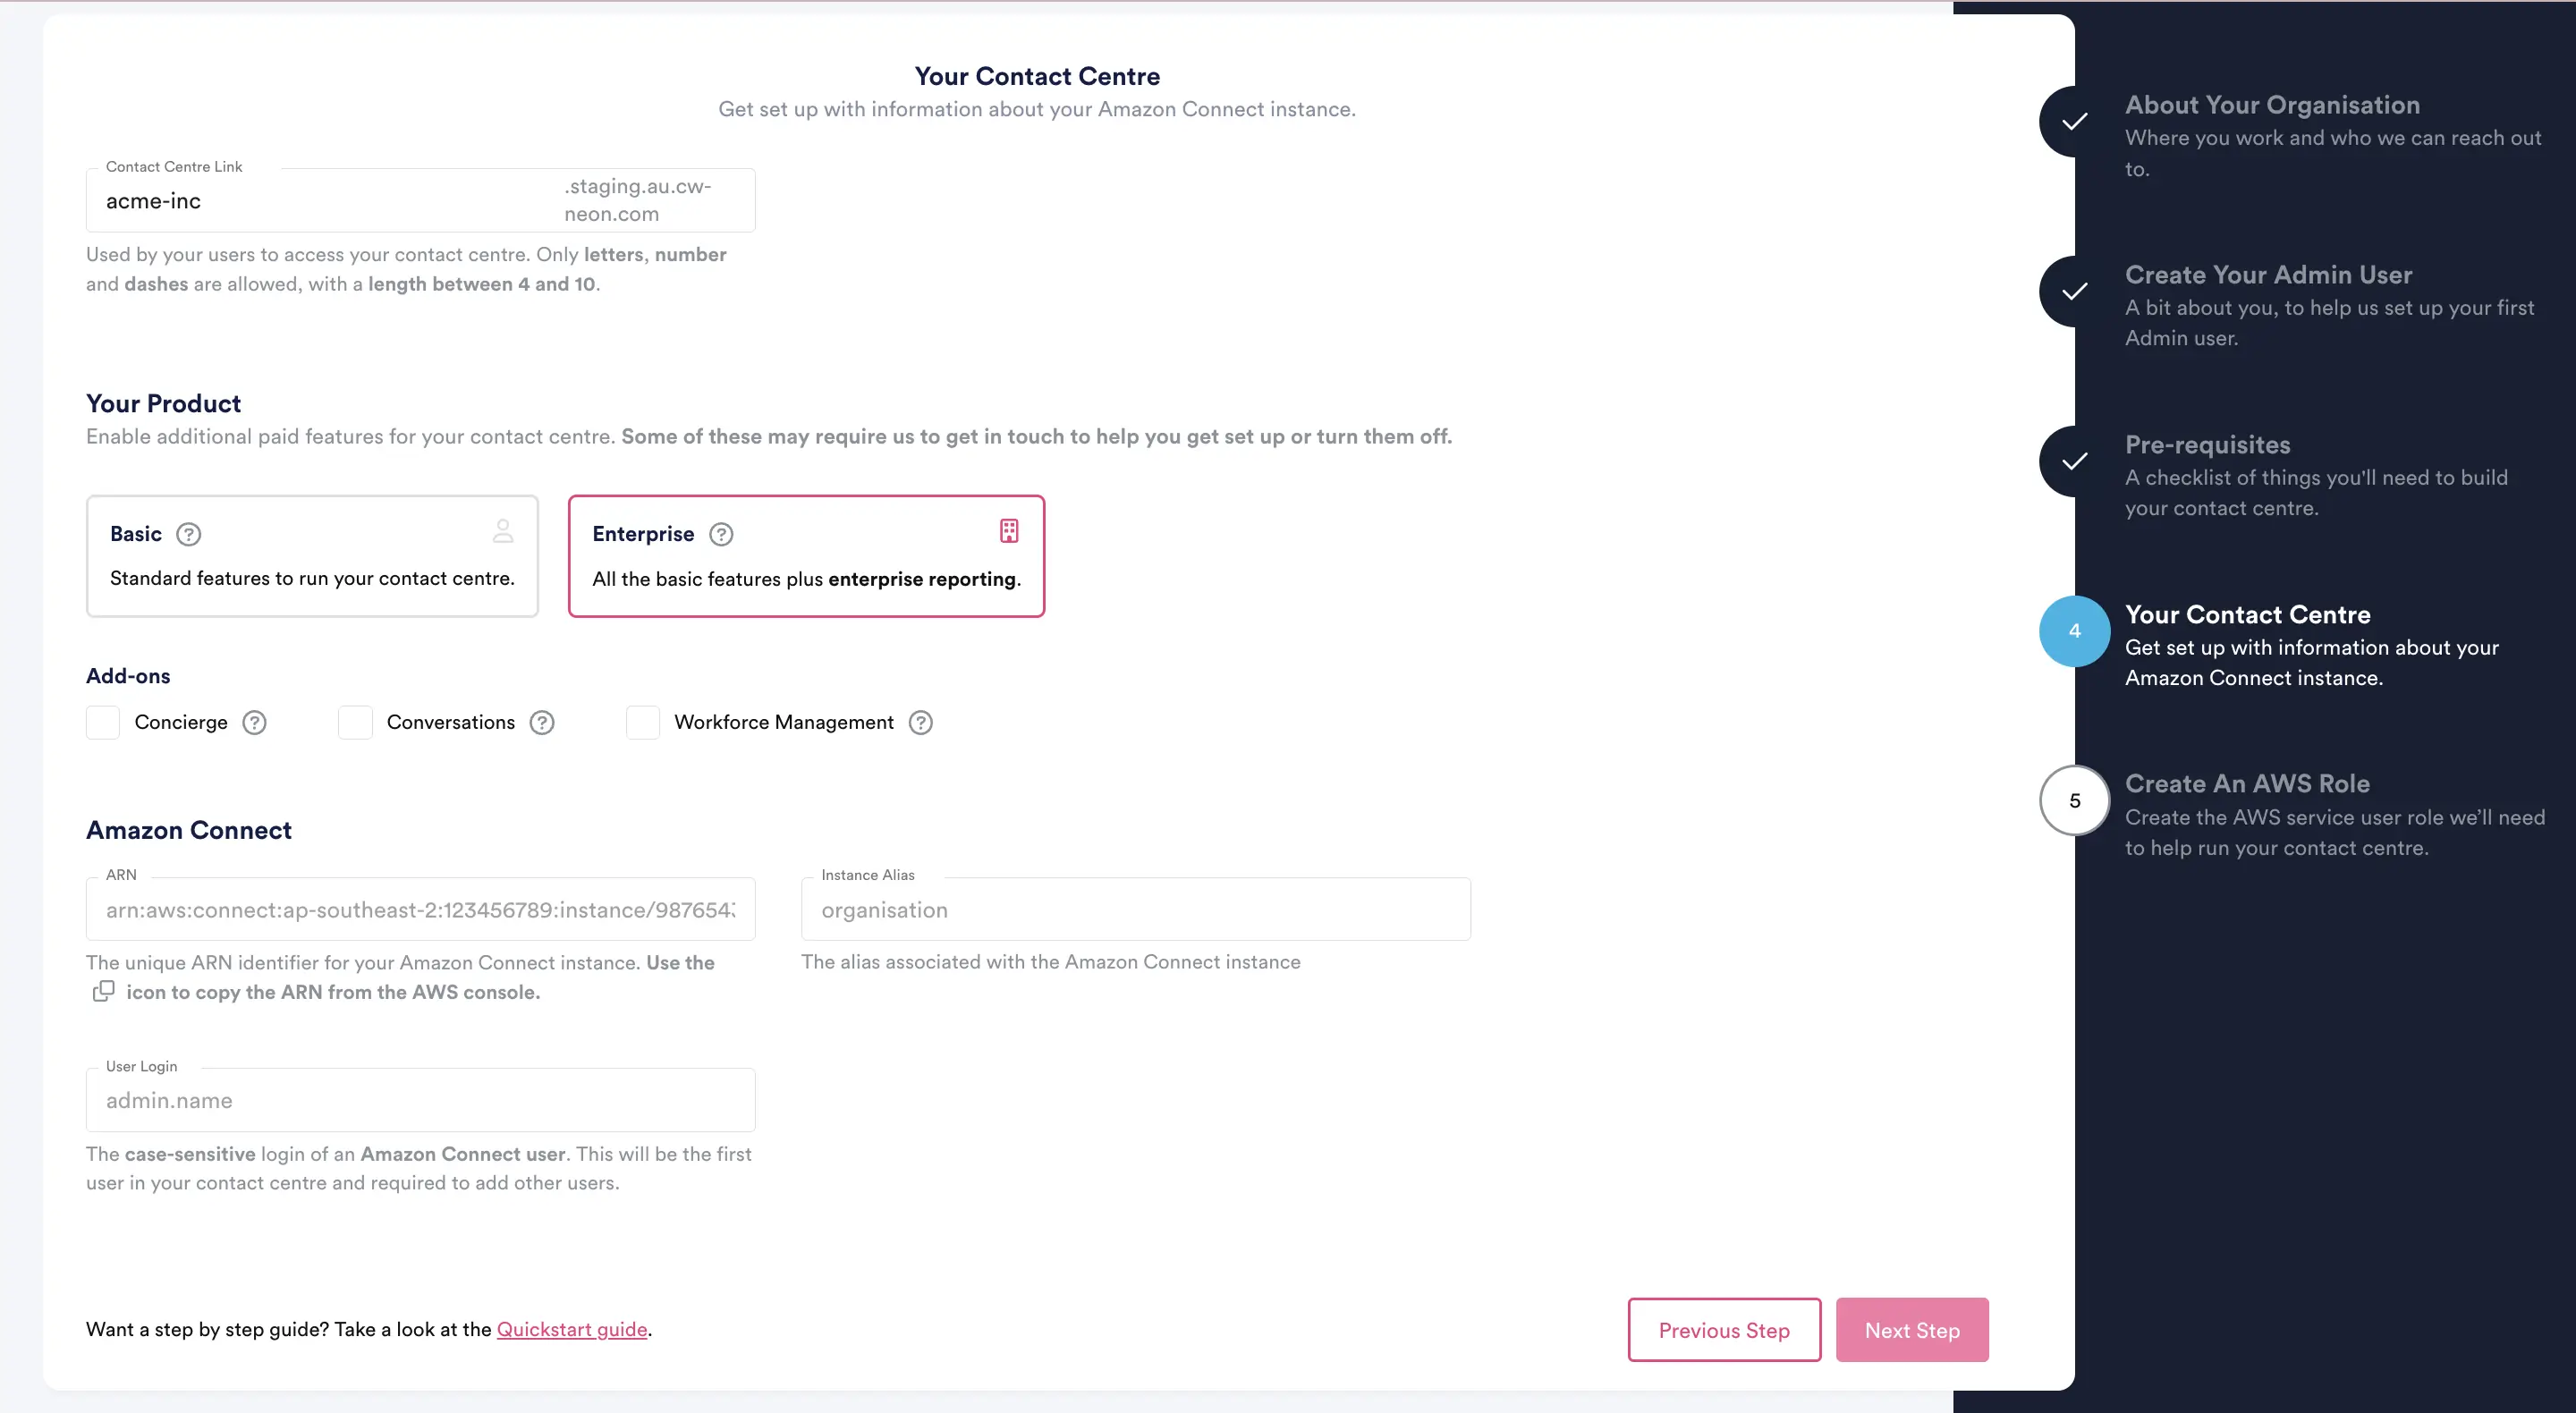
Click “Next Step“.
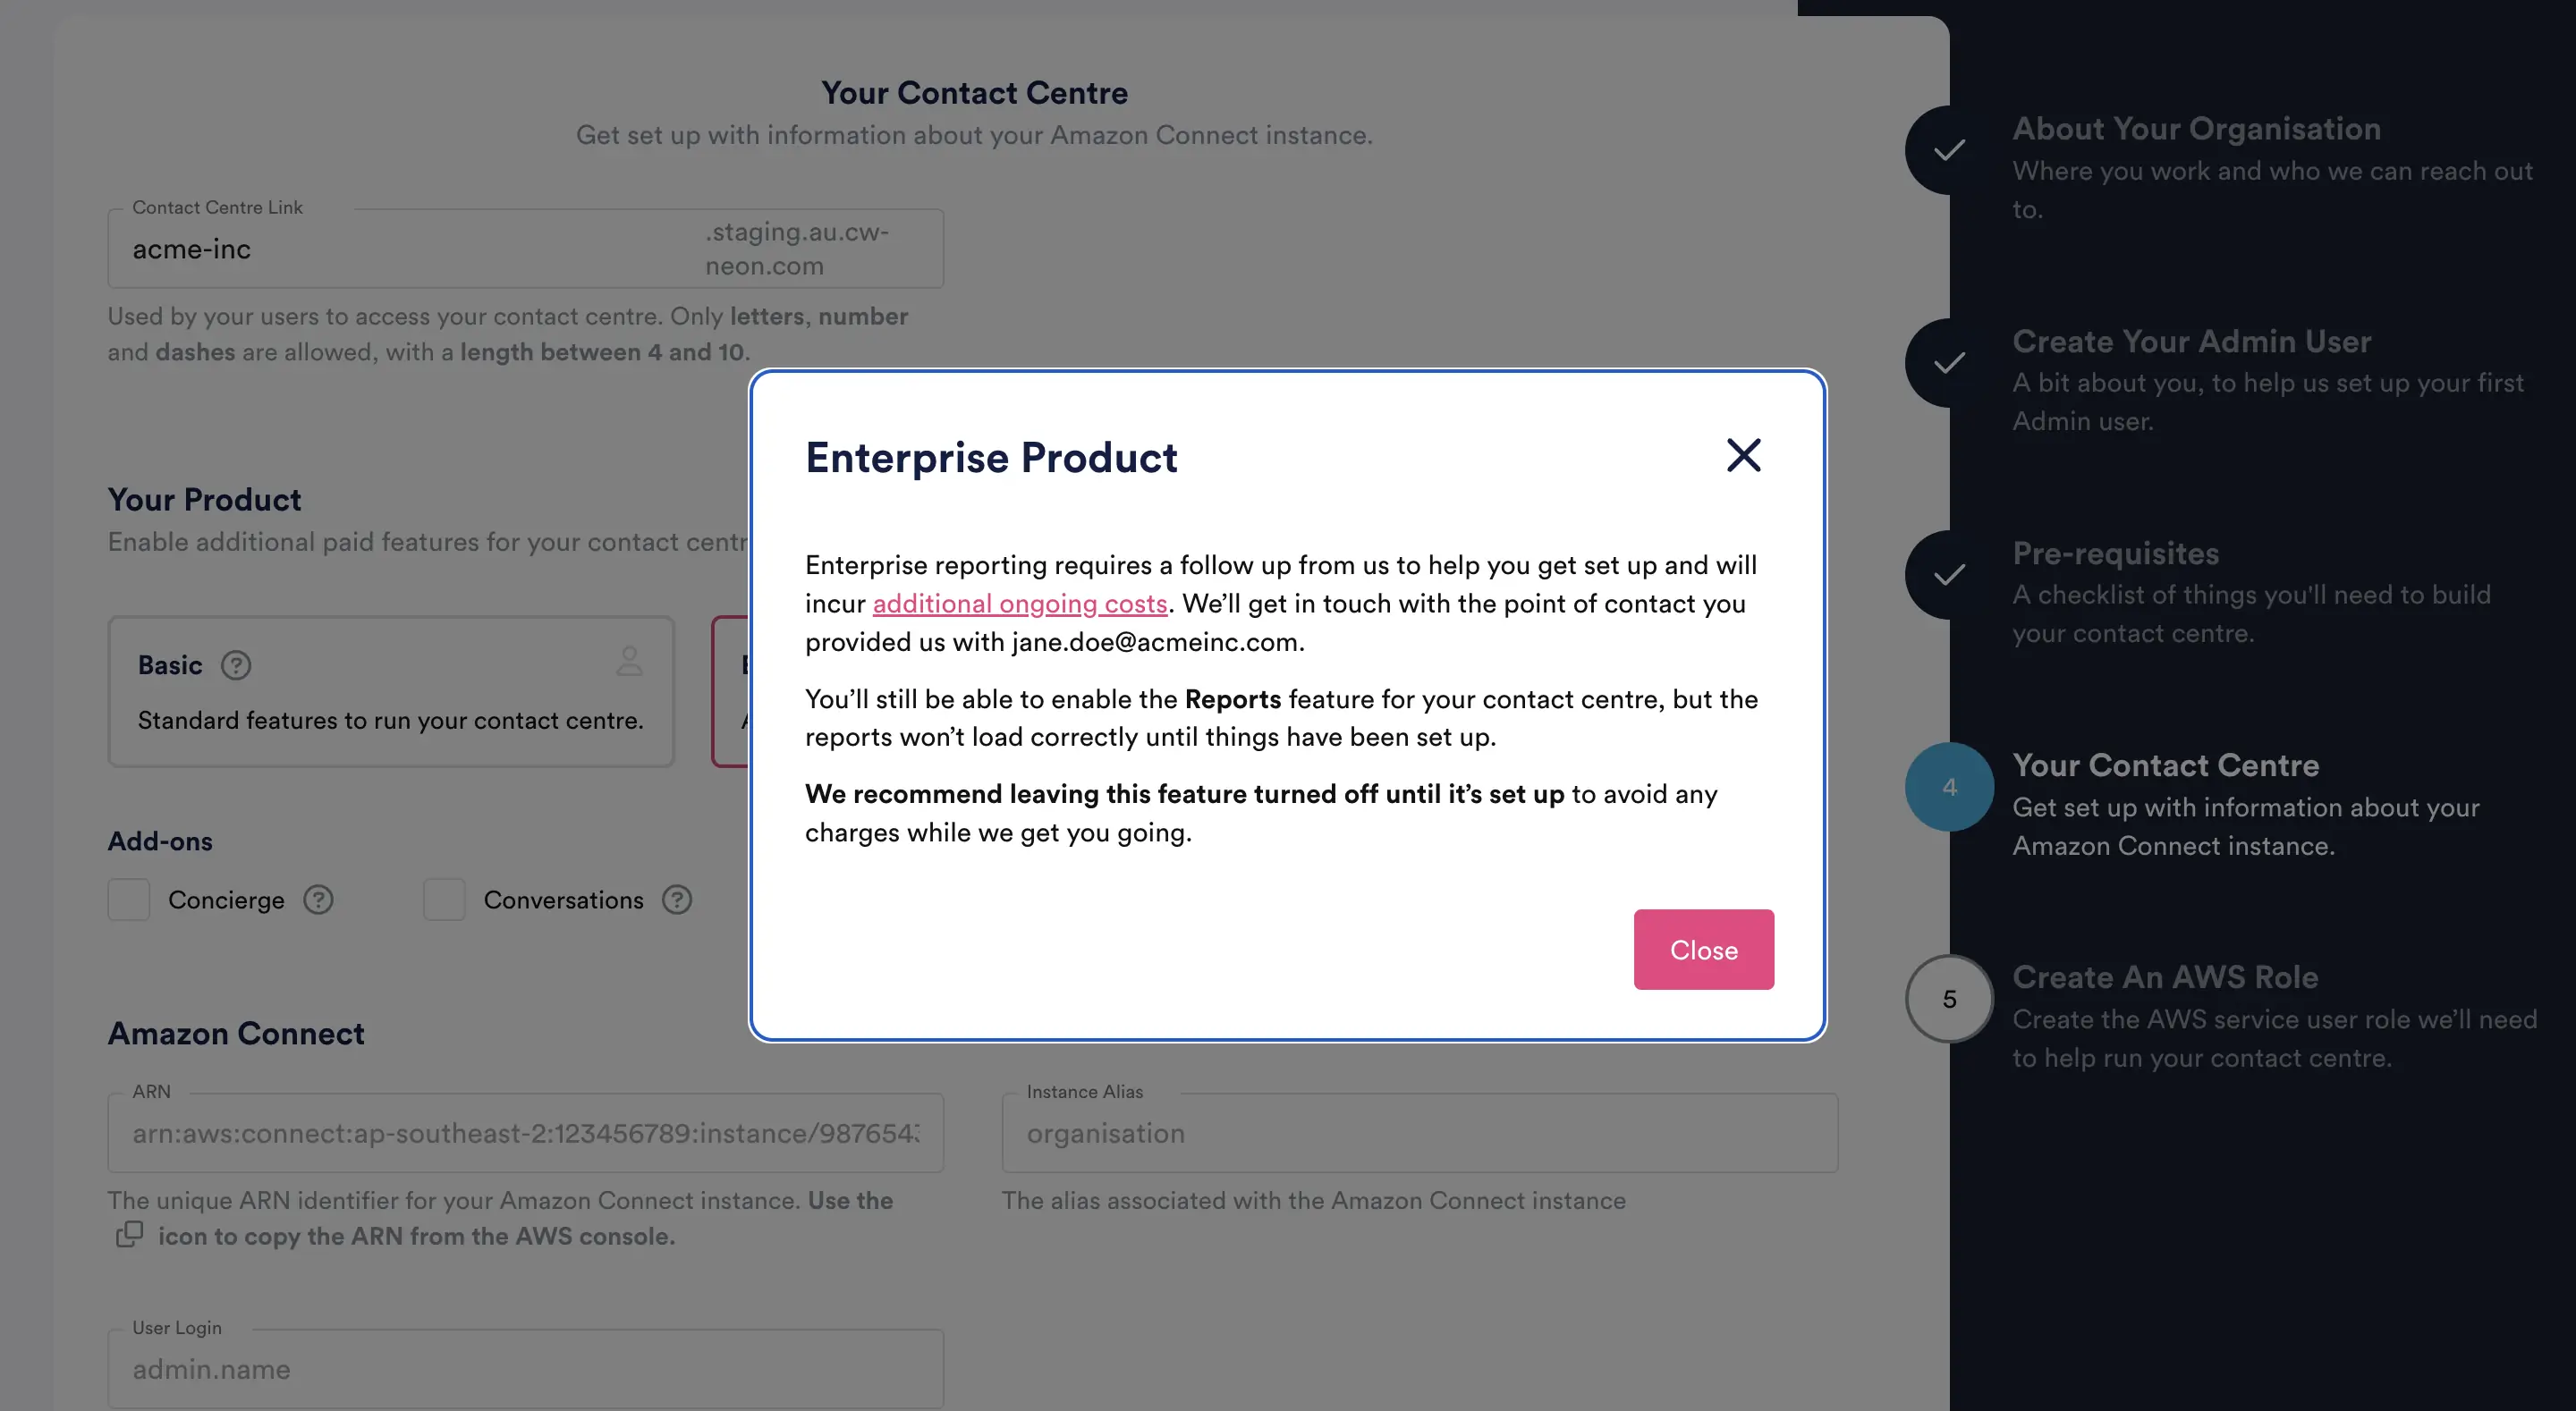
Read the popup note about enabling Enterprise Product and then click on Close.
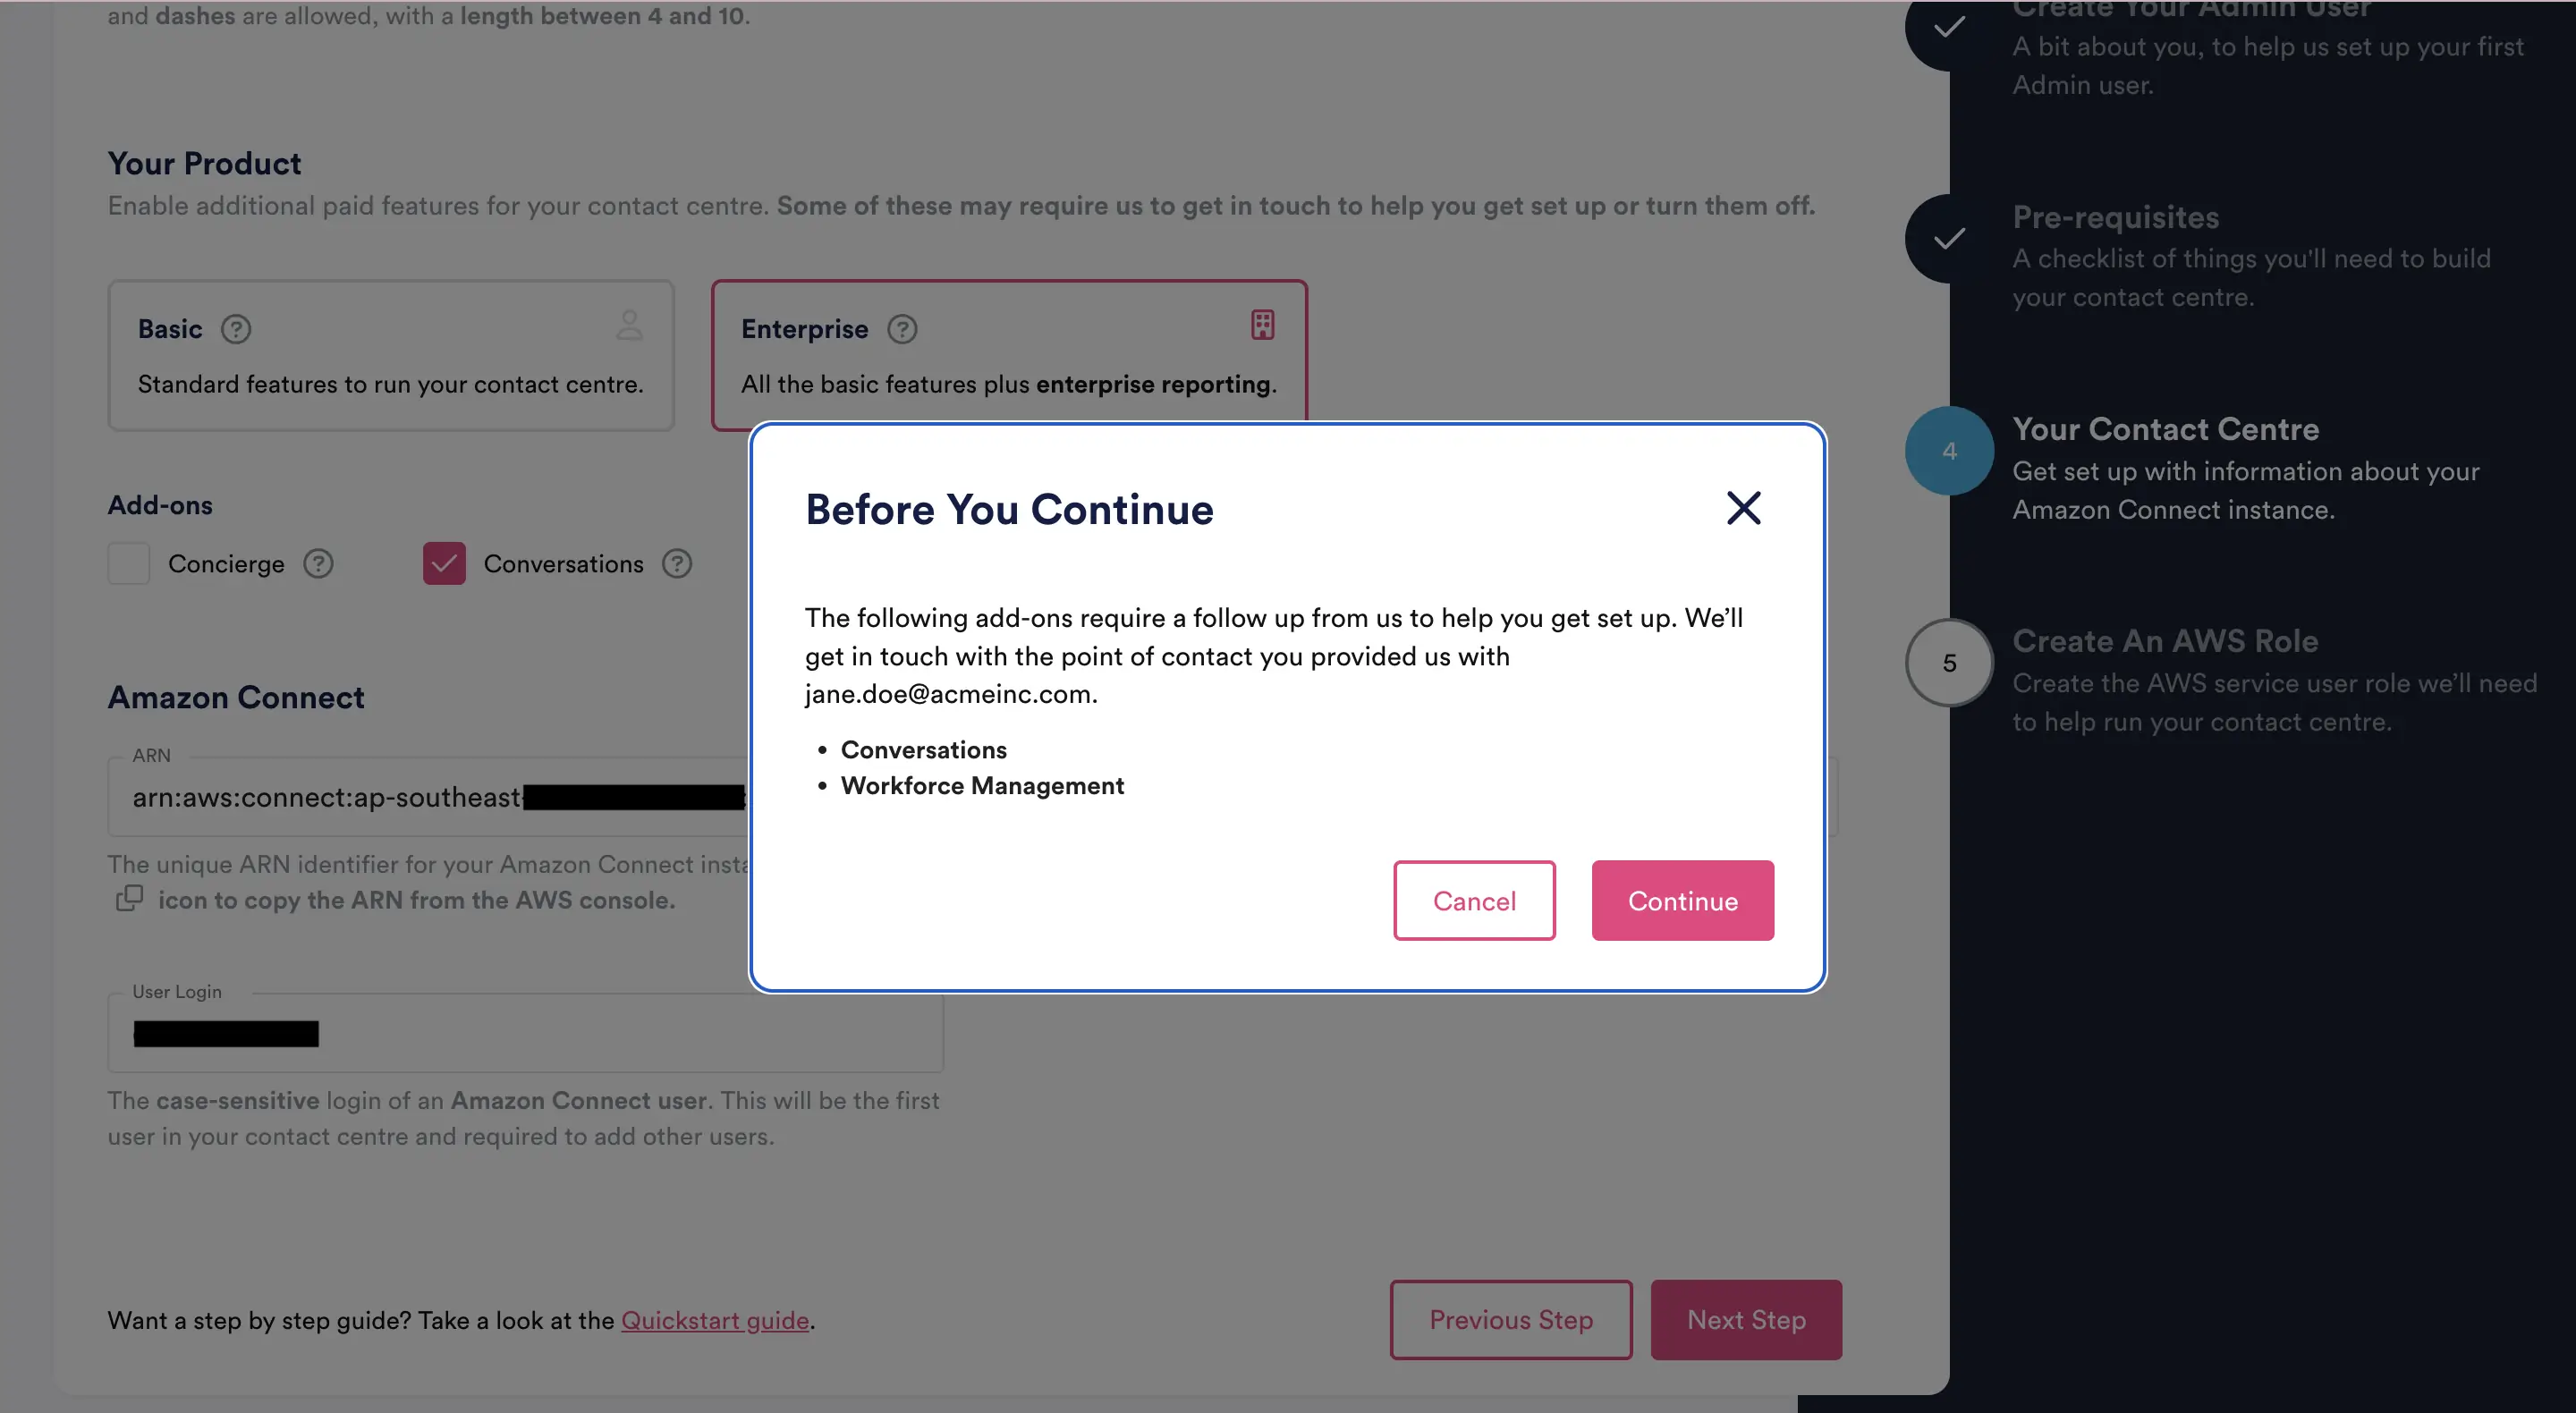
Click on “Continue“ on the Before You Continue popup note if you selected any of the add-ons.
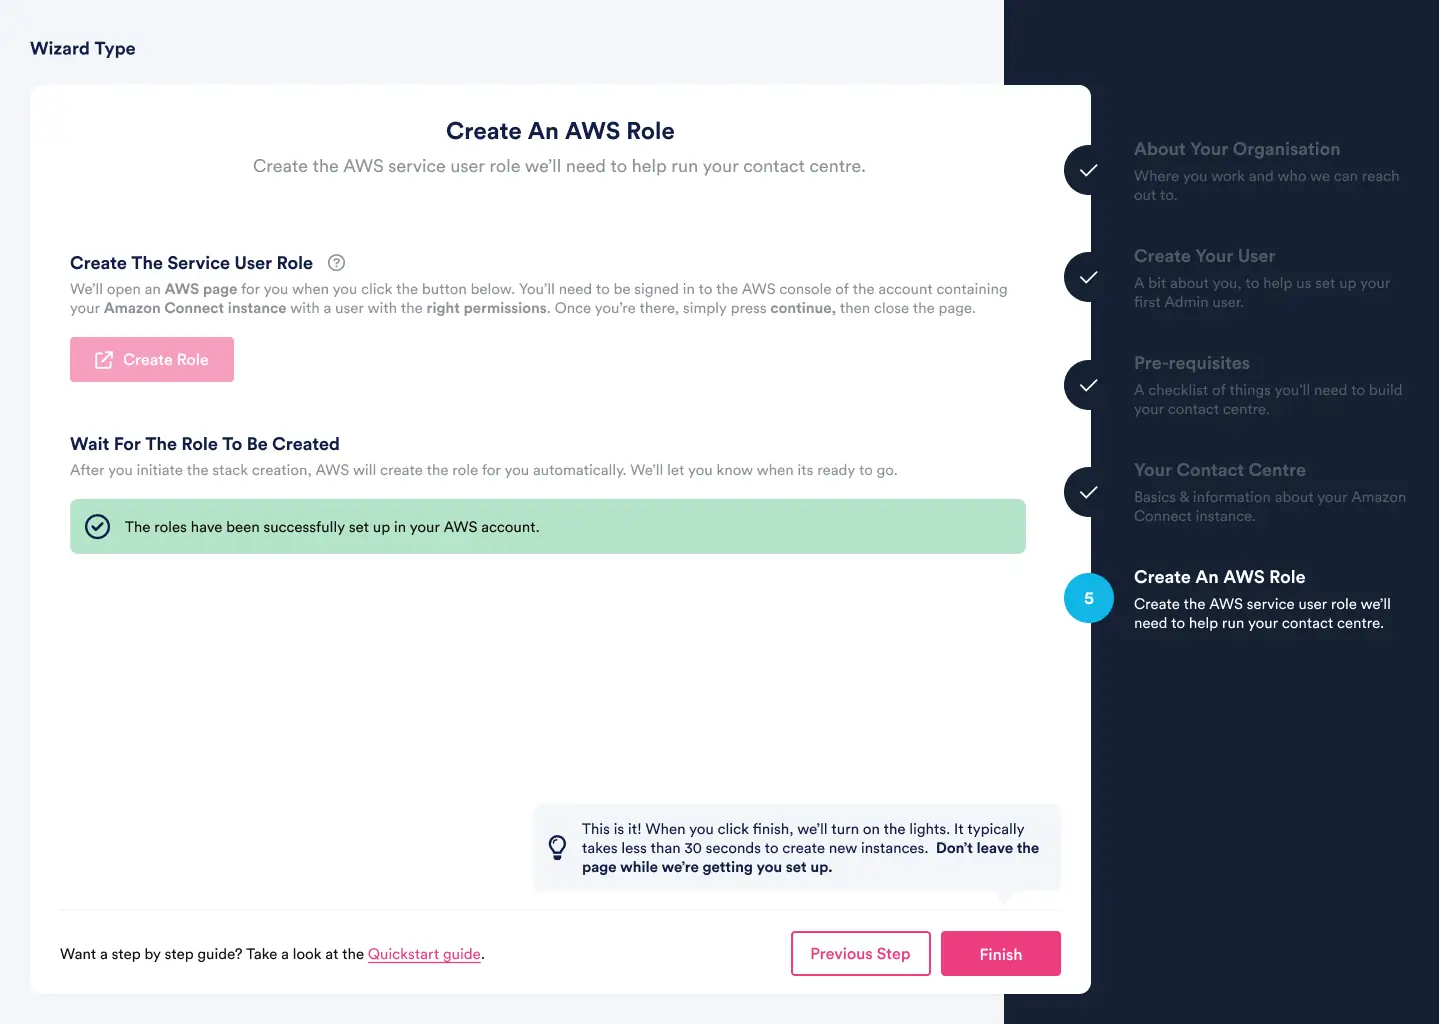
Next, create the AWS service user role we will need to help run your contact centre.
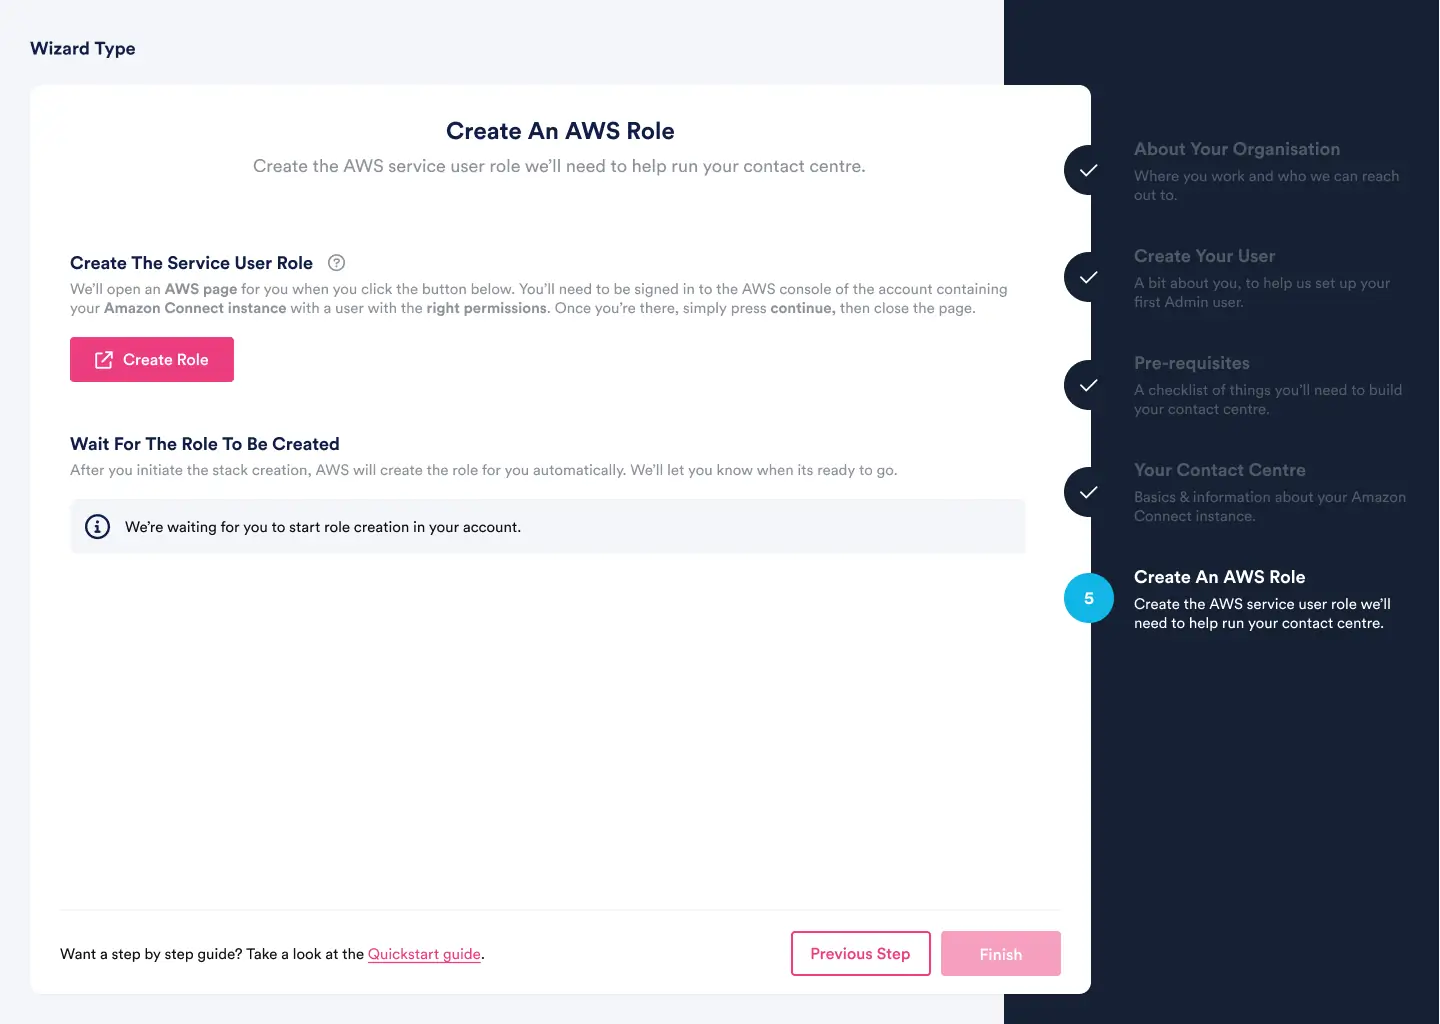
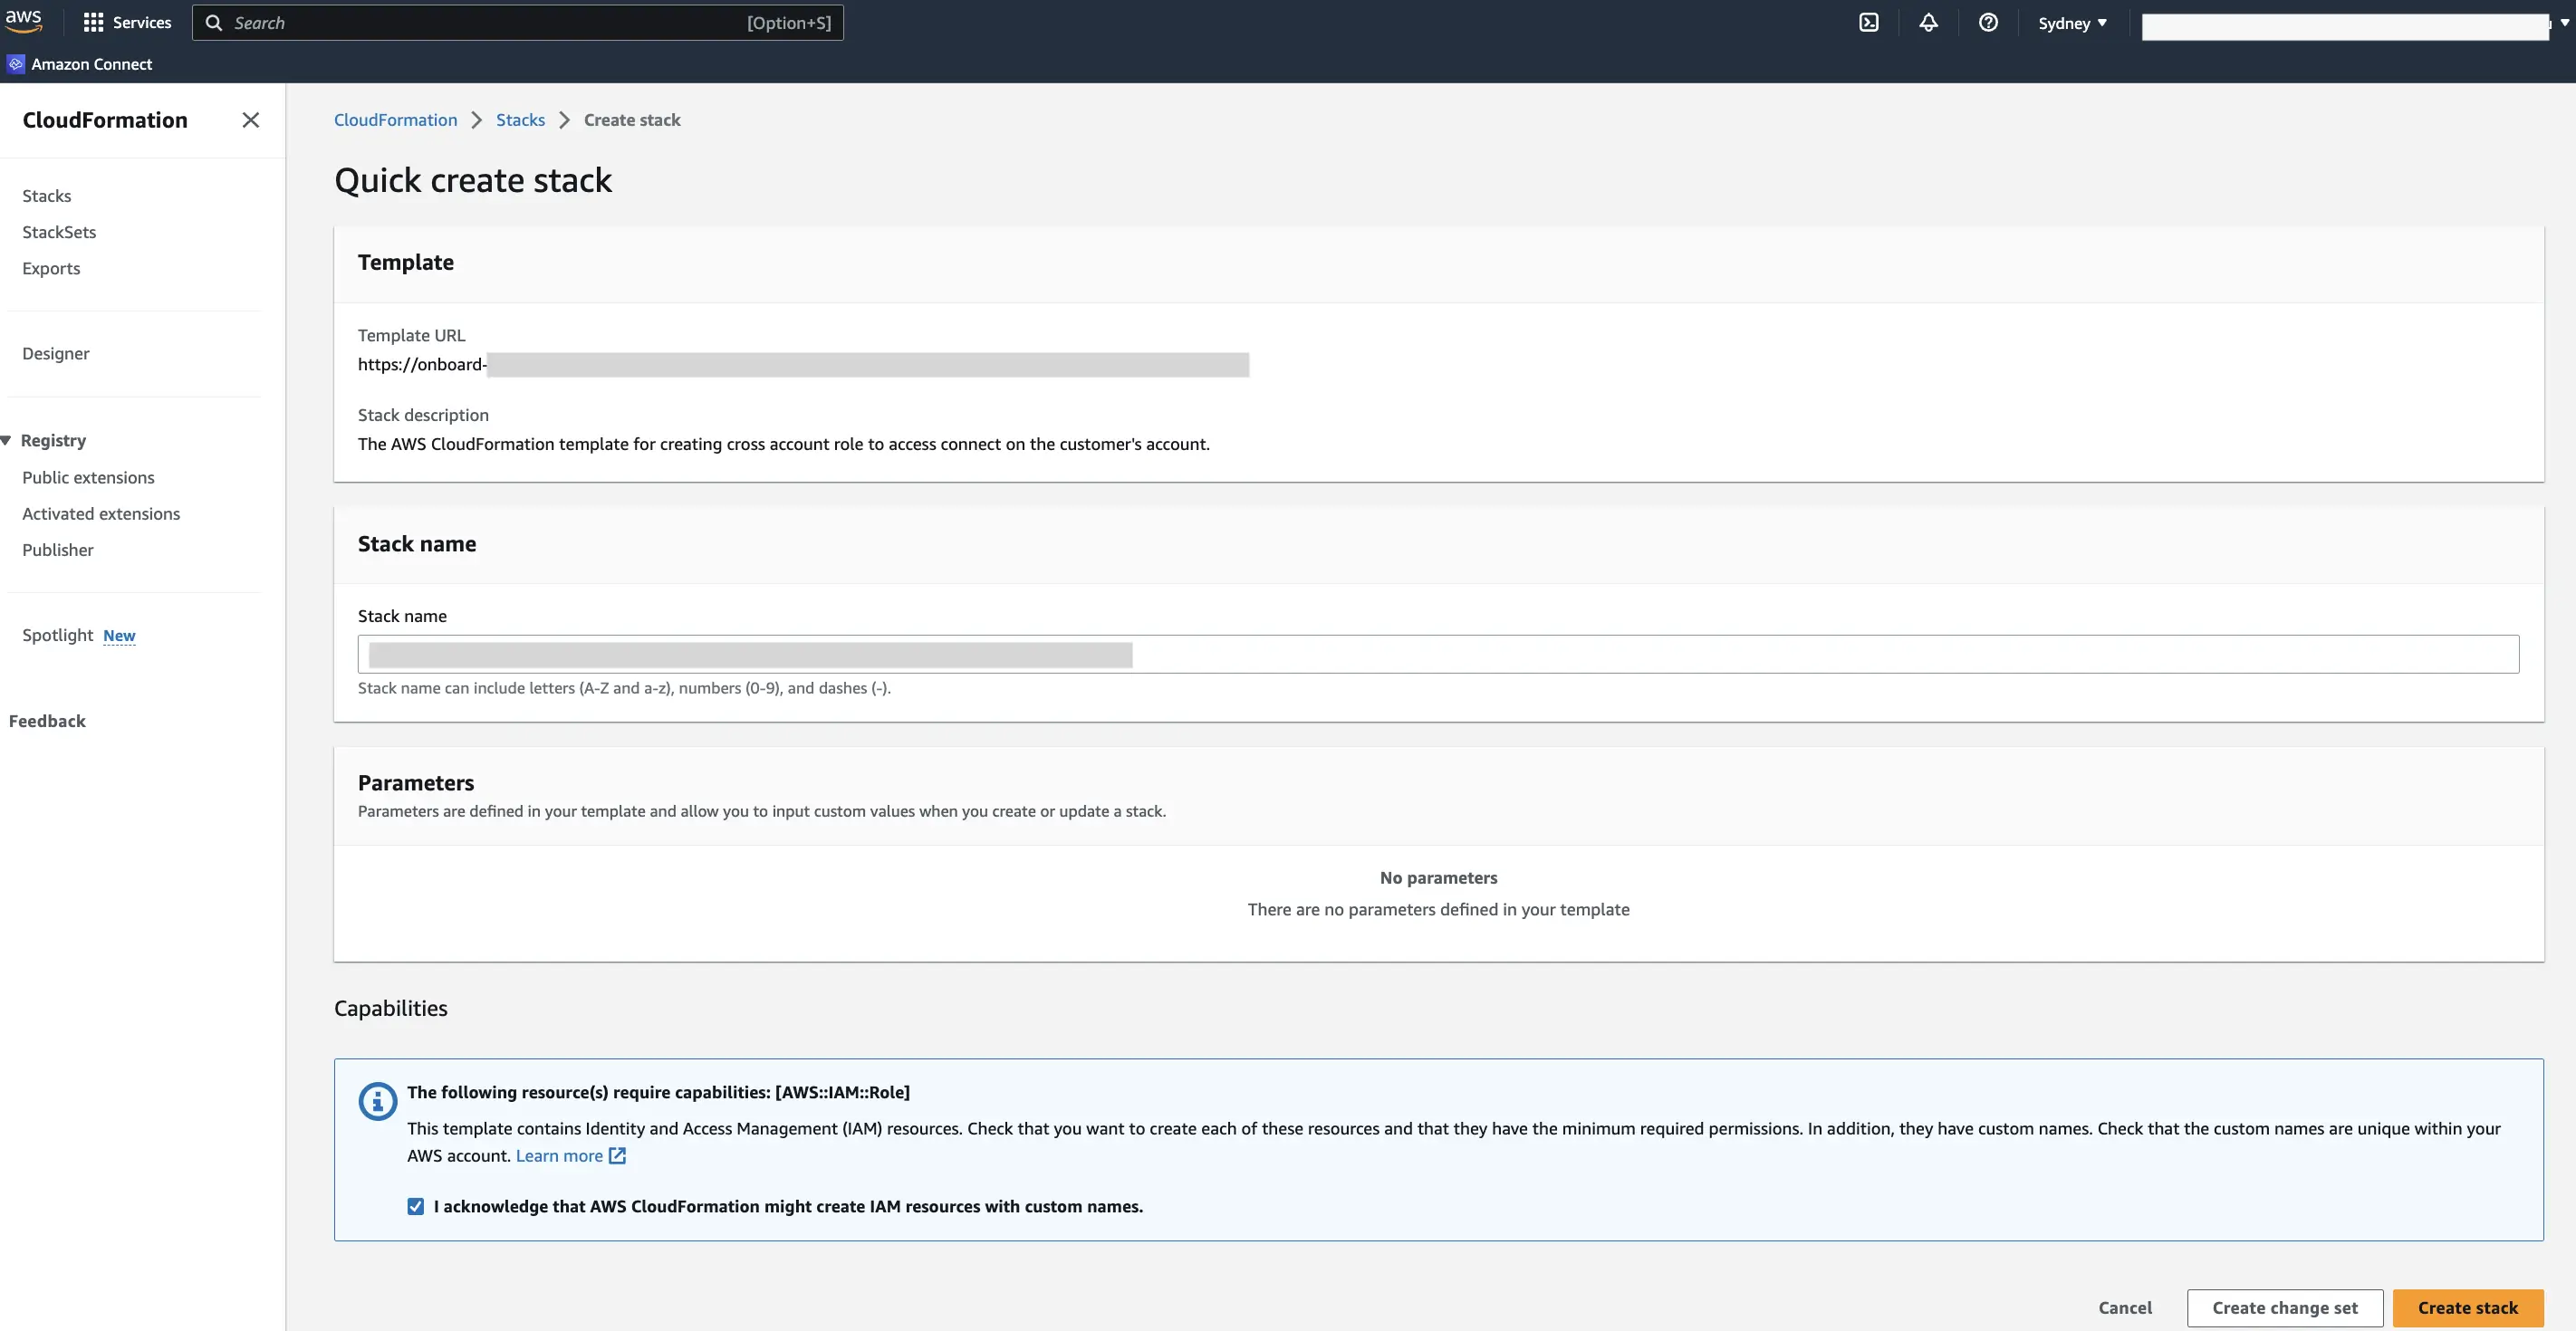
Click on “Create Role“, which will take you to the “Quick create stack“ in a new browser tab to create the required role automatically. Click ”Create Stack”.
Note: You will need to have your AWS account logged in with Admin permissions for this step to complete.
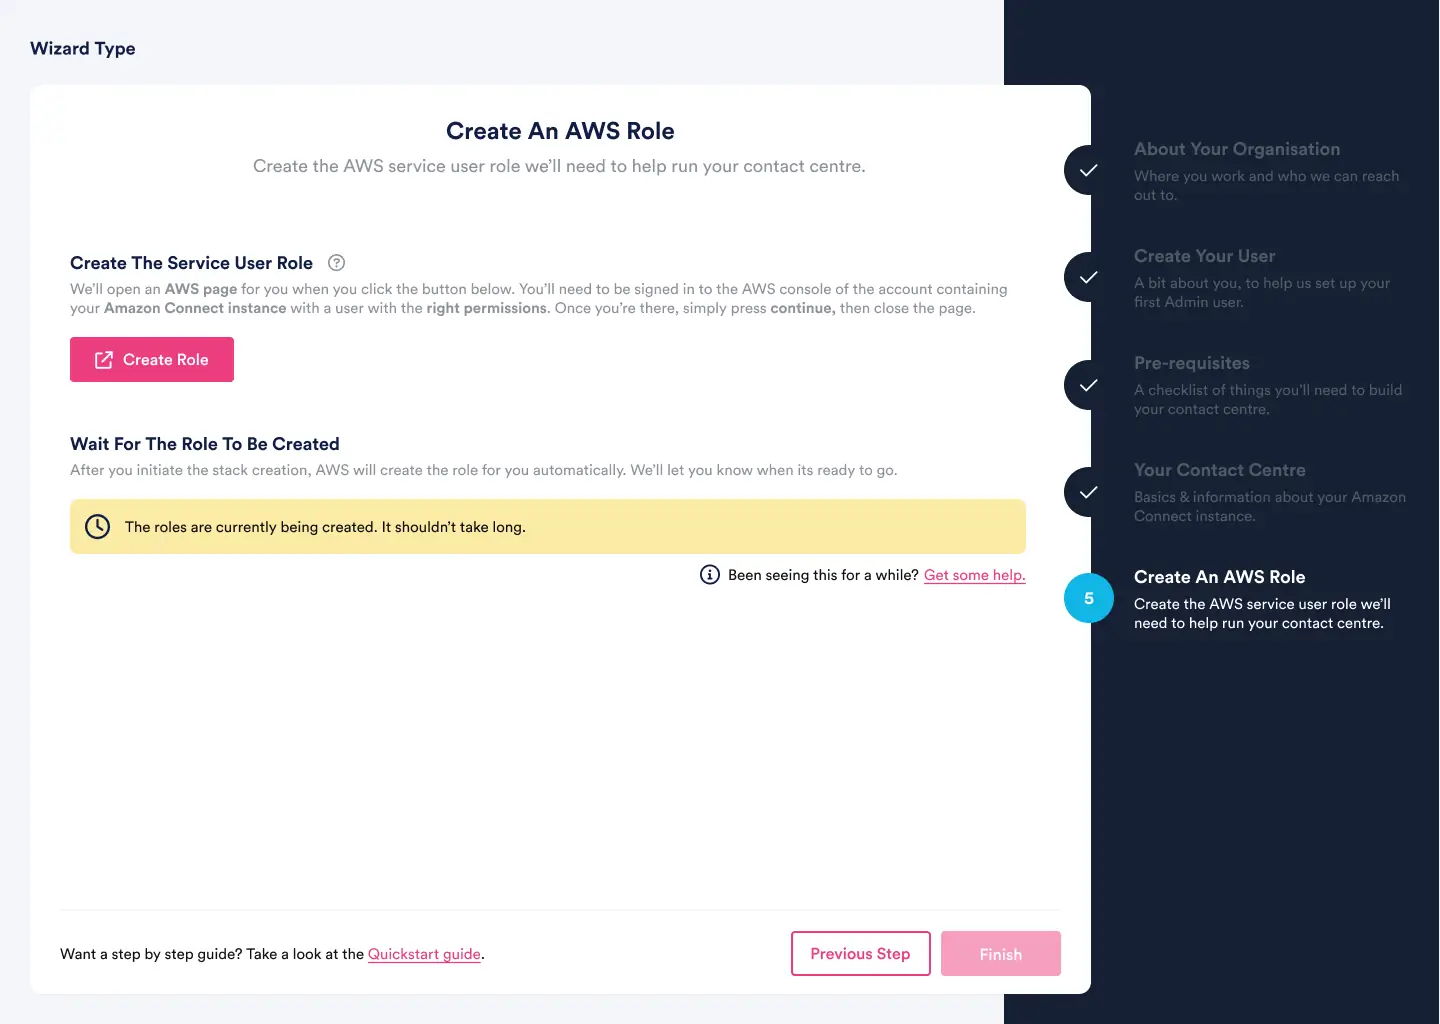
This page shows when your roles are being created in the signup flow.
Once the role has been created, the “Create An AWS Role” screen will automatically be updated with a success message, as shown below.
Click “Finish”
After the role is created, log out of the AWS admin user you used for creating the role above.
Congratulations! Your NEONNOW sign-up has been completed.
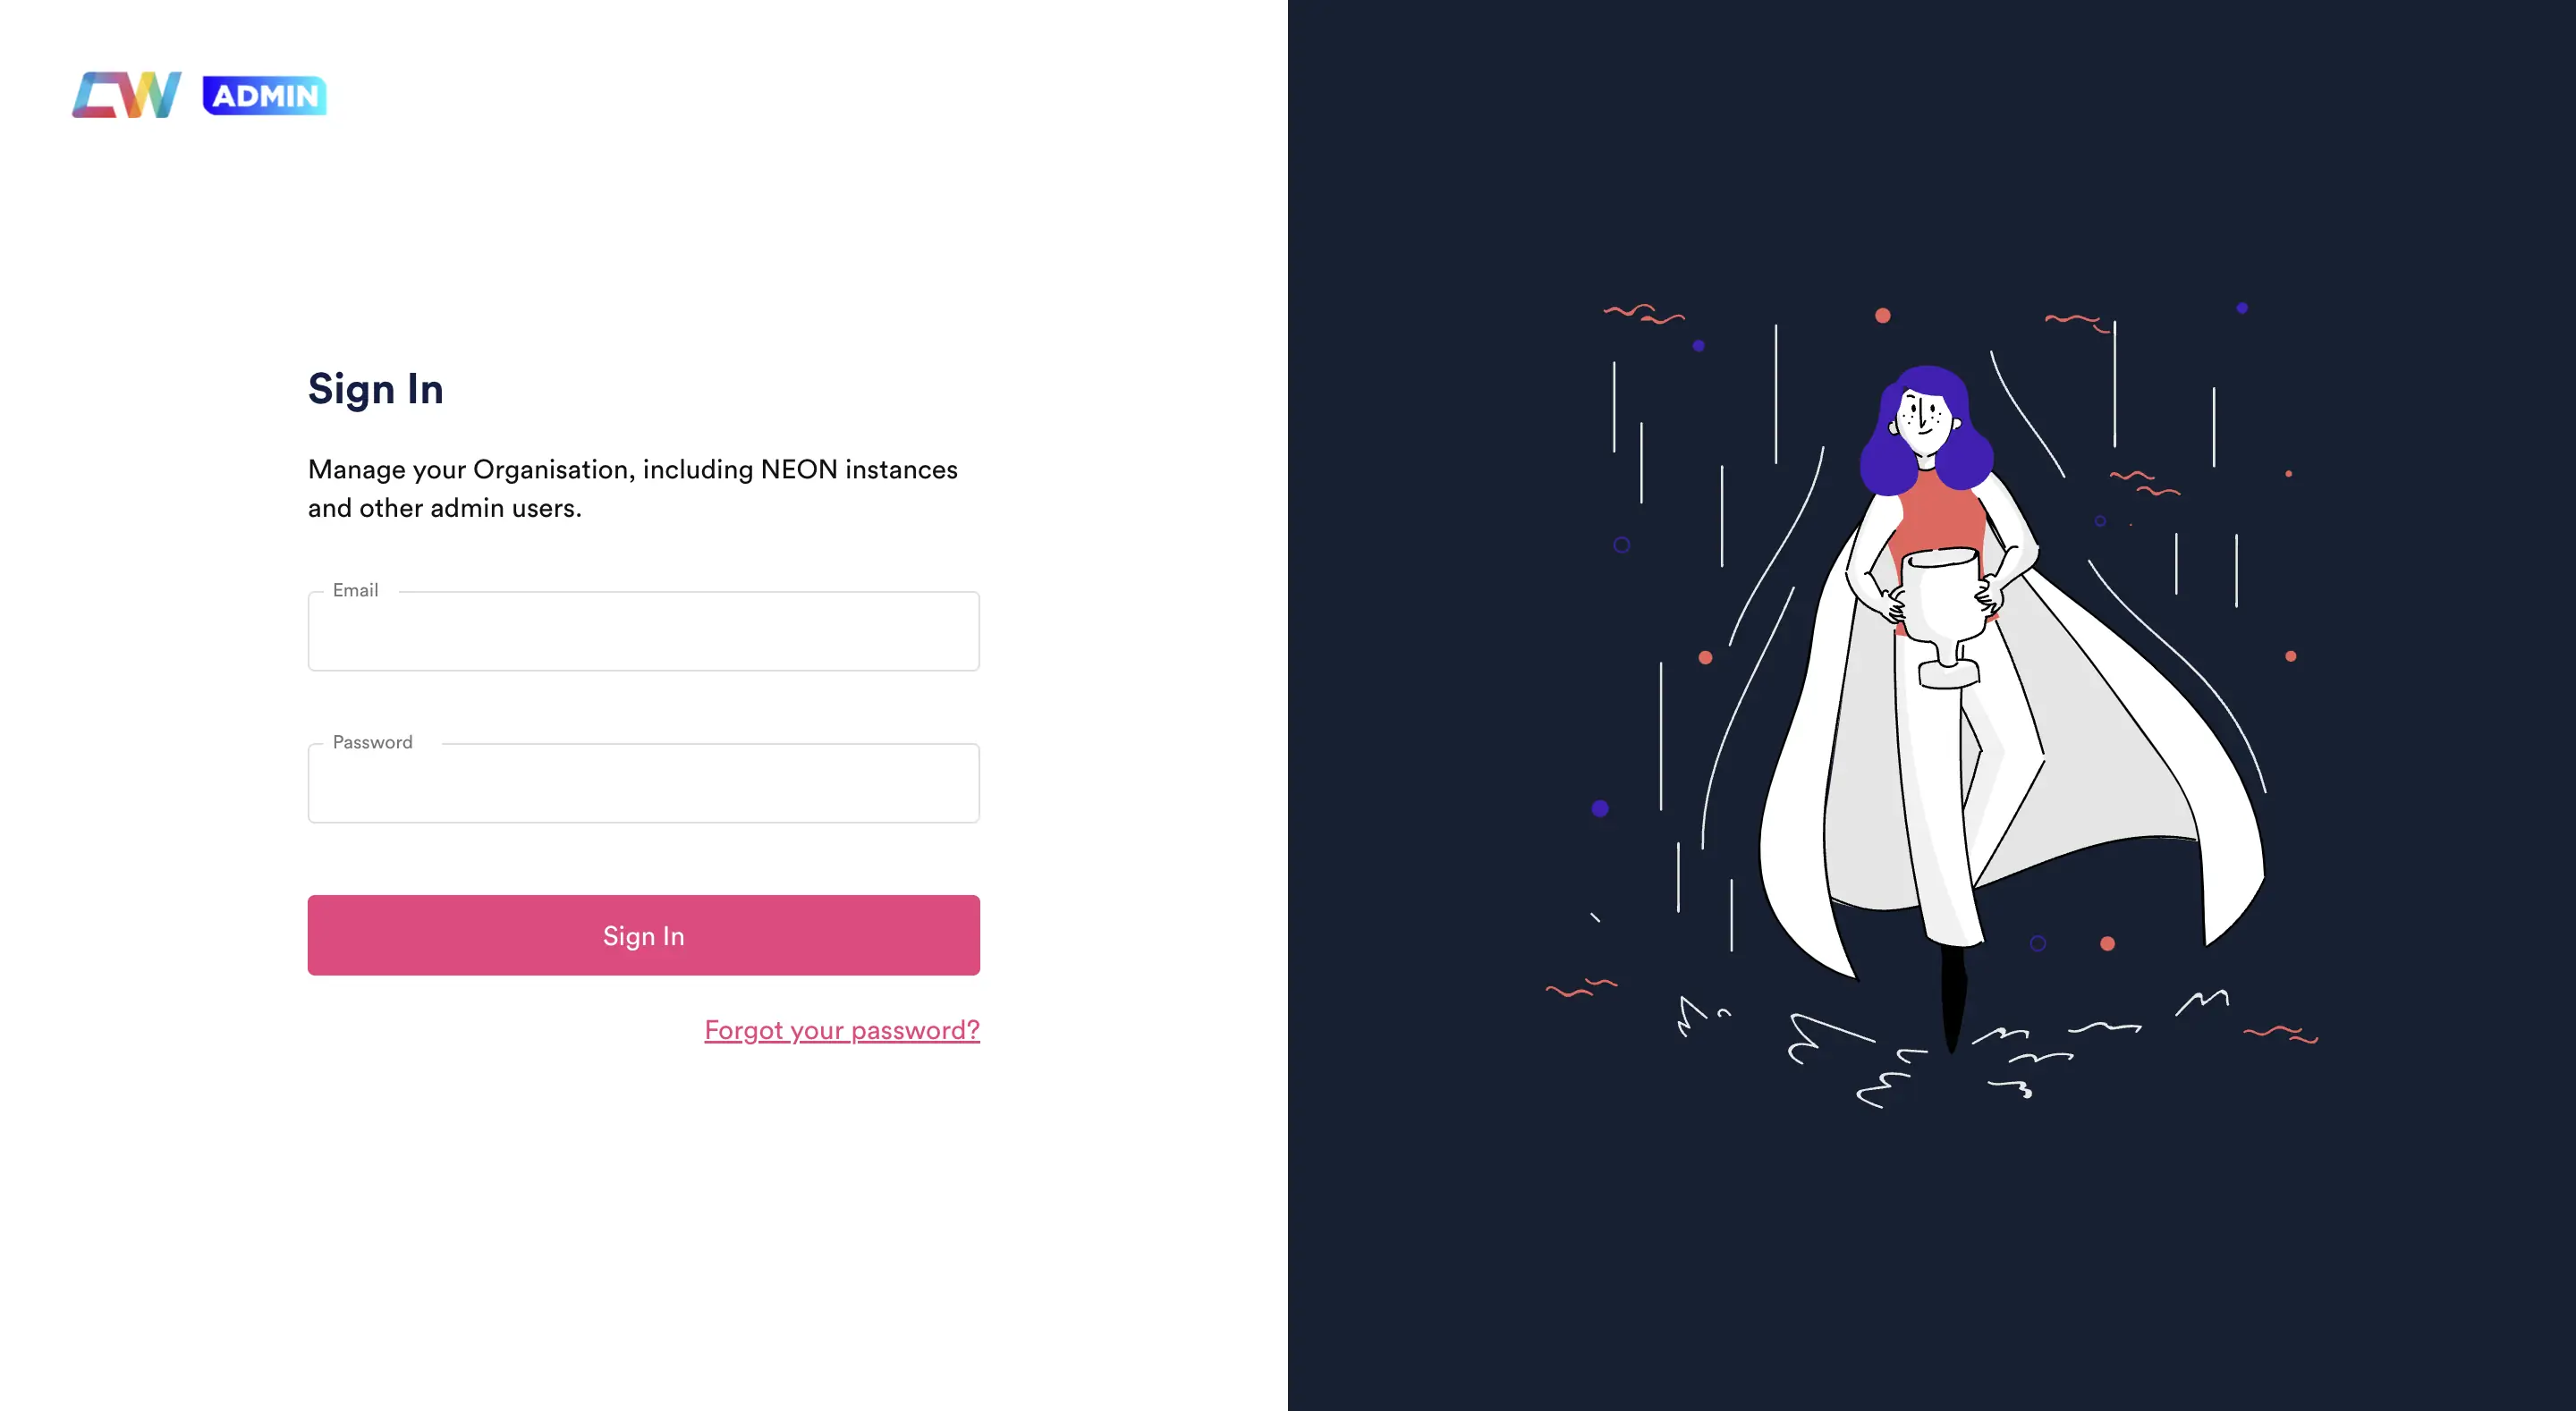
You can sign in from your admin app. Provide the admin user email and password you set up in the “Create Your Admin User” step under NEONNOW Signup Wizard, and click Sign In.
Accessing your NEONNOW Admin Portal
You can manage your Organisation, including NEONNOW instances and other admin users through the NEONNOW Admin application
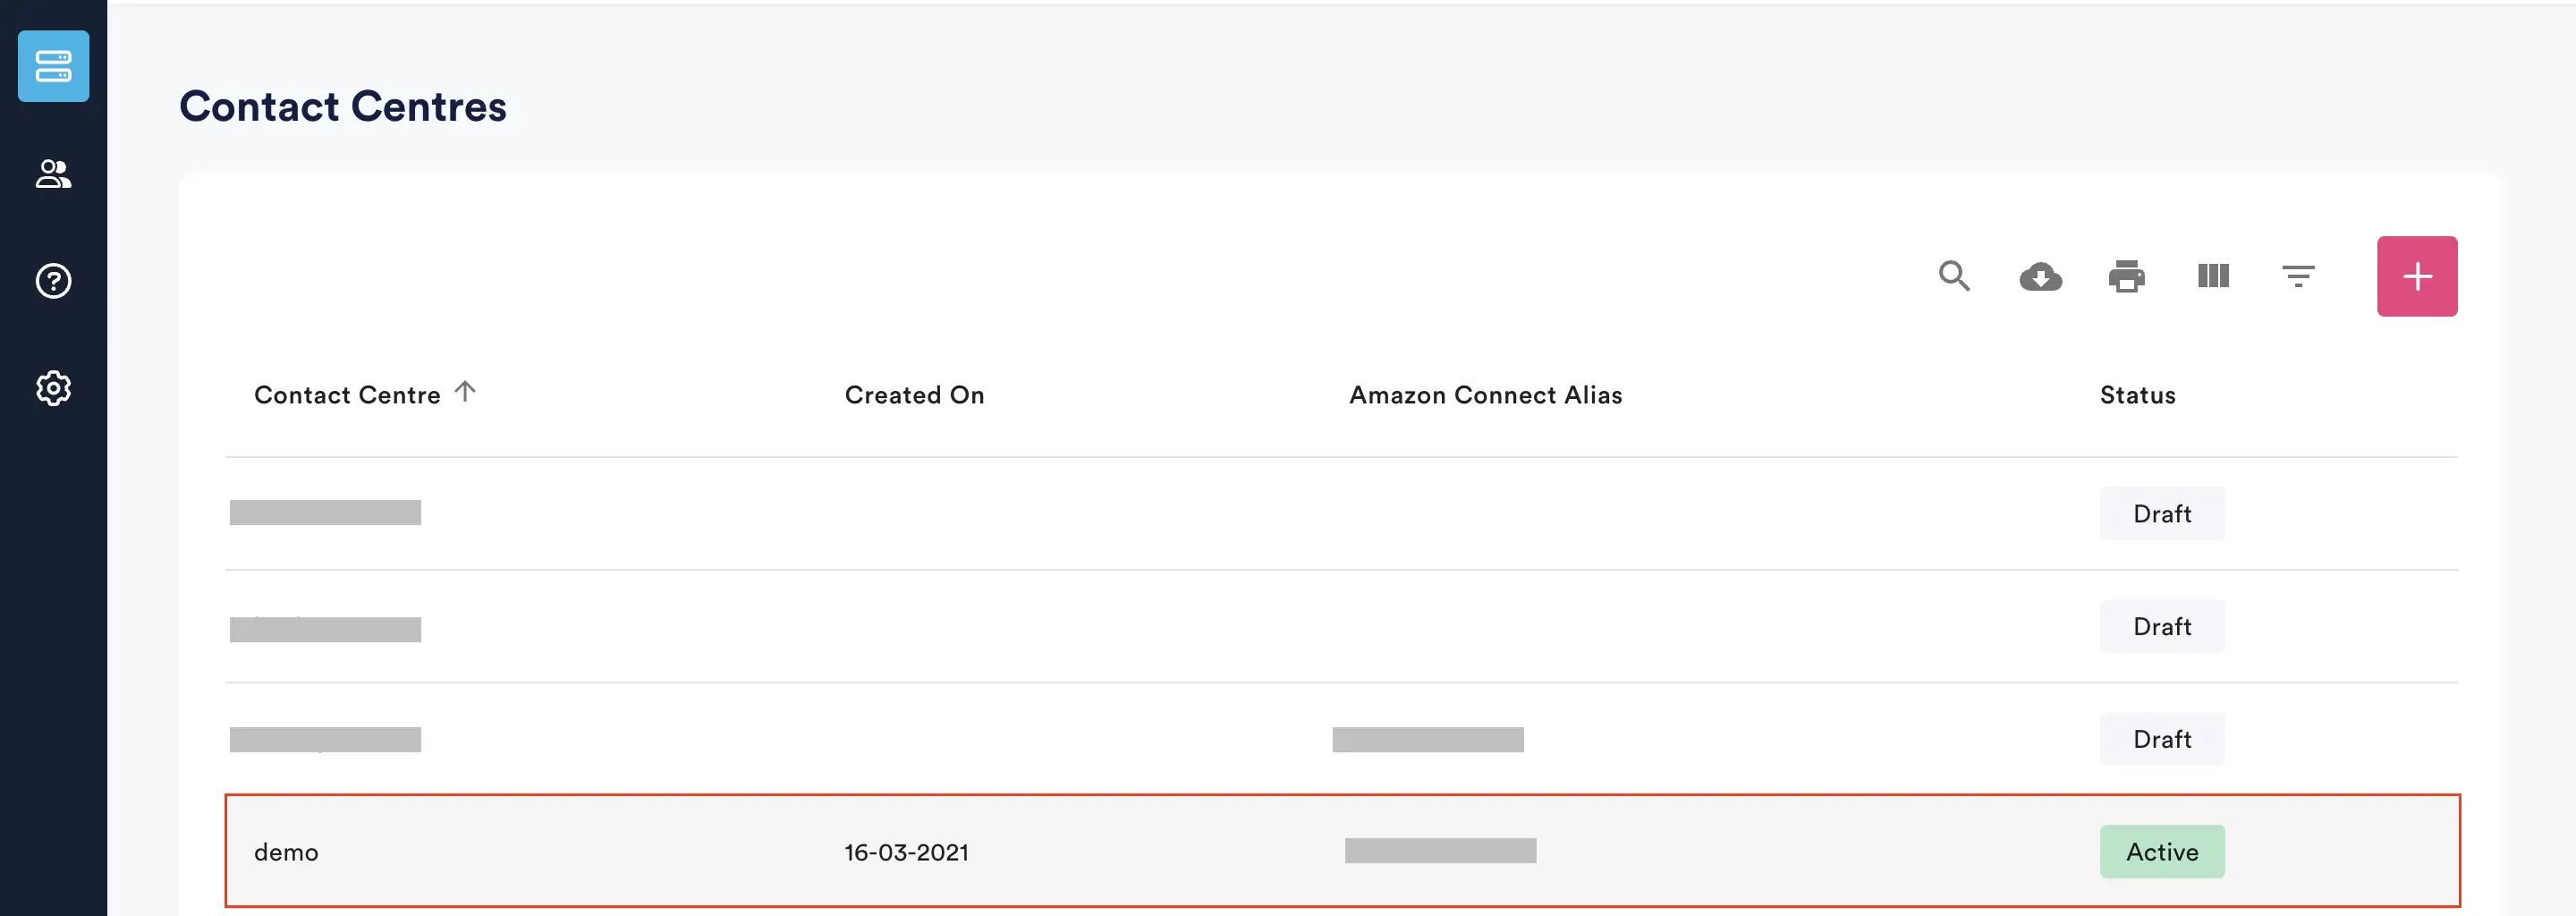
Once logged in, you should see NEONNOW contact centres screen similar as below:
Click on the Contact Centre you want to config.
Click “Customise“ to begin the customisation process.
Enterprise and Add-ons require a follow-up from us to help you get set up. We’ll get in touch with the point of contact you provided us with.
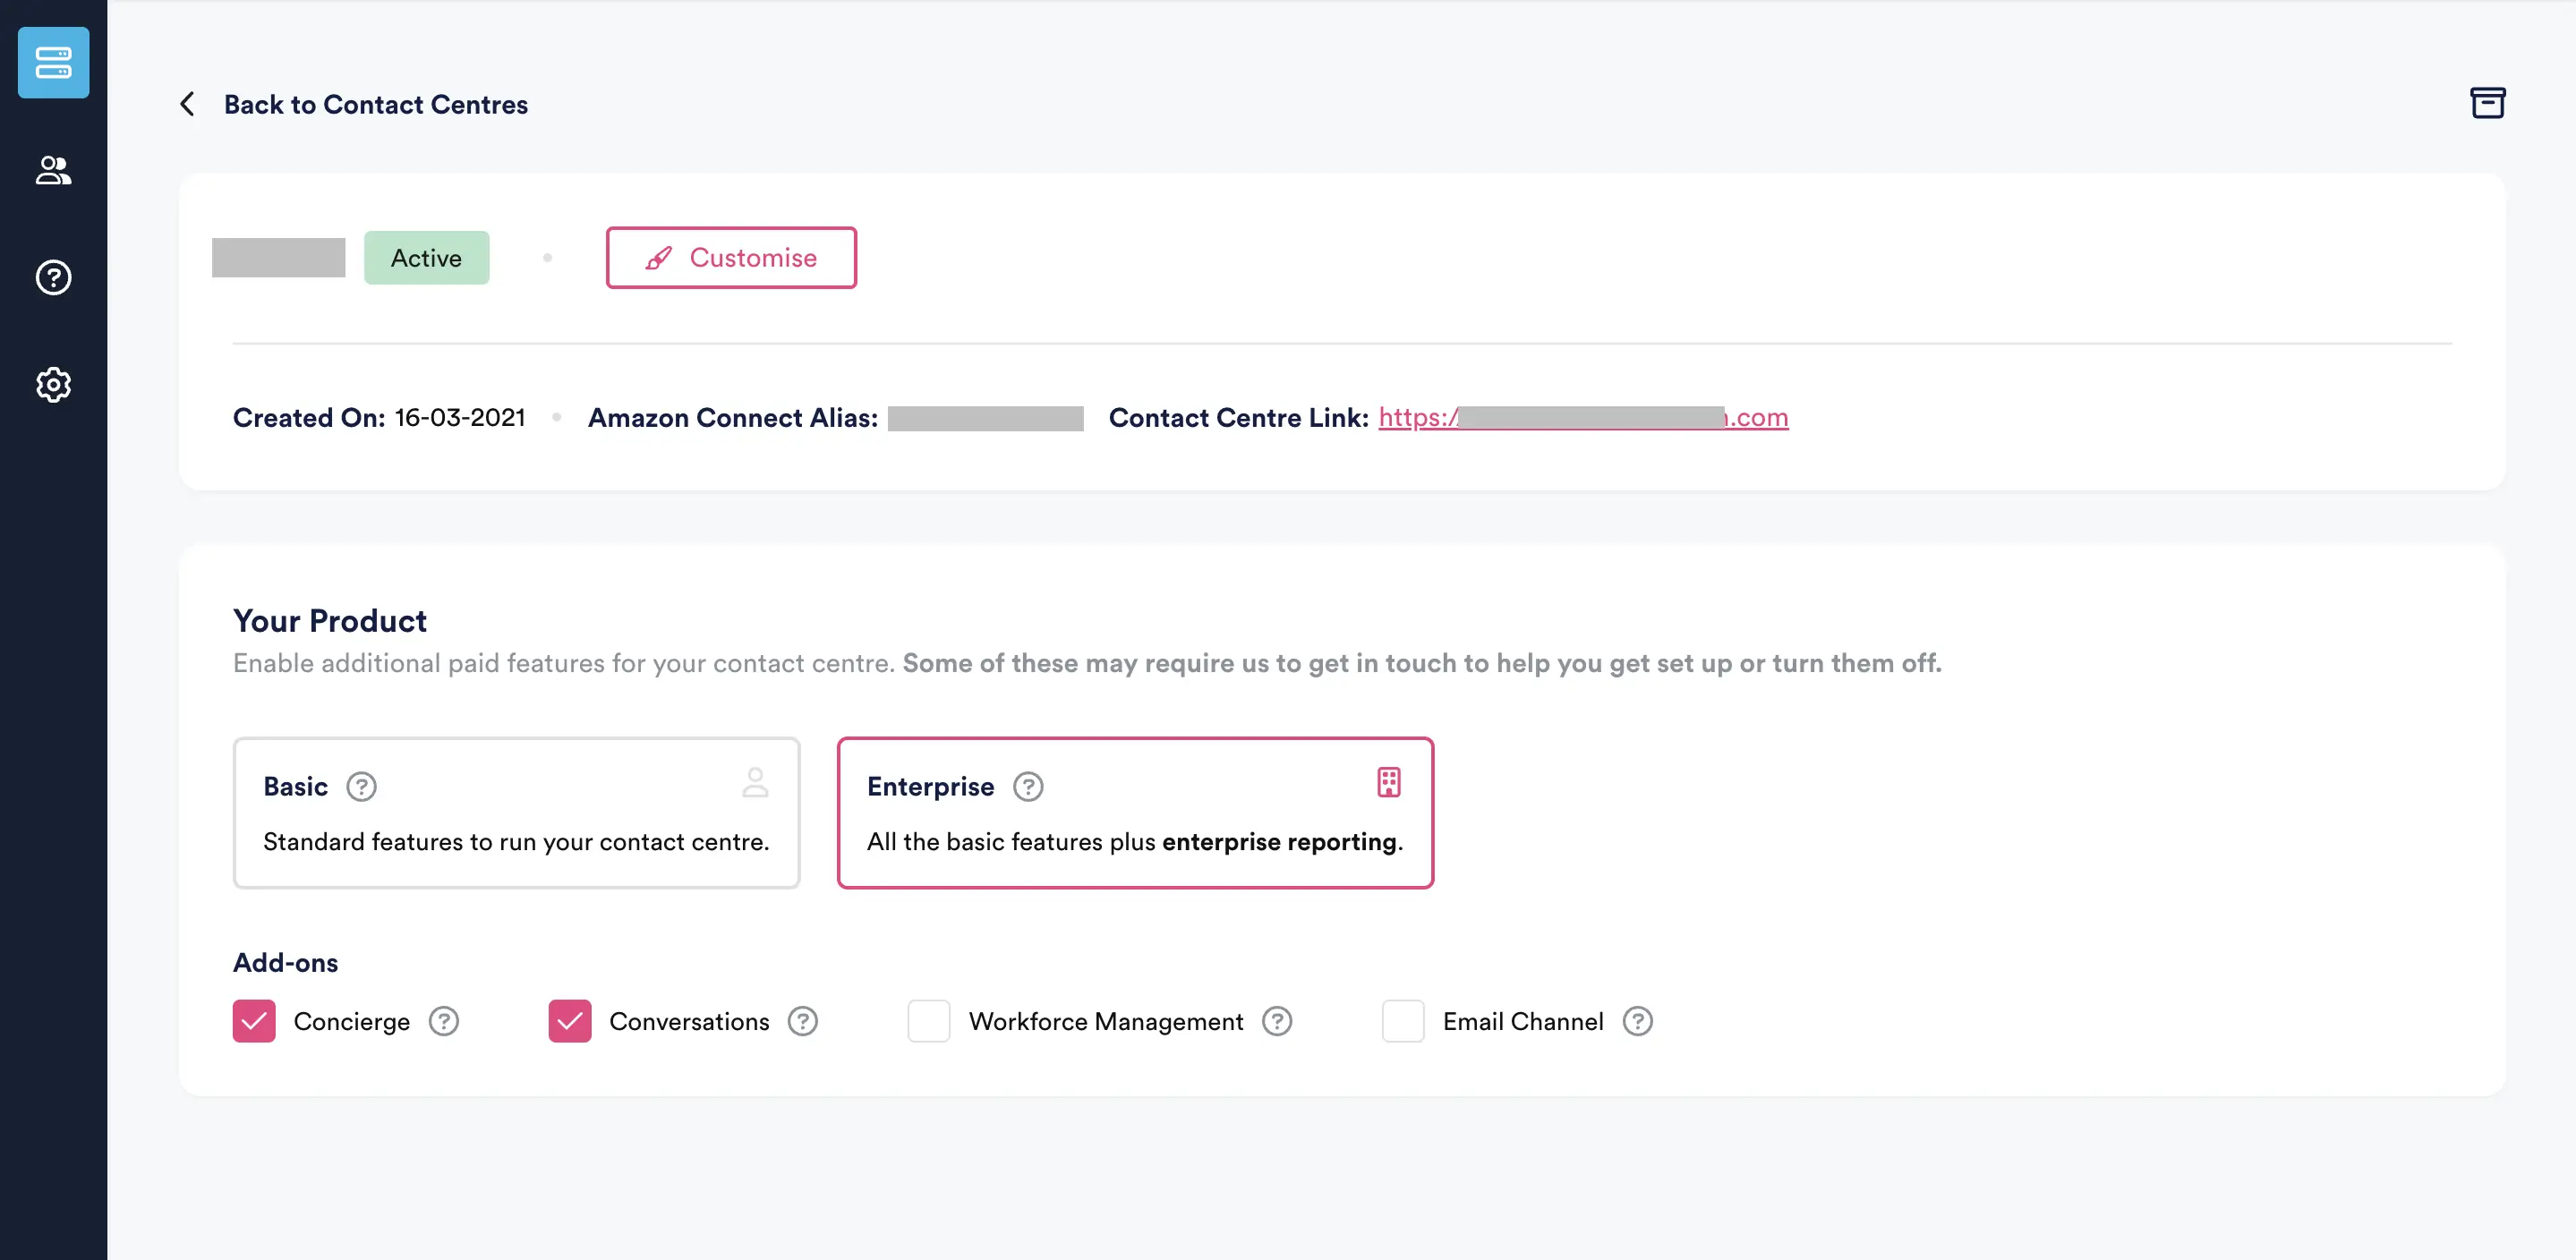
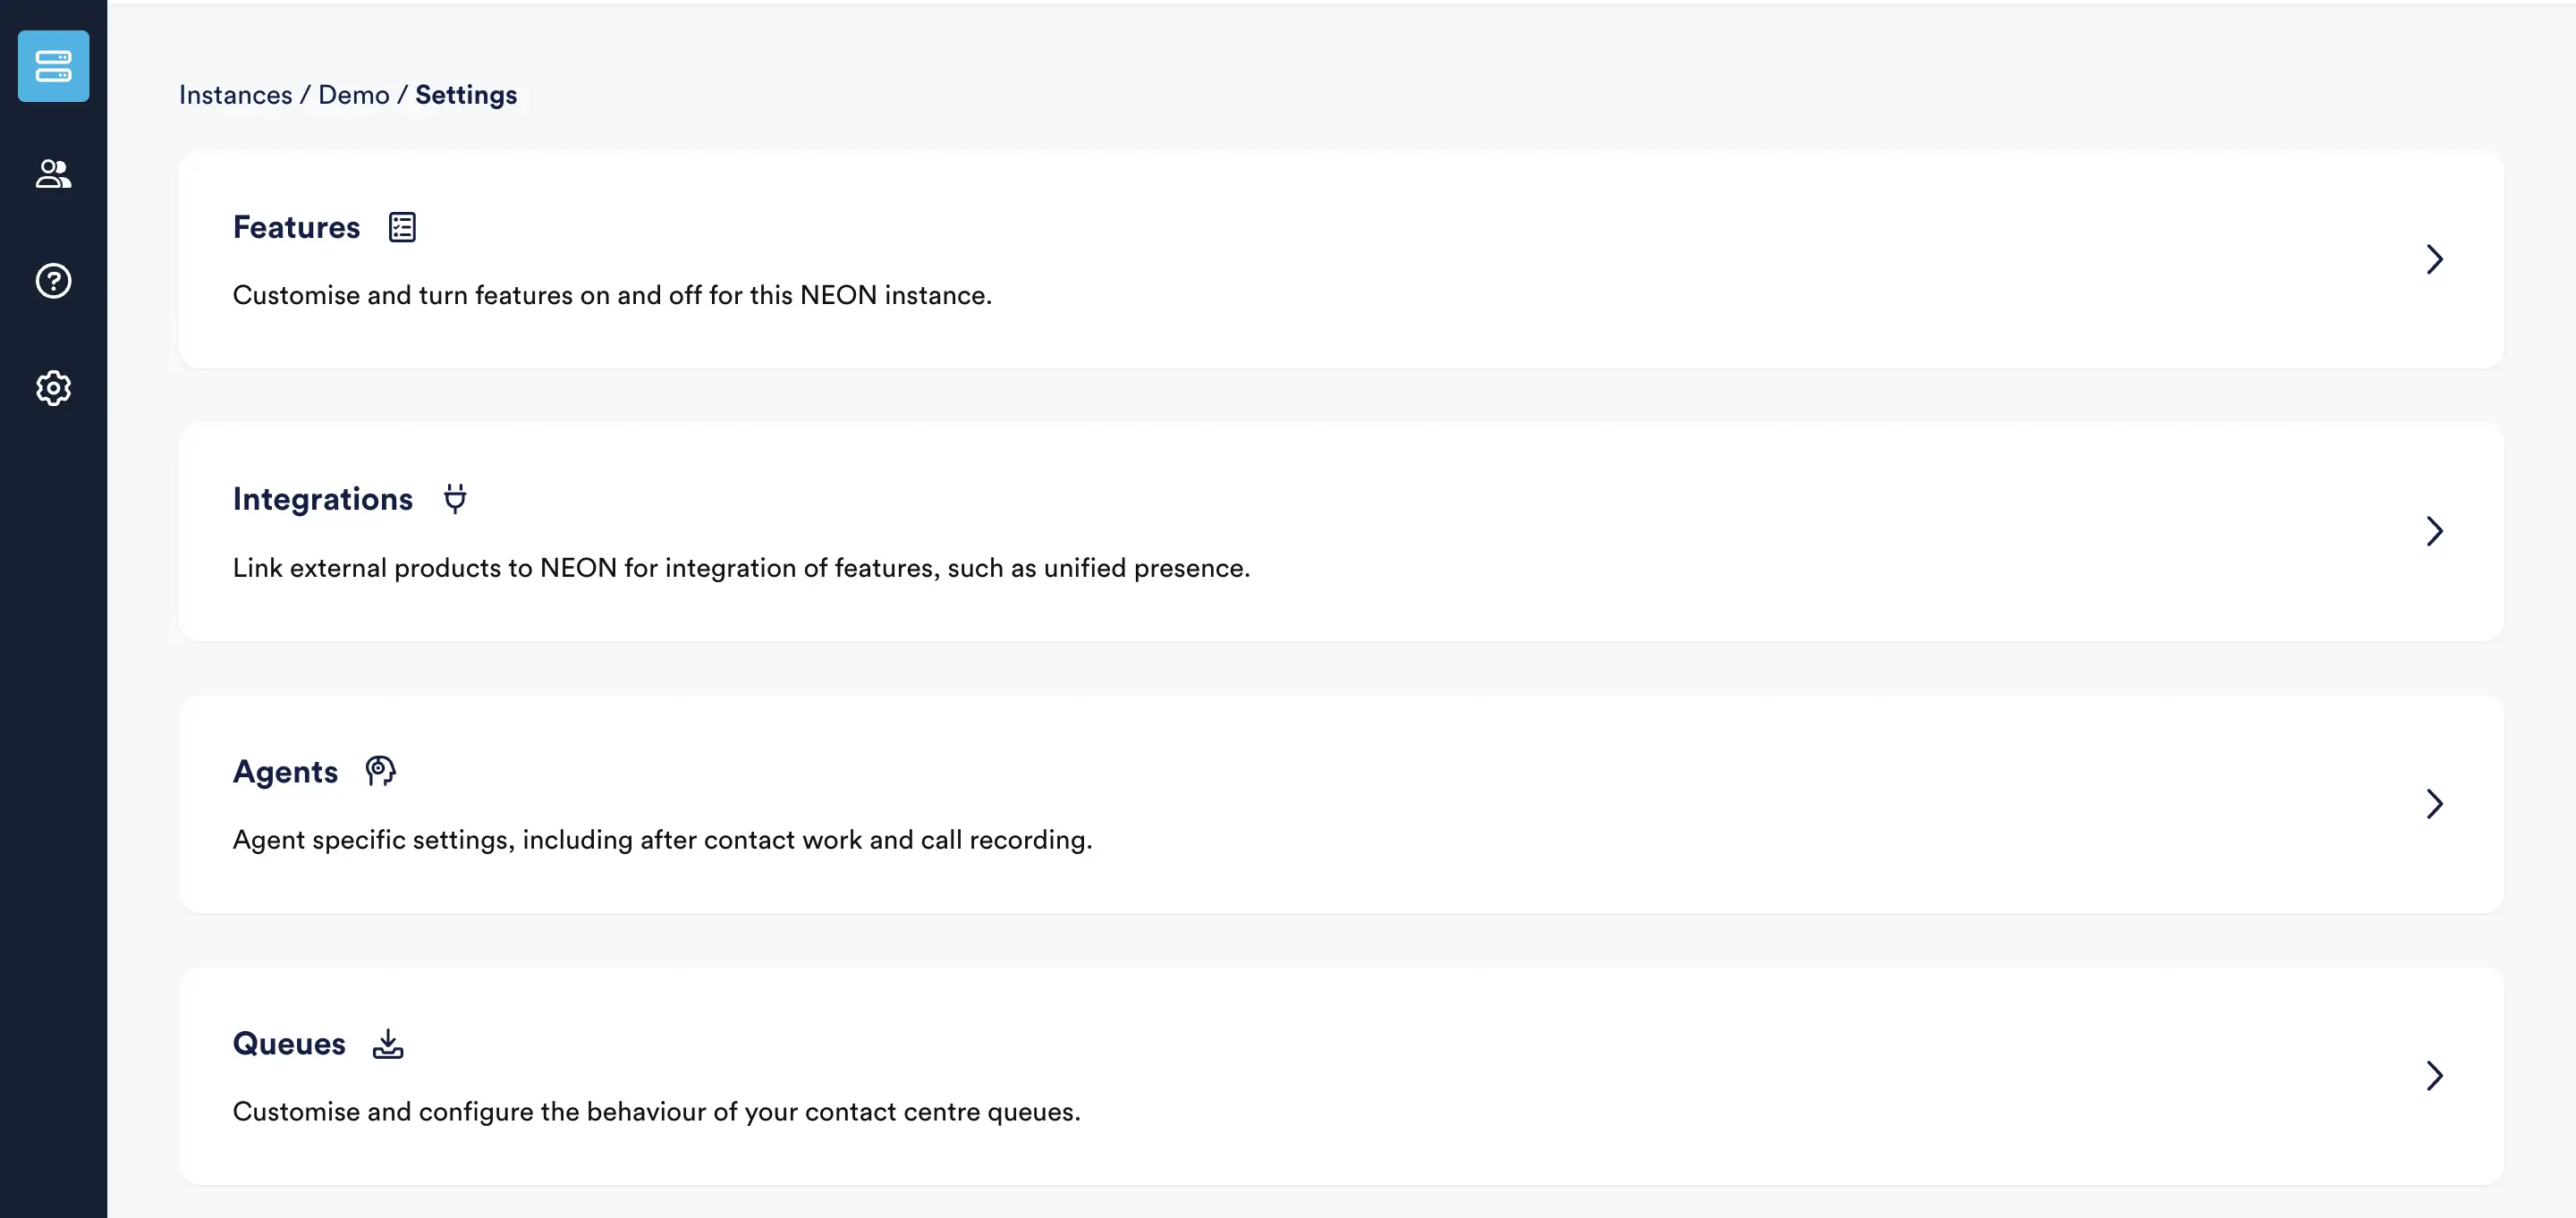
Config your contact centre based on your needs:
For example, you may want to set up After Call Work or Wrap-Up codes to provide specific options to your customers.
Networking Setup
The following table defines connectivity required by the NEONNOW agent workspace/softphone, as well as the NEONNOW admin portal.
Local and Network corporate firewalls should allow all domains on below list, on the ports defined. Corporate web accelerators and proxies should be used with caution as these can cause unpredictable delays, especially to Real-Time audio traffic.
Please visit Amazon Connect's network page here for network requirements for Amazon Connect.
For NEONNOW, the following is also required:
| Domain/URL allow list | AWS Region | Ports | Direction | Traffic |
|---|---|---|---|---|
| *.cw-neon.com | Region-specific sub-domains can be utilised, please refer to your account manager to for specific region sub-domain | 443 (TCP) | OUTBOUND | SEND/RECEIVE |
NB: Each agent workspace will utilise approximately 100 Kbps bandwidth per connected workstation.
Test Core Features
Note: The onboarding flow automatically white-listed the NEONNOW Domain within the AWS Console.
Open the NEONNOW Agent Workspace URL created for your organisation (e.g. https://acme-inc.cw-neon.com) in a supported browser such as Google Chrome.
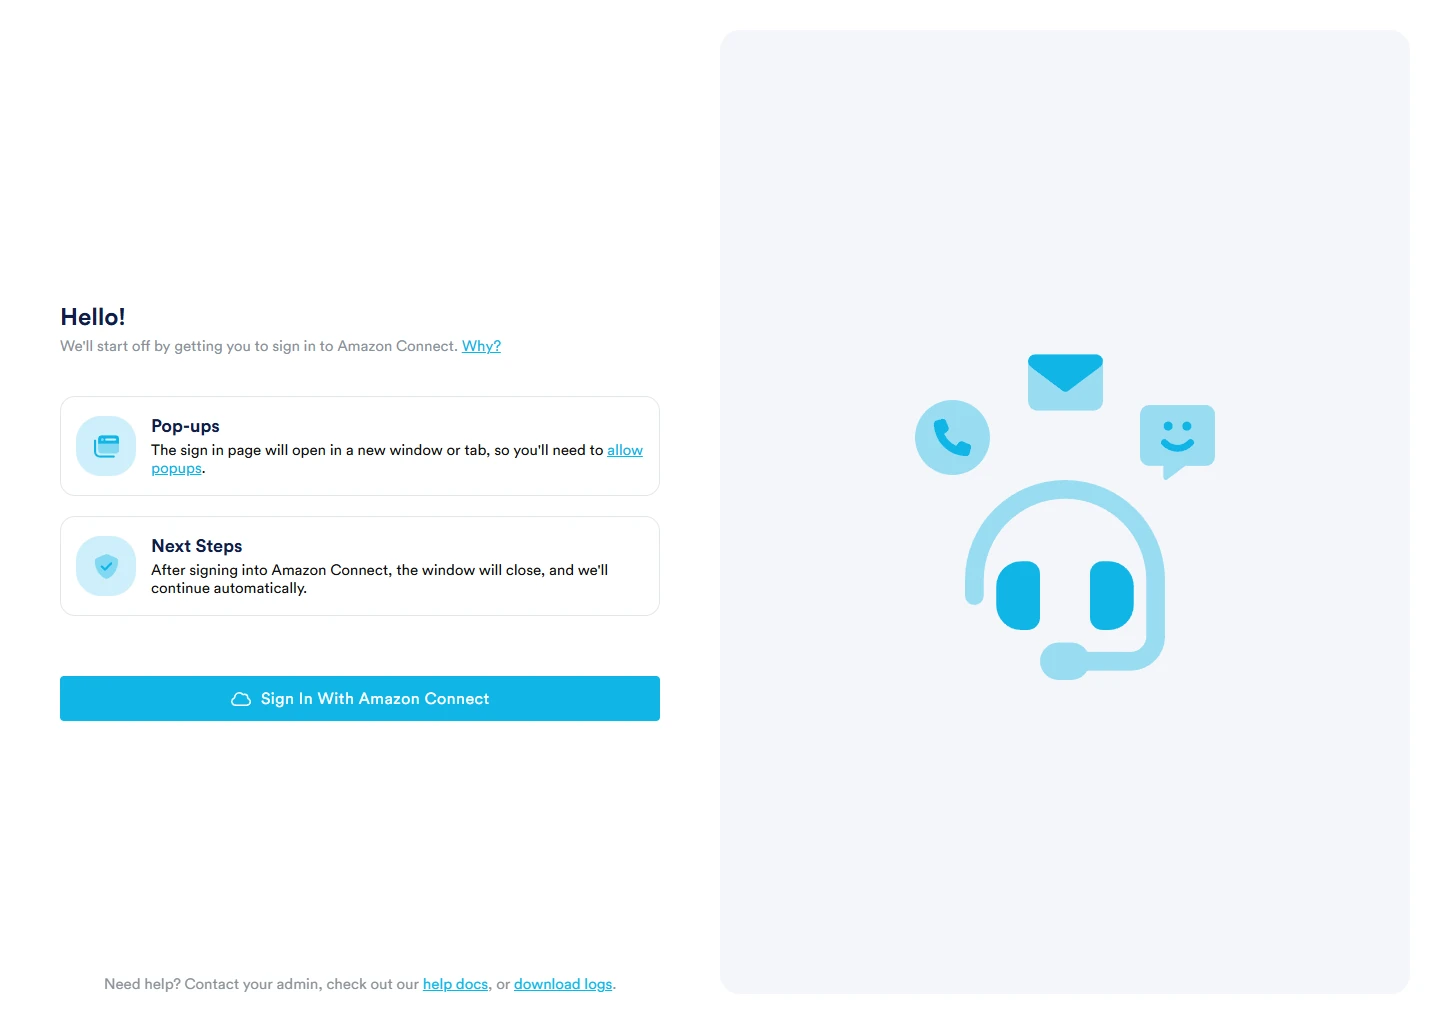
Select ‘Sign In With Amazon Connect', or 'Sign In With Your Provider’ - this should open Amazon Connect CCP in a new popup window. If the Amazon Connect CCP window does not pop up, make sure the browser’s popup blocker is not blocking your NEONNOW URL.
Provide your Amazon Connect credentials on the Amazon Connect CCP popup window and wait for the CCP screen to close itself after the successful authentication.
If MFA is enabled, you will then be prompted to enter an MFA token sent to your user’s email address or mobile phone number. Note, if an email address or Phone number isn’t set up, you will receive an error.
You also need to give Microphone access to NEONNOW to accept inbound/ outbound calls.
Note: You must use the same Amazon Connect user that you provided in the NEONNOW Signup wizard
Troubleshooting Issues
If you are having problems, please see our Agent FAQs which provides guidance to common problems.
Setting Up your Agent Desktop Experience
Now you have successfully signed in to the NEONNOW agent workspace.
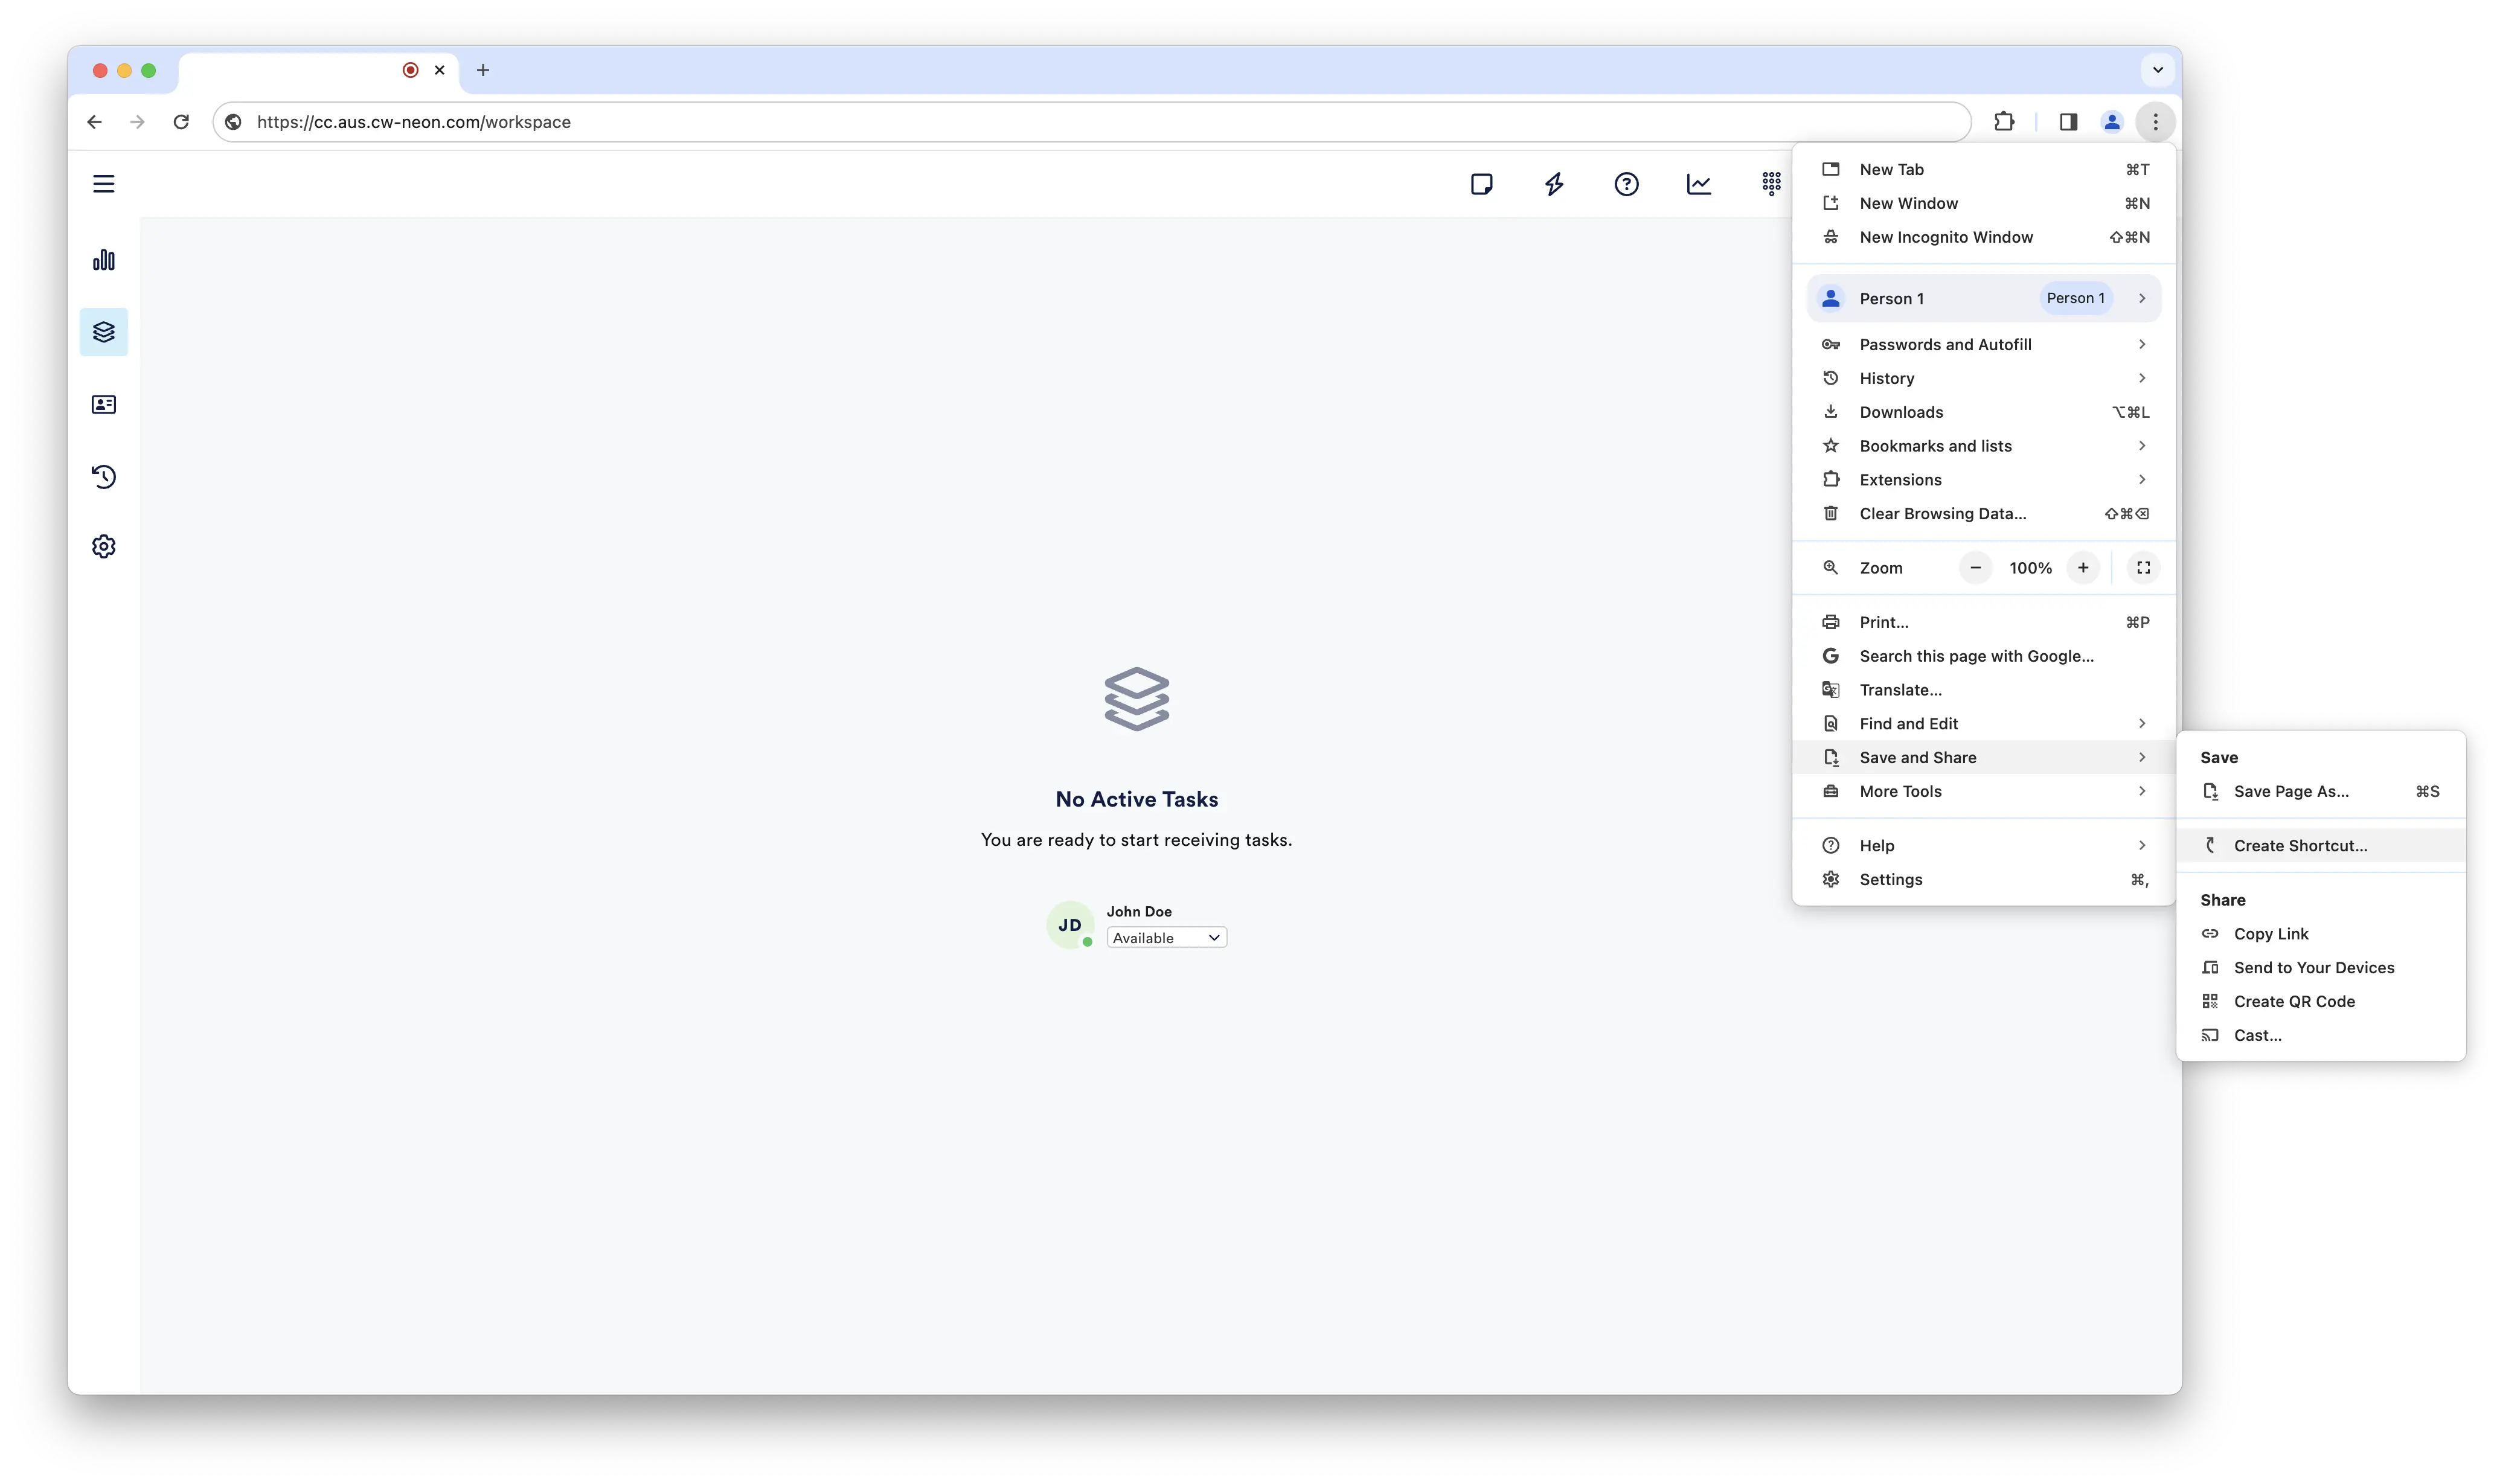
Click on the 3 dots at the top-right corner of the Chrome browser window, and go to “Save and Share” then click “Create Shortcut”.
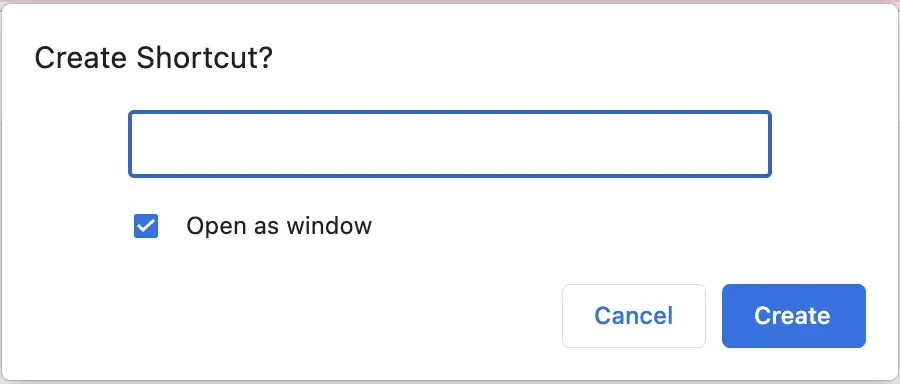
Enter NEONNOW as the application name, be sure to select “Open as window”, then click Create.
Go to your Desktop; there should be a NEONNOW icon created. Double click to open, then select and drag the top right corner to adjust the Window to an appropriate size to fit the preference of the user.
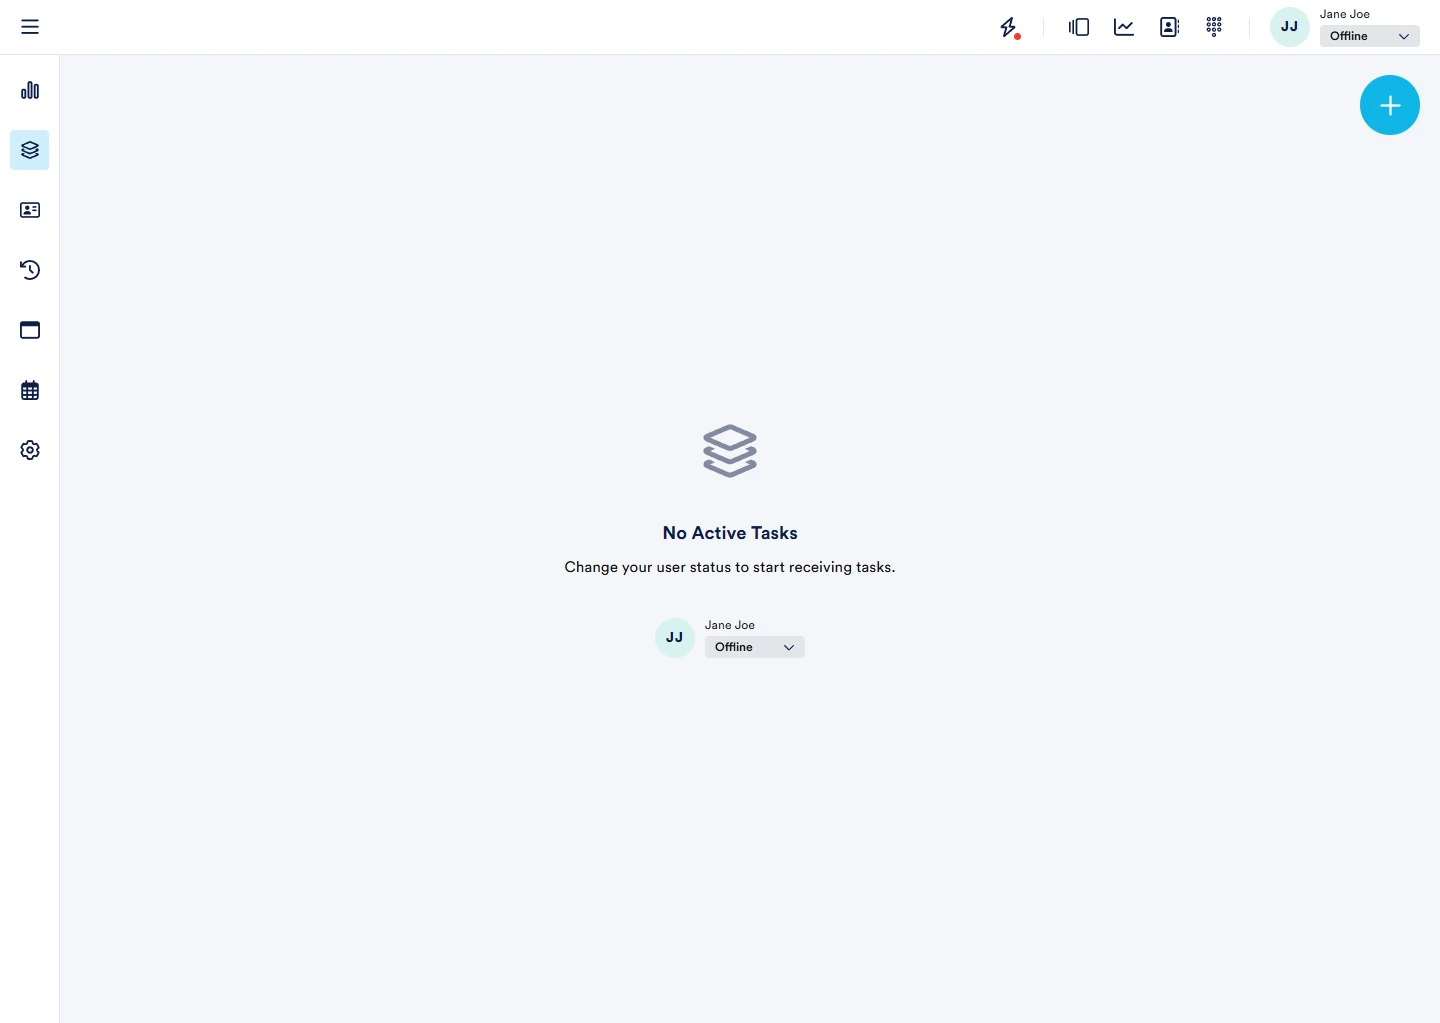
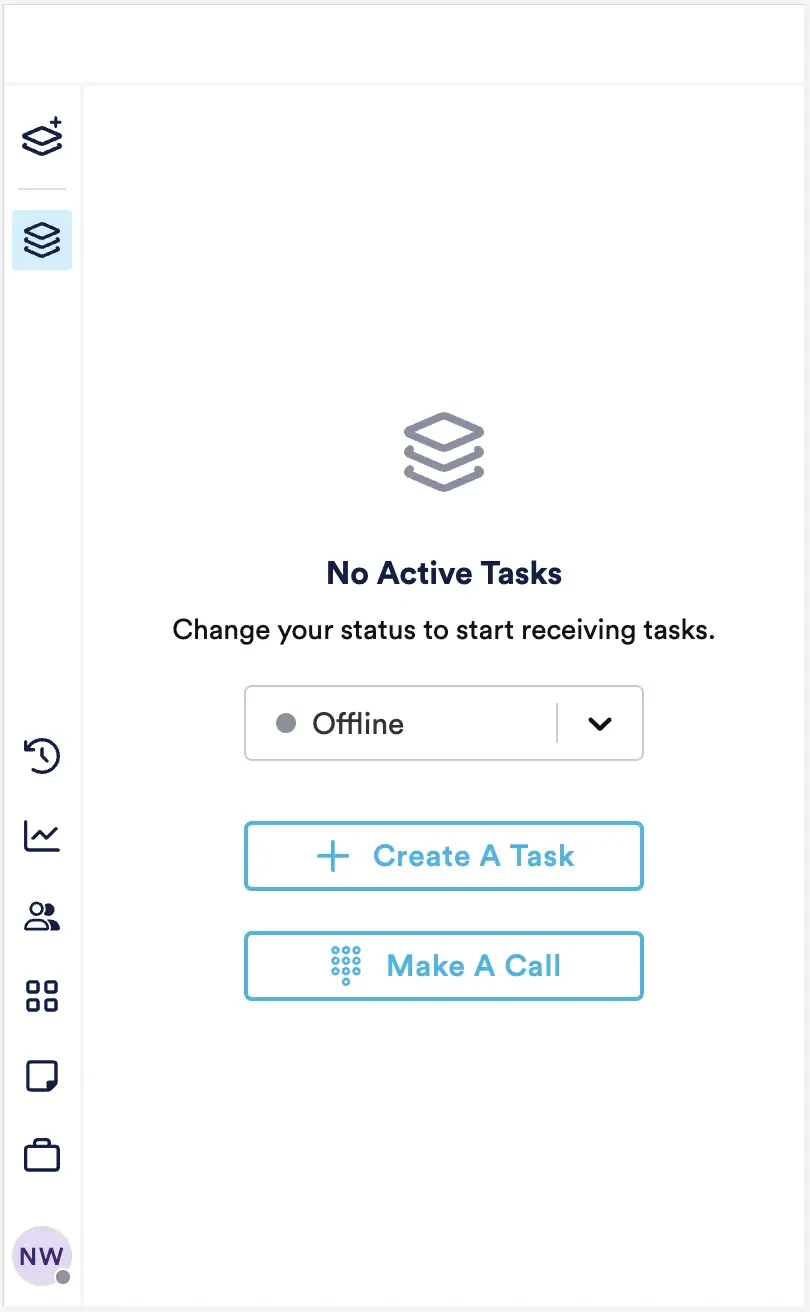
You can choose to use NEONNOW Desktop or NEONNOW softphone:
Now let’s test Core Telephony Features:
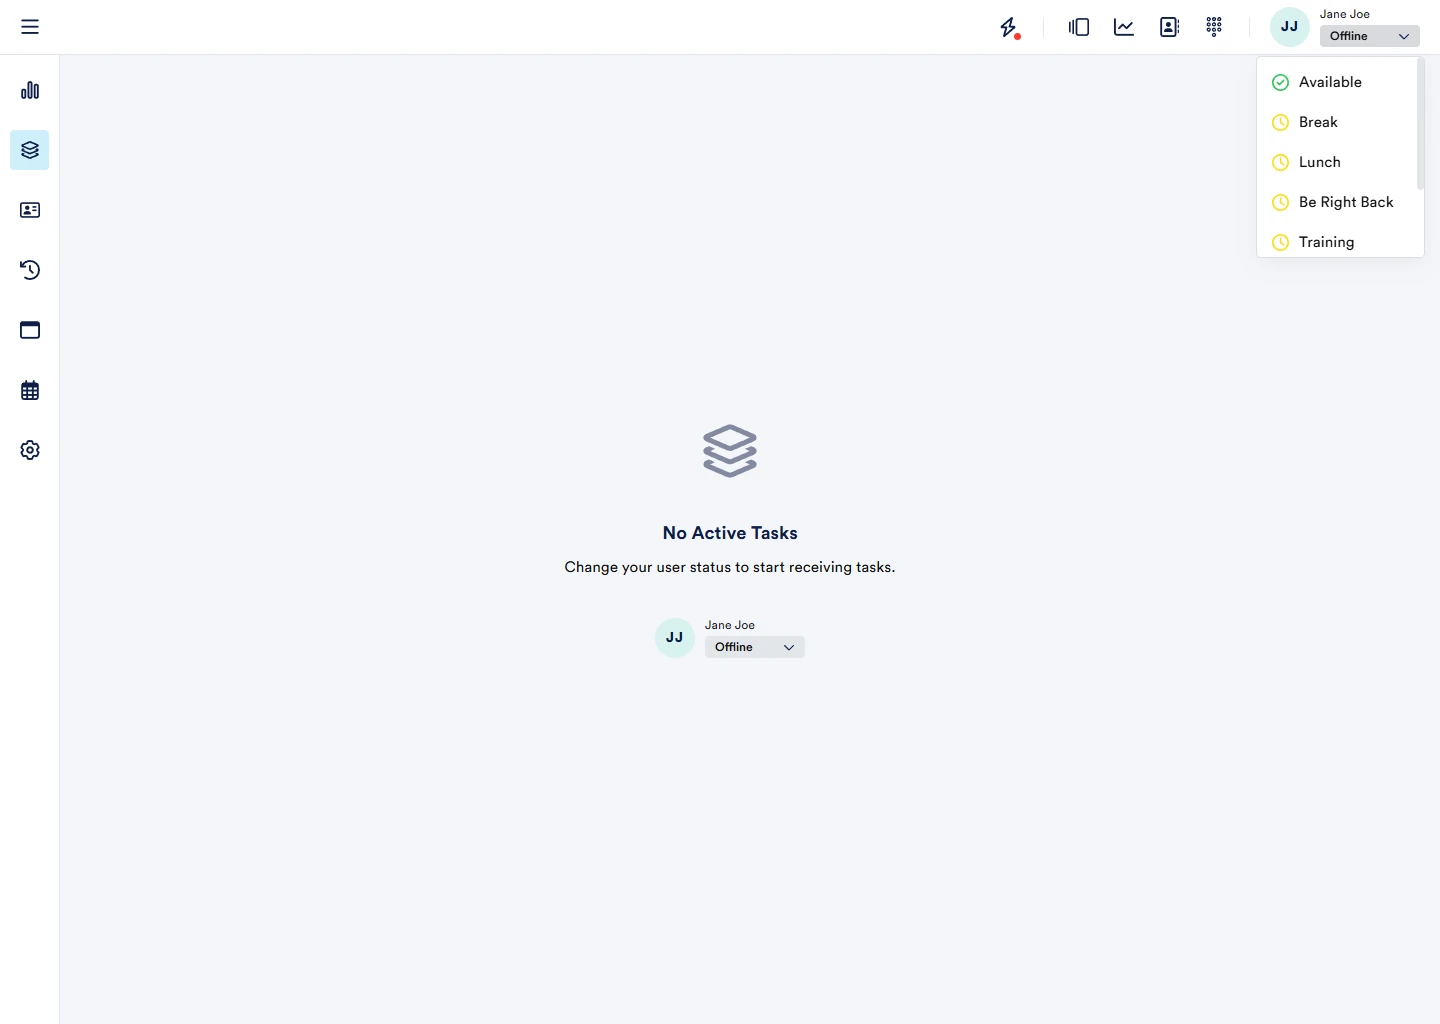
Agent Status
From the top right corner, select Available from the status list:
Inbound call
Use your cell phone or landline to dial the Amazon Connect number that is associated with your test contact flow, which should transfer the call to a queue where you are a member.
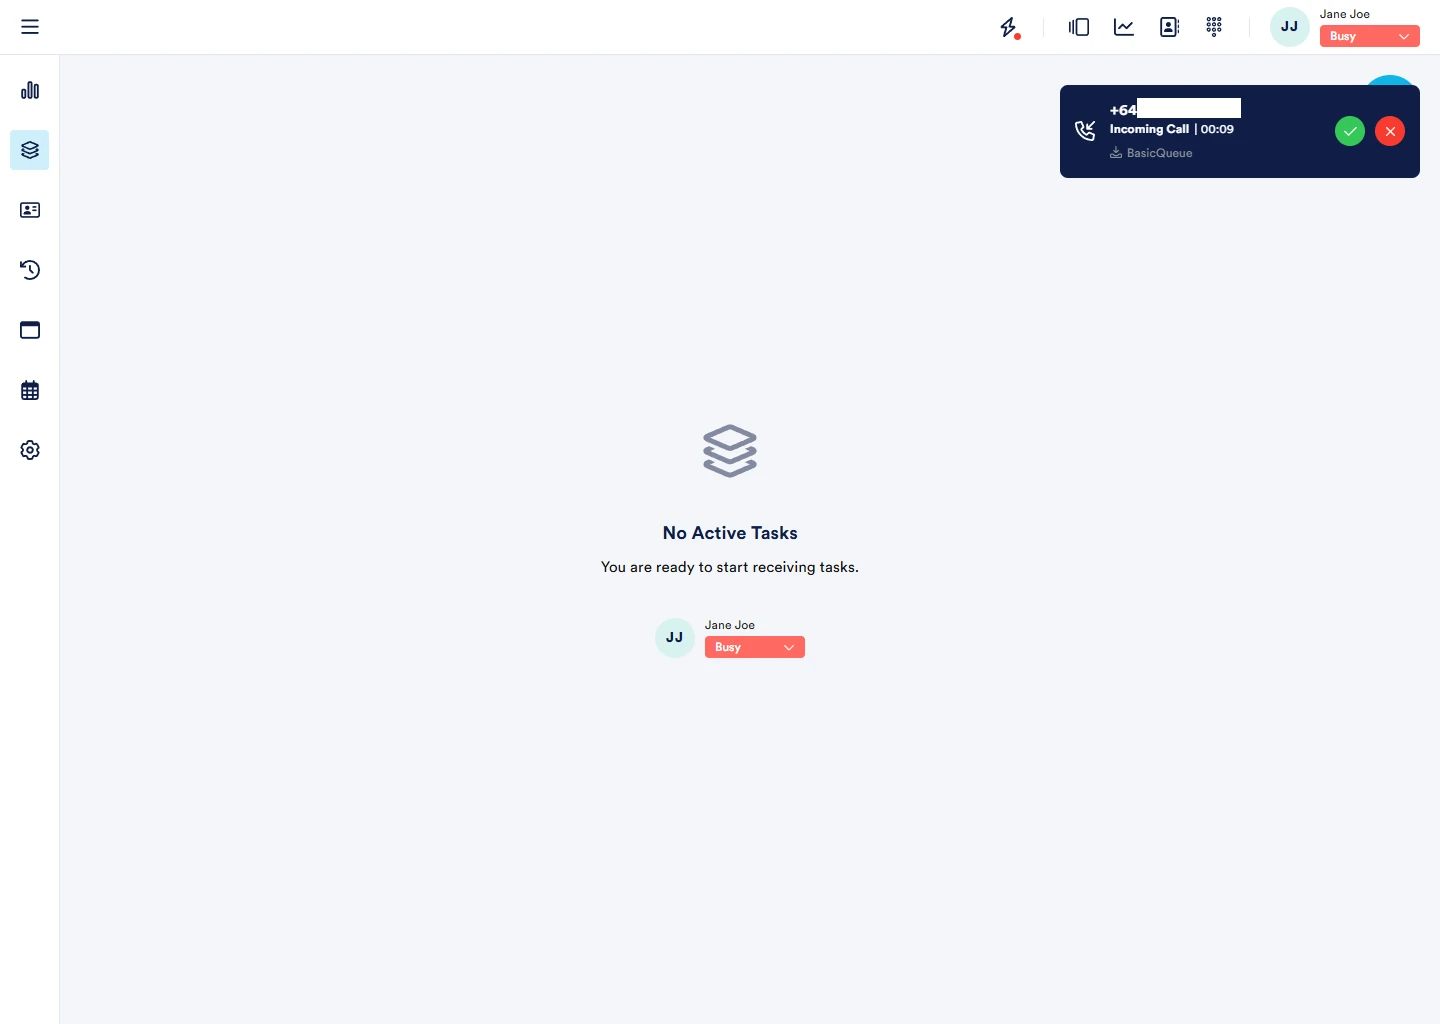
Ensure you are in available status; you should see an incoming call alert appearing from the right corner of NEONNOW as shown in the below snapshot:
Click on the green answer button, and you should be connected to the caller.
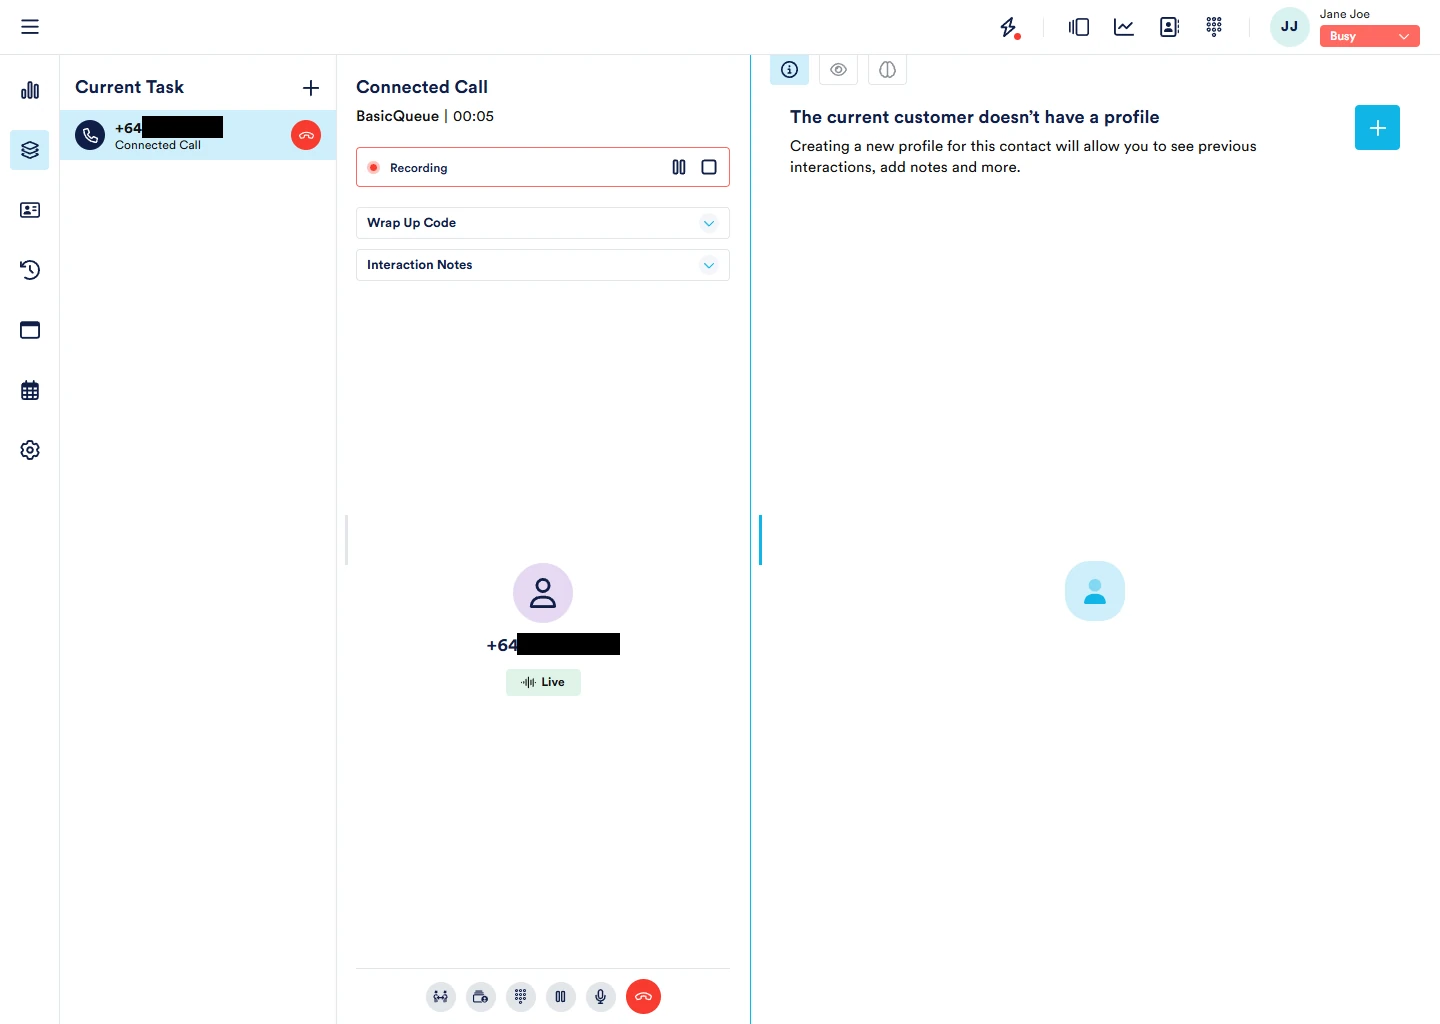
Once connected, you will see some information about the call, such as caller’s phone number, queue name, call timer, wrap-up code, interaction code, and the core telephony functionality.
Note: You can configure wrap-up codes from the NEONNOW Admin app; however, they are not required for basic telephony testing with NEONNOW.
Please feel free to try various NEONNOW features available during the call, such as transfer, hold, mute, wrap-up codes, interaction notes, etc.
Click on the red button to disconnect the call.
After Call Work
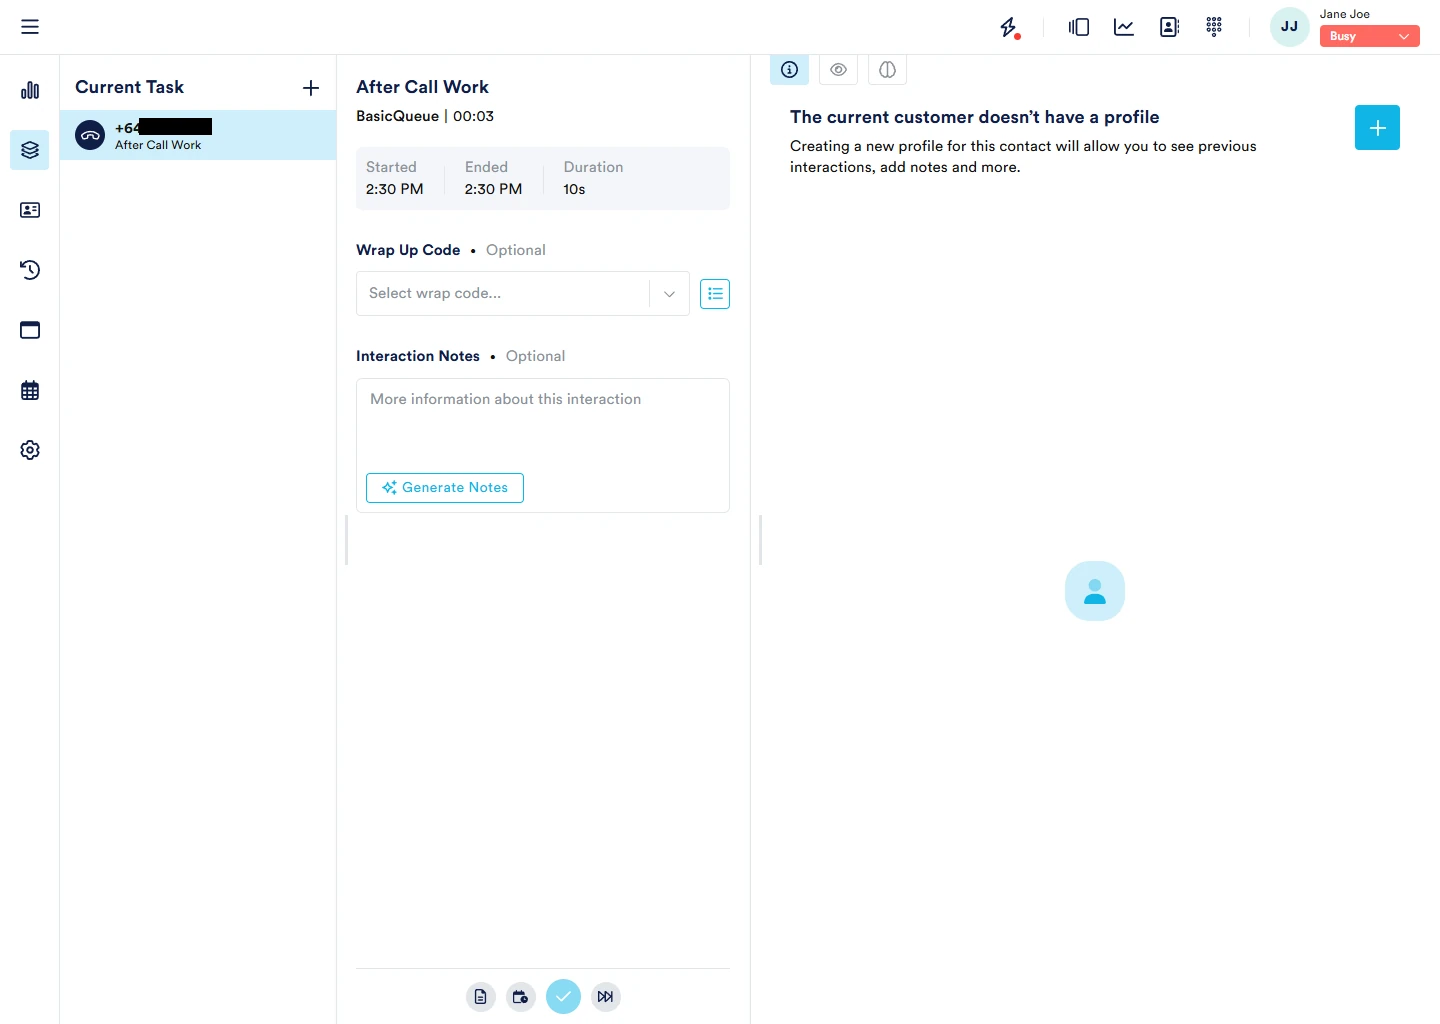
You are now in the ACW (After Call Work) mode( if configured in the NEONNOW admin app)
Review the info and click on the red tick button.
Outbound call
Next, let’s try an outbound.
You will need a default outbound queue to make outbound calls, check Outbound requirements in thePrerequisites for more information.
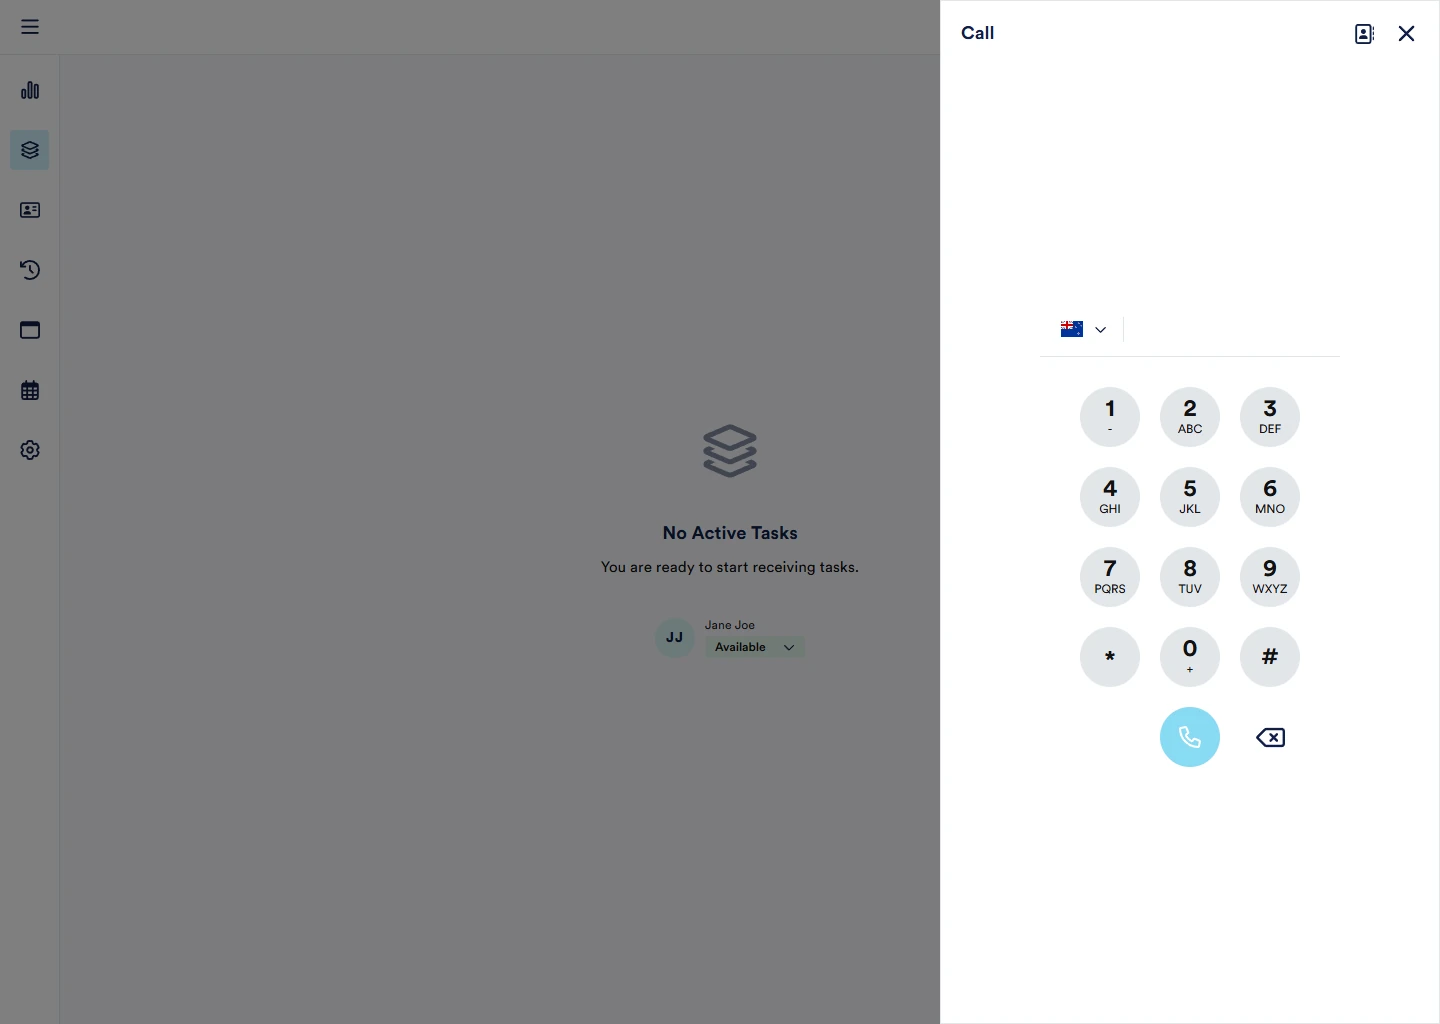
From the top right corner, click on the Directory icon to open NEONNOW Directory in a popup window within the NEONNOW app.
Click on the Dialpad tab and type the number to dial in the phone number field as shown below:
Click on the green call button to initiate the outbound call.
Next Steps
Add NEONNOW Users
Login into your Amazon Connect Admin account.
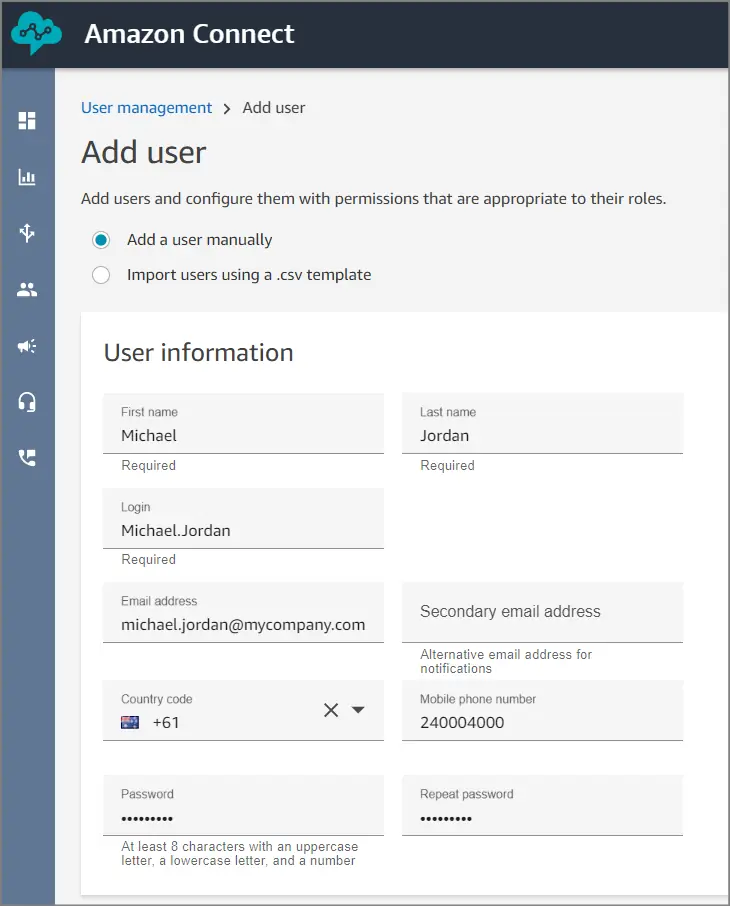
From the menu on the left, go to Users > User management > Add new users
Fill the new user info and assign the necessary routing and security profiles:
Click “Save“.
Login into the NEONNOW application using the URL created for your organisation (e.g. https://acme-inc.cw-neon.com) with the Amazon Connect admin user credentials you provided during the NEONNOW setup.
Once logged into NEONNOW from the menu on the left, go to Settings > Users
You should see the new user you created above should appear in the users list.
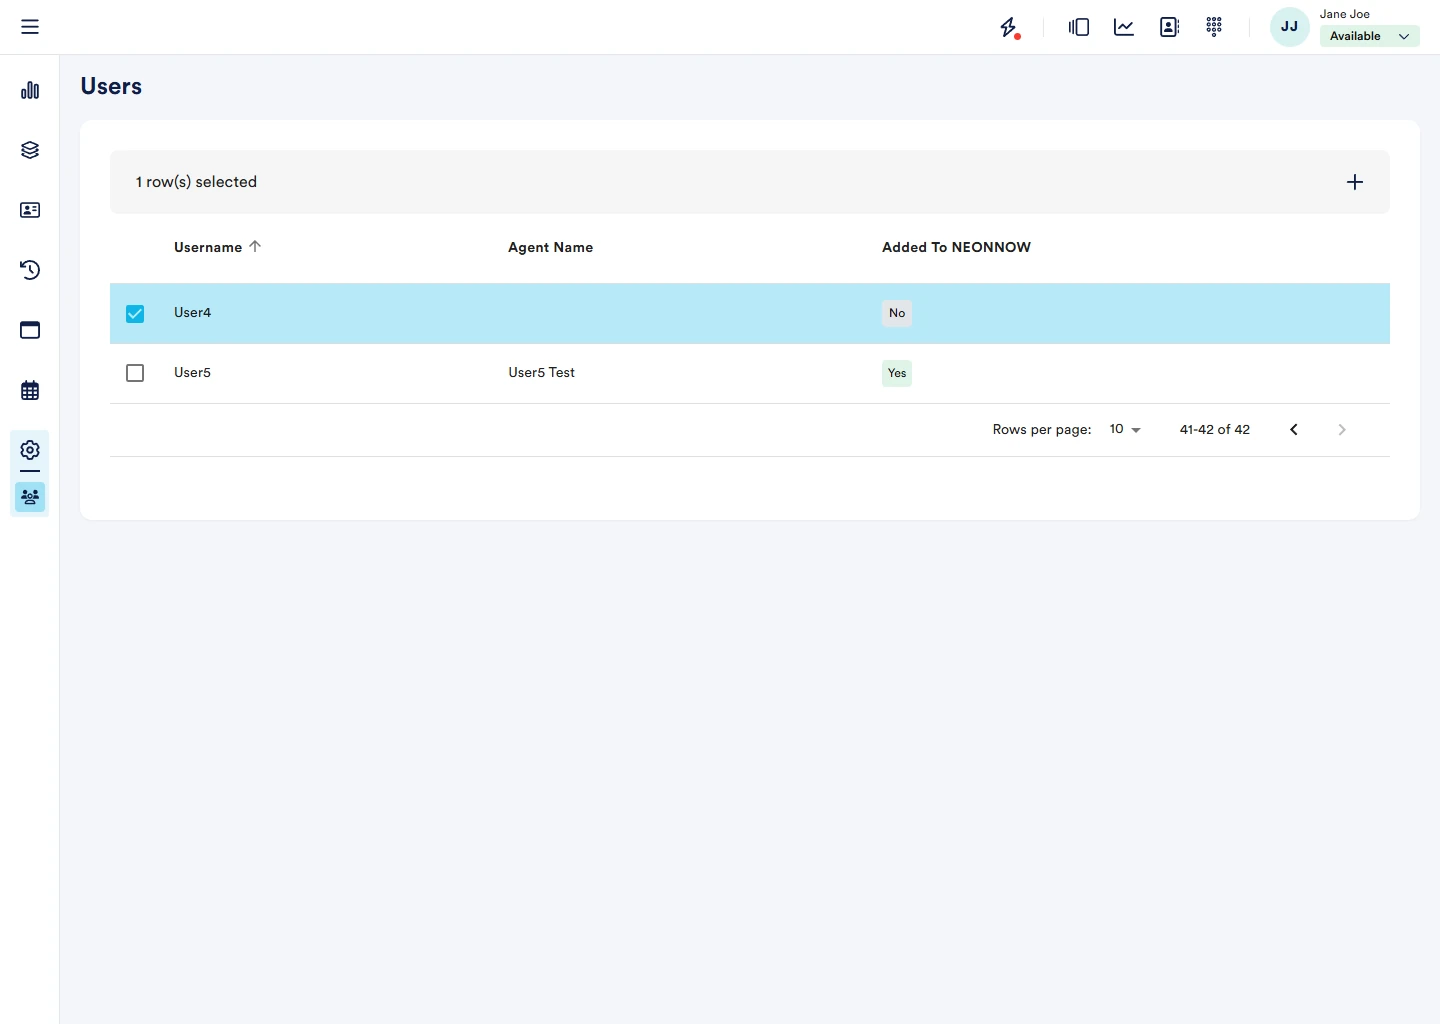
Select the new user by clicking the checkbox before the user’s name:
Click on the “+” button on the right top of the Users page:
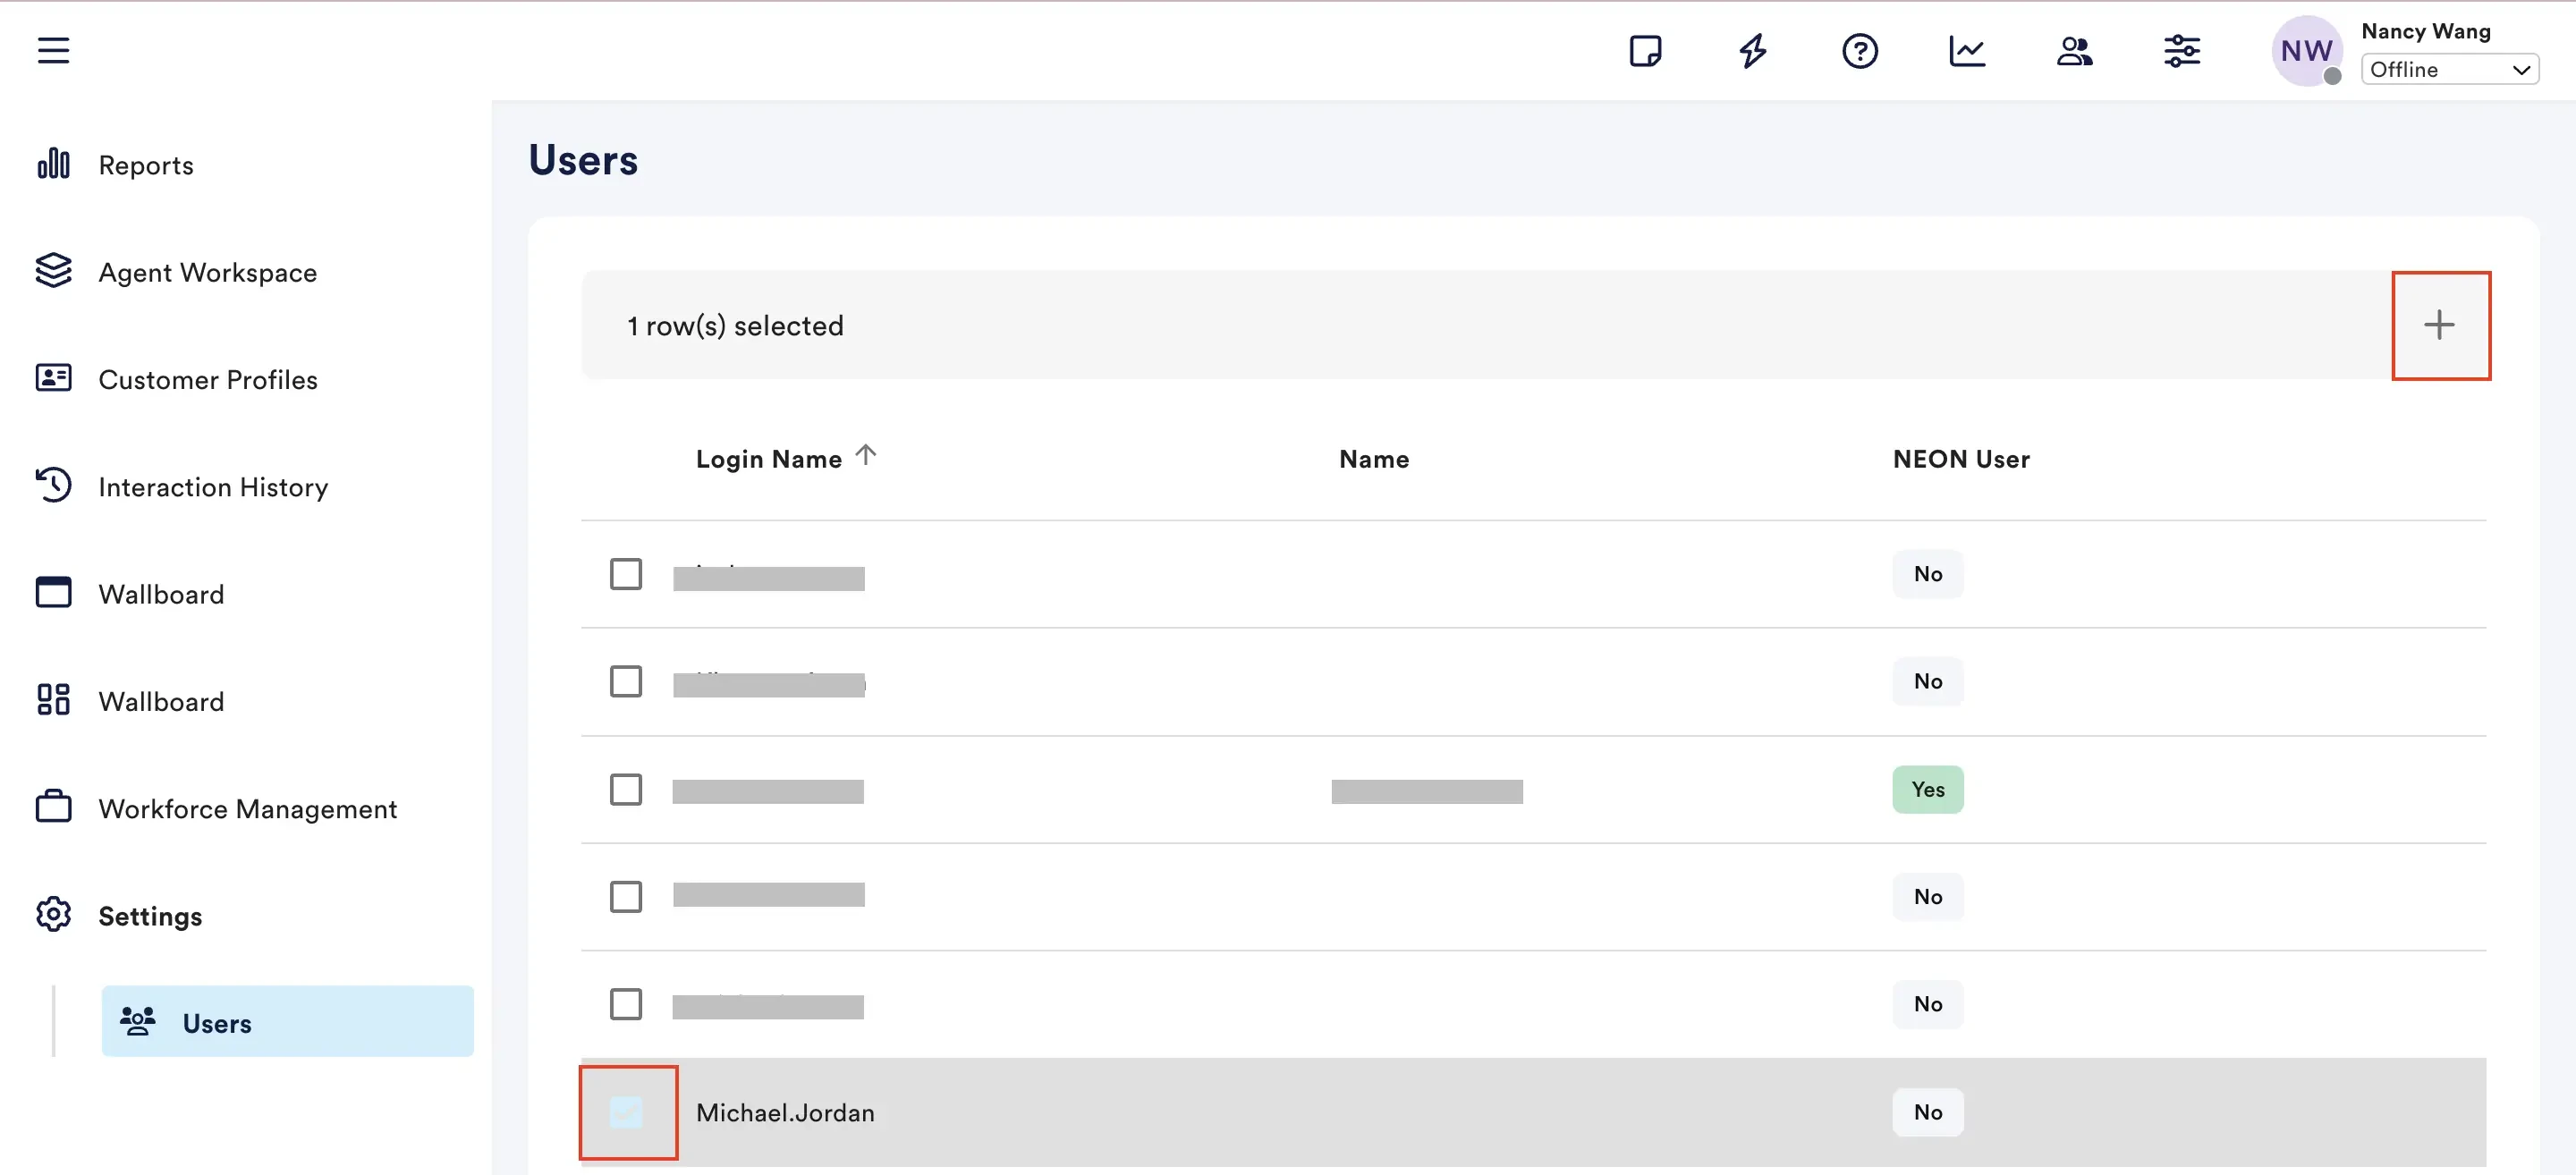
Click on the Role dropdown and select either Agent or Admin from the list and click “Save”
The “NEONNOW User“ column should now show “Yes“ for the new user indicating the user we created in Amazon Connect is now a NEONNOW User.
Go to the NEONNOW Agent Workspace URL created for your organisation (e.g. https://acme-inc.cw-neon.com) in a browser, such as Chrome. You will be able to login using the newly created user.
Modify NEONNOW Features
Login to NEONNOW Admin using the admin URL: https://admin.neon.au.cw-neon.com
Click on your NEONNOW instance name, and you should see a similar page as below:
Click “Customise” to config your NEONNOW features.
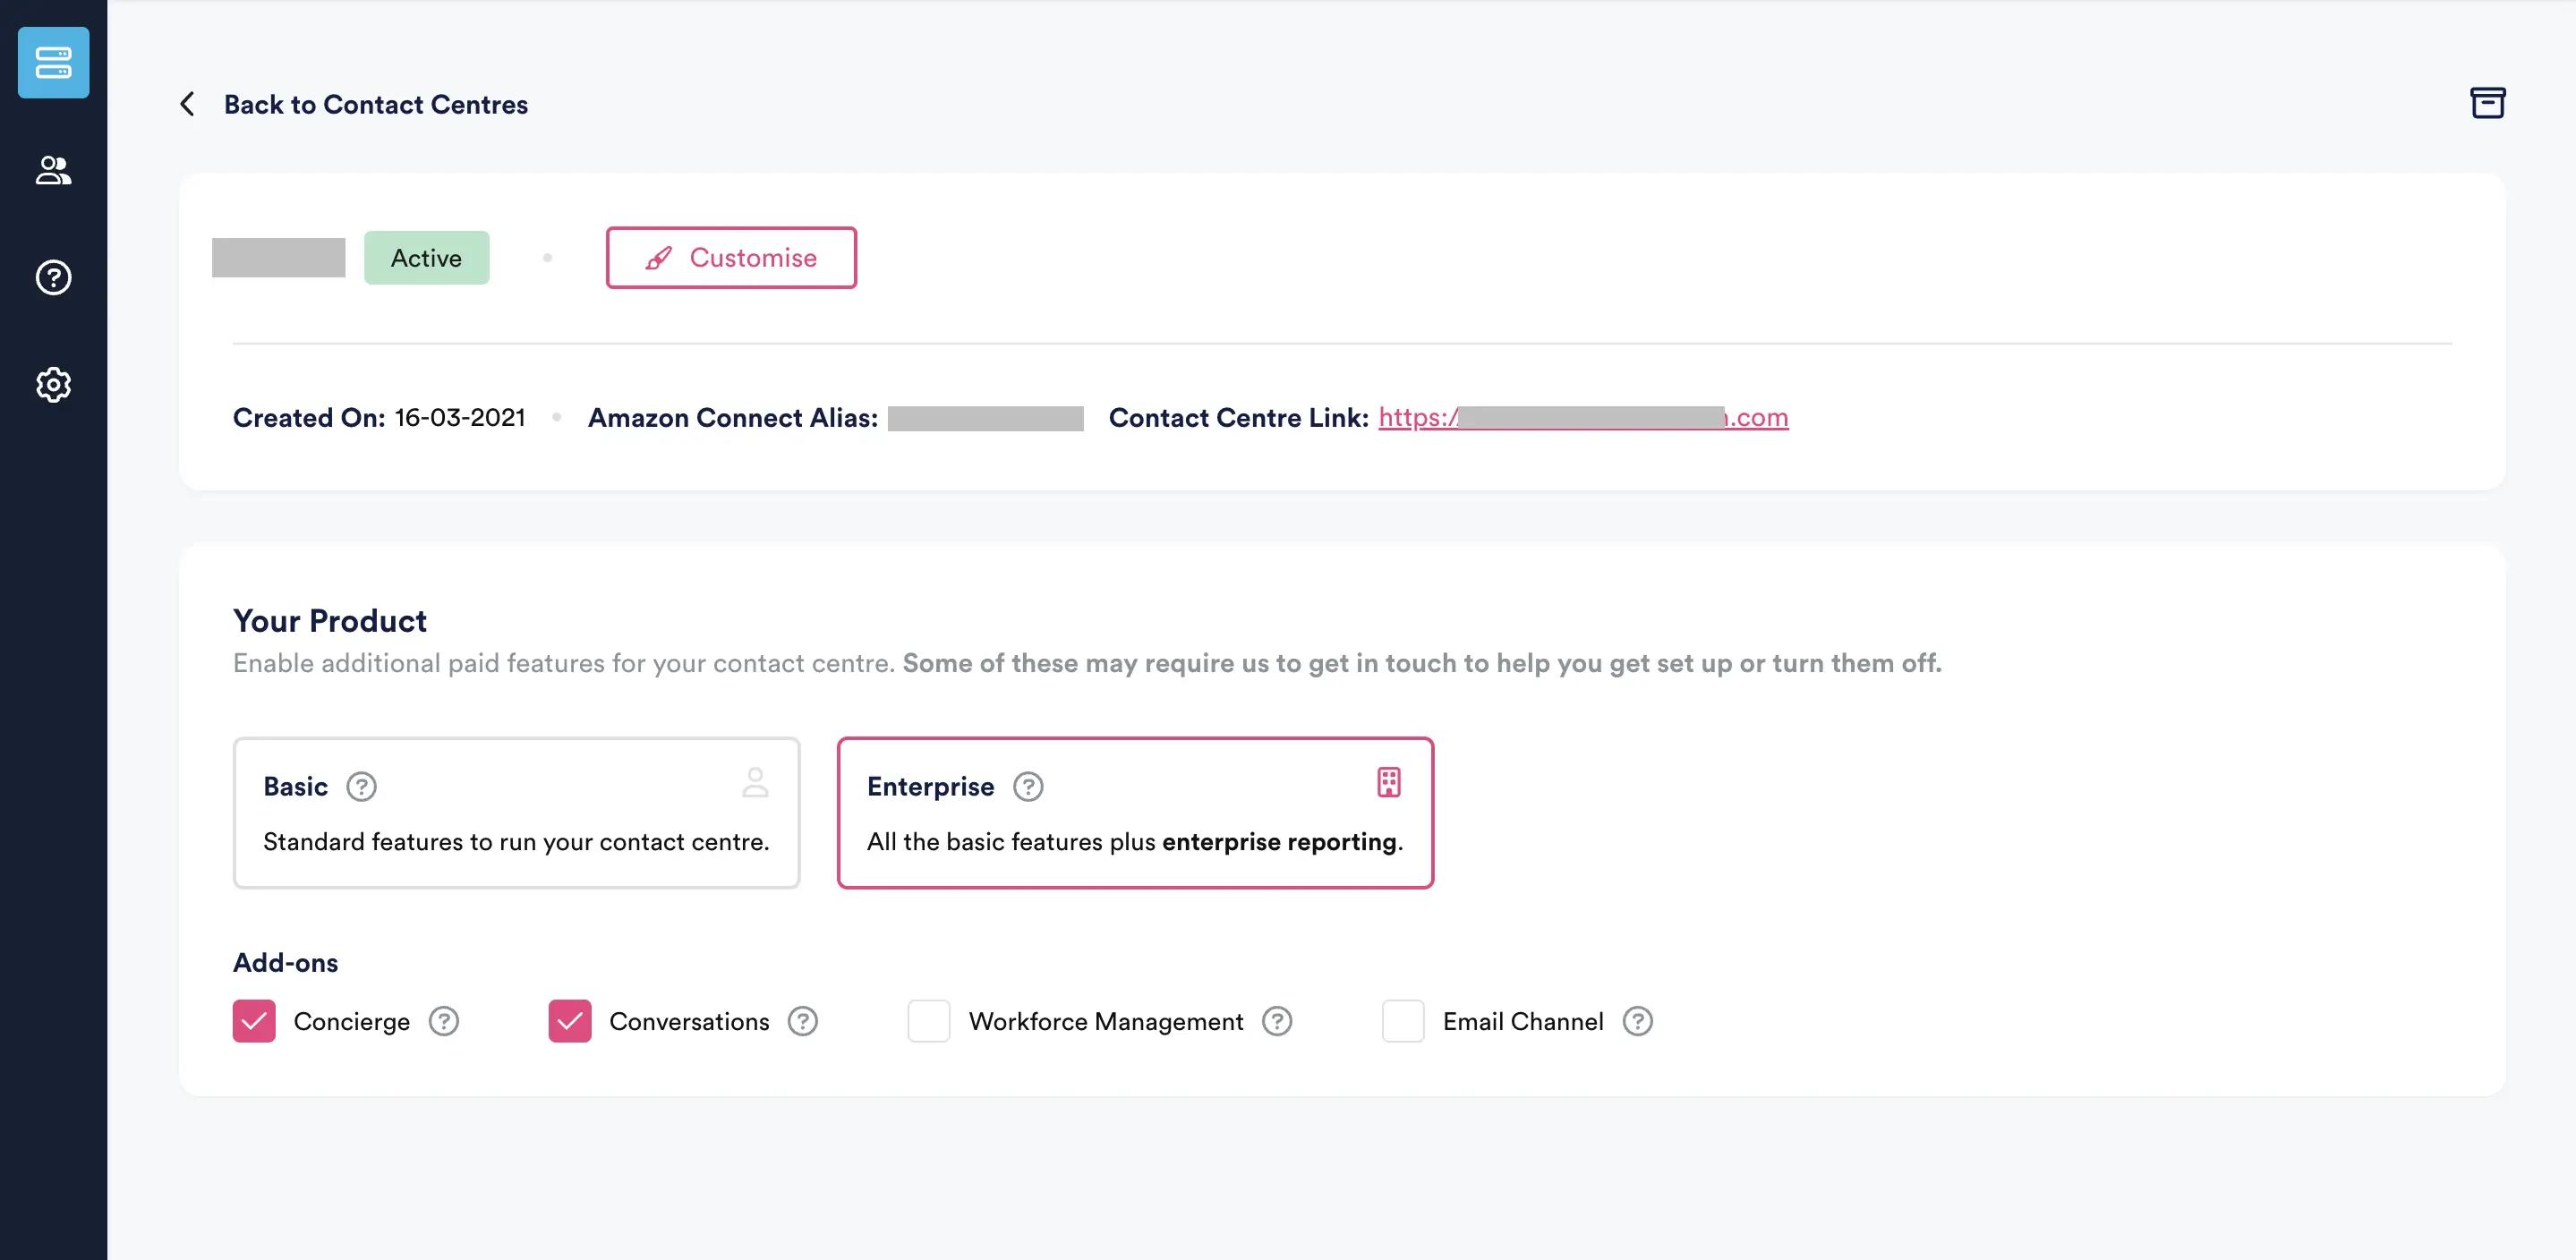
Modify Call Flows
A flow defines how a customer experiences your contact center from start to finish. At the most basic level, flows enable you to customize your IVR (interactive voice response) system.
For example, you can give customers a set of menu options and route customers to agents based on what they enter on their phone. Although with Amazon Connect, flows are significantly more powerful than that: you can create dynamic, personalized flows that interact with other AWS services.
Please visit the following link for more details: Create a flow
Unsubscribe NEONNOW
To unsubscribe, you need to login to Marketplace and click “cancel subscription“, then you will not be able log in to NEONNOW and NEONNOW admin app.
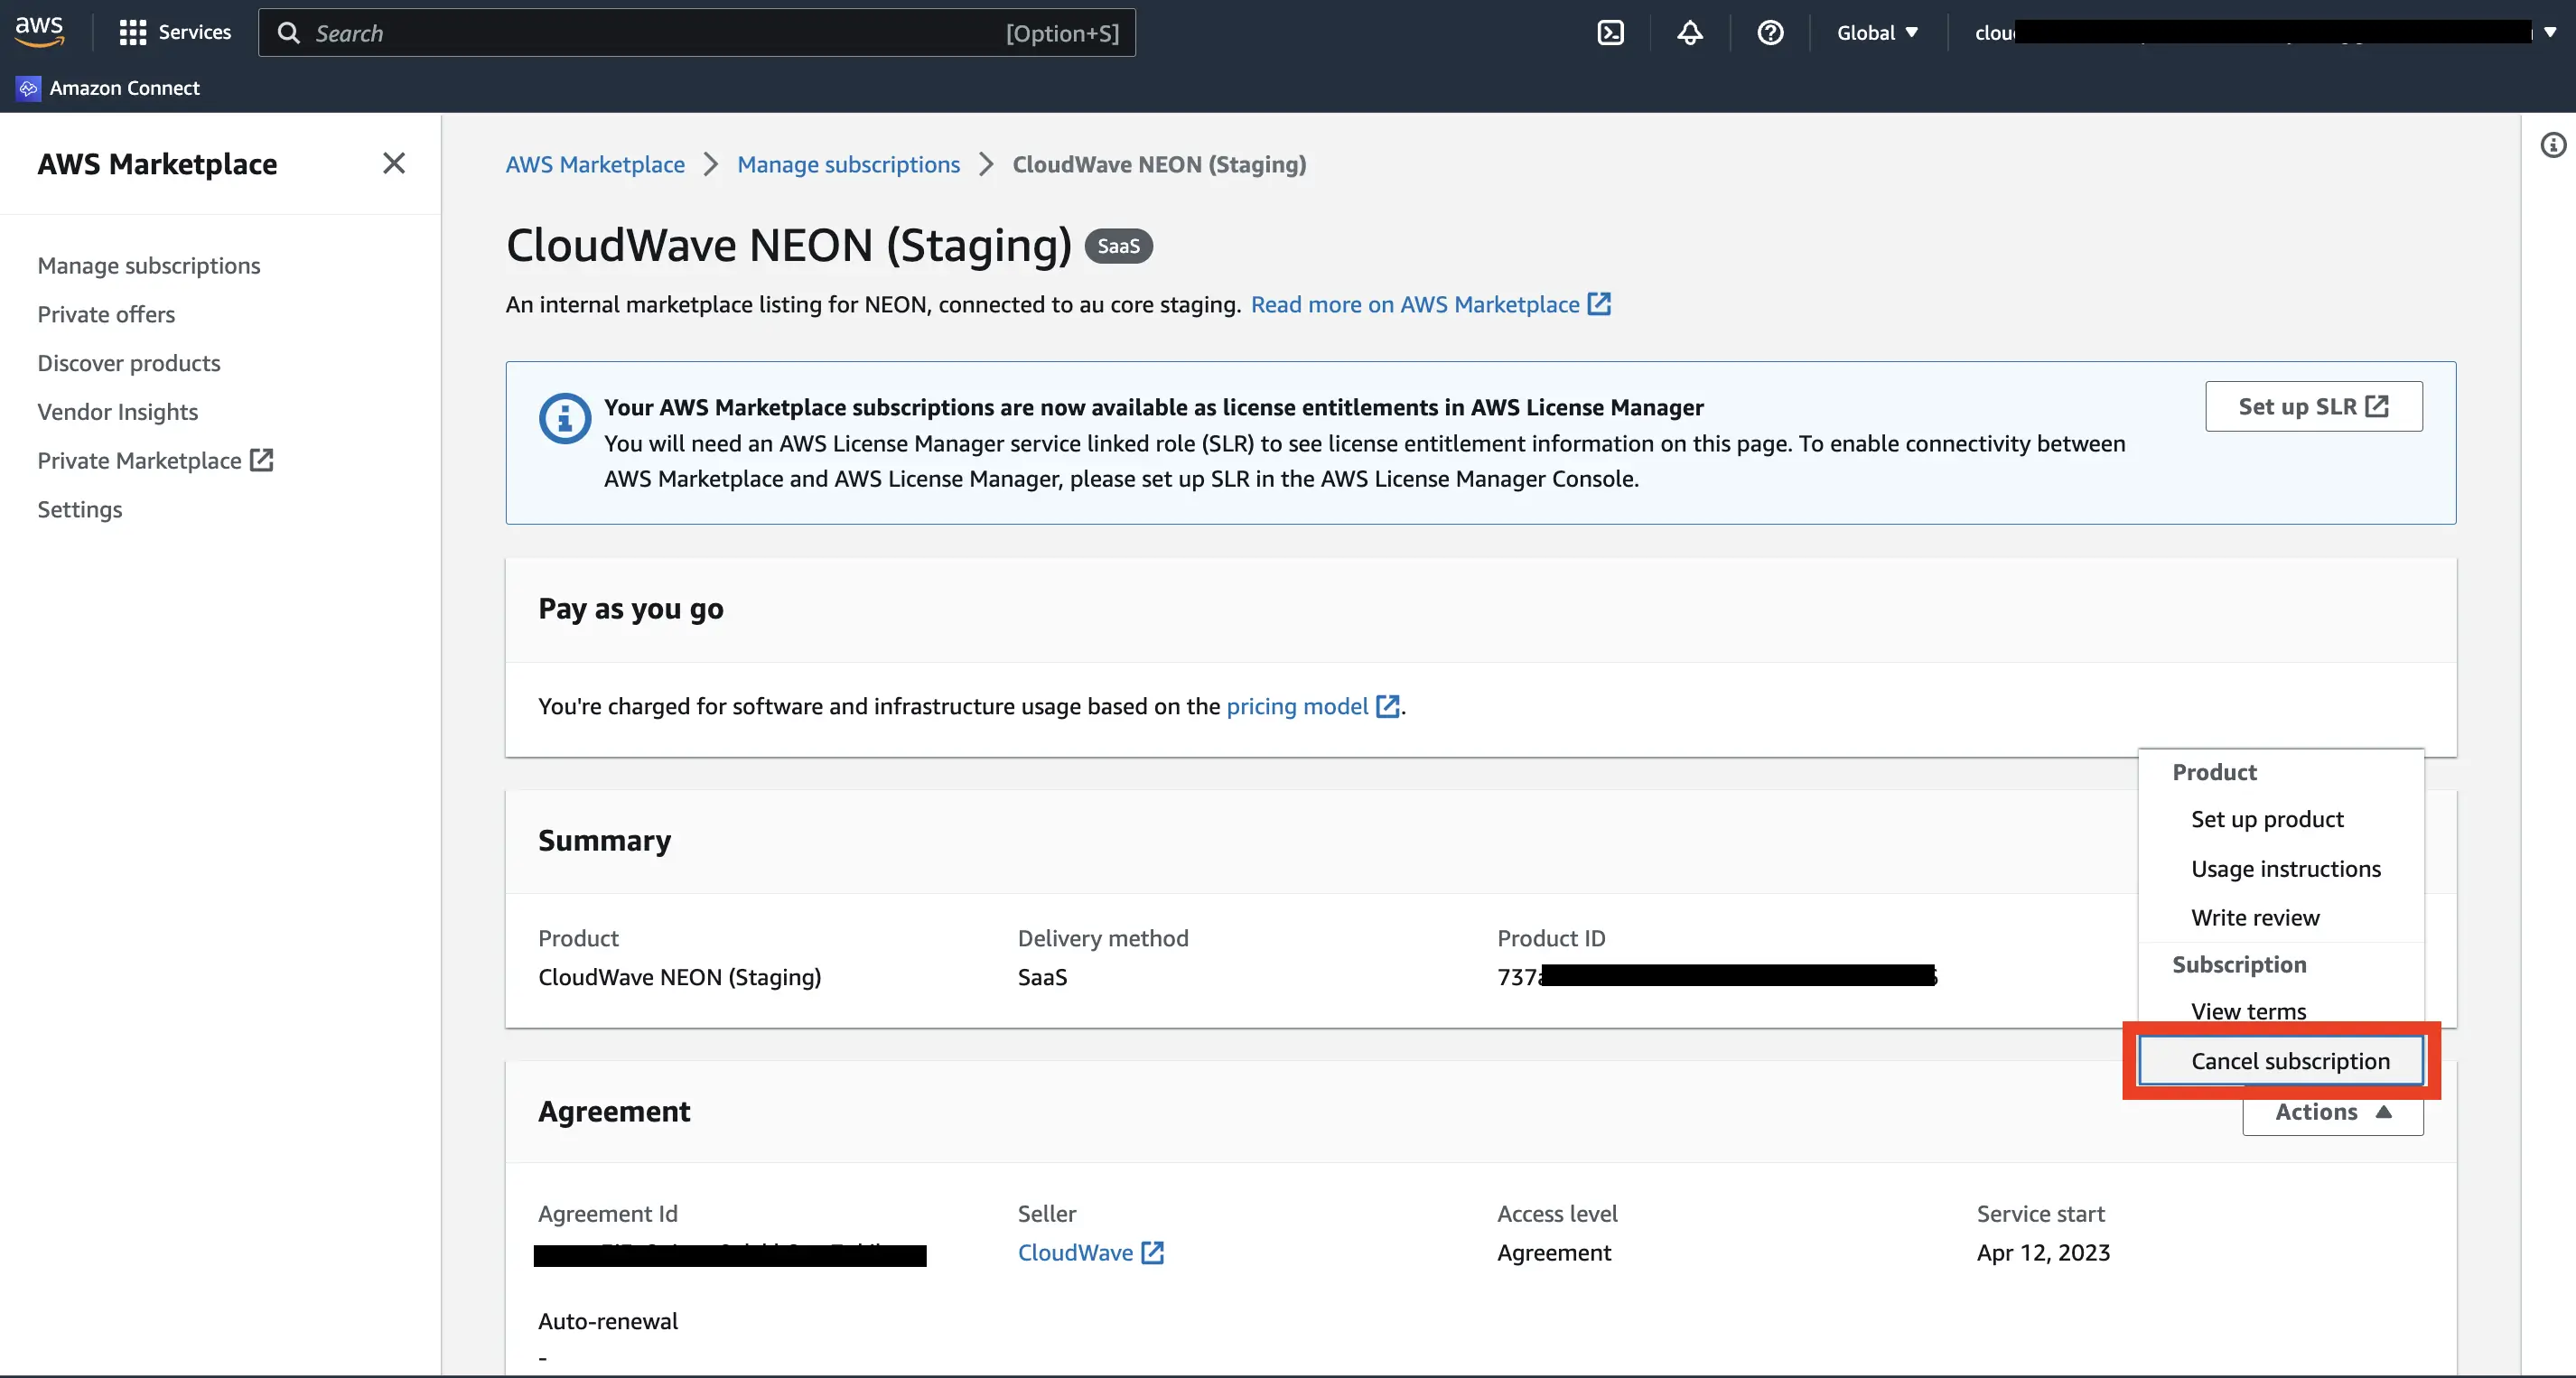
Beyond unsubscribing to the NEONNOW marketplace listing, to fully decommission AWS resources deployed to your account (deployment role), log into the CloudFormation and carry out the following steps:
Find the CloudFormation stack deployed earlier – name will be prefixed with cloudwave-neon Select this using the radio & select ‘Delete’ This will remove the local role from your AWS Account
