Service Now
Overview
This pages describes how to embed NEONNOW into Service Now.
The specific features of the NEONNOW integration is:
- Inbound screenpop
- If specific sn_id and sn_object exist on the inbound interaction, then that specific record will be loaded of that specific type - this could be a case, incident, or any other object
Pre-Requisites
- Admin access to Service Now
- NEONNOW Admin Access
Add Approved Domain for Connect
Add the Service Now domain to the Connect instance’s approved domains, per https://docs.aws.amazon.com/connect/latest/adminguide/app-integration.html.
This URL must be HTTPS and will be in the format of your Service domain - e.g. https://abc123123.service-now.com
Service Now Configuration
Installing OpenFrame plugin
To install the OpenFrame ServiceNow plugin:
- Sign in to ServiceNow. Select System Definition > Plugins.
- Search for OpenFrame using the filter criteria and search bar. If you already have installed the plugin, you can skip this step.
- Select Install and then Activate on the Activate Plugin dialog.
Configuring OpenFrame CTI softphone
In this step you will be creating a new OpenFrame configuration with your new page.
Go to All > OpenFrame > Configurations by searching for “OpenFrame” and clicking Configurations.
- In the OpenFrame Configurations list, find the CTI OpenFrame configuration, and click on it to open its properties.
- If there is no existing OpenFrame configuration, click New to create one.
- To the right of the URL field, click the lock button to edit the URL.
- Add the URL for the configuration in the following format:
https://{NEONNOW domain}/workspace?base=https://{servicenowdomain}.com
- Click the lock button again to lock the URL
- Set the Width to 350, and Height to 600
- Select and add any relevant user groups (needs expanding - Softphone didn't show unless I added these MF)
- Finally, Make sure that the OpenFrame configuration is still active (see the checkbox for Active at the top of the configuration properties). User is required to add Group first
- Click Update to save your changes
Configure System Properties
Allow Same Origin (Whitelist) Go to System Properties by searching for “sys_properties.list” in the ServiceNow admin UI’s Search field.
Note: The if the newer UI version doesn't surface System Properties via the search above you can browse to any app System Properties and view all by browsing to the parent in the hierarchy. Alternatively go straight there with the URL in the following format (remembering to update your instance ID)…
https://{instance}.service-now.com/now/nav/ui/classic/params/target/sys_properties_list
Then narrow your search by setting the filter to “Name” and searching the system properties for “glide.ui.concourse.onmessage_enforce_same_origin_whitelist”.
- If the property does not already exist, click New to create it.
- If it already exists and you see it in the list, click into the property to modify it
In the properties for “glide.ui.concourse.onmessage_enforce_same_origin_whitelist” edit the Value field with your root domain NEONNOW URL. Make sure that the URL begins with “https://” and there is no “/” at the end of it.
Optionally, if you are utilising any modules/iframes within NEONNOW, then also add those domains (comma separated).
Click Update.
Assigning of OpenFrame role to a ServiceNow user
The OpenFrame user role called sn_openframe_user is added with activation of OpenFrame. All user accounts need to have the sn_openframe_user role assigned to them in order to use the embedded Agent Desktop. You can assign it to individual users, or to the group of which the users are members.
To assign the role to an individual user:
- Go to Organization > Users and click on the name of the user who needs the role.
- At the bottom of the user's details, find the Roles tab and click Edit.
- Use the filters to search for "sn_openframe_user" and add it to the user's role list.
- Click Save.
- Repeat for all desired users. NB You may also have to add users to a Group that you assigned to the OpenFrame config originally.
NEONNOW Admin Config
To enable the NEONNOW adapter, turn the Service Now integration on in the NEONNOW admin portal:
- Login to NEONNOW admin portal
- Select the Contact Centre you want to manage, then select 'Customise'
- Navigate to Integrations then CRMs, and toggle on the Service Now integration
- Enter the openframe javascript url for your Service Now Instance - it follows the format: https://{servicenowinstance}/scripts/openframe/latest/openFrameAPI.min.js
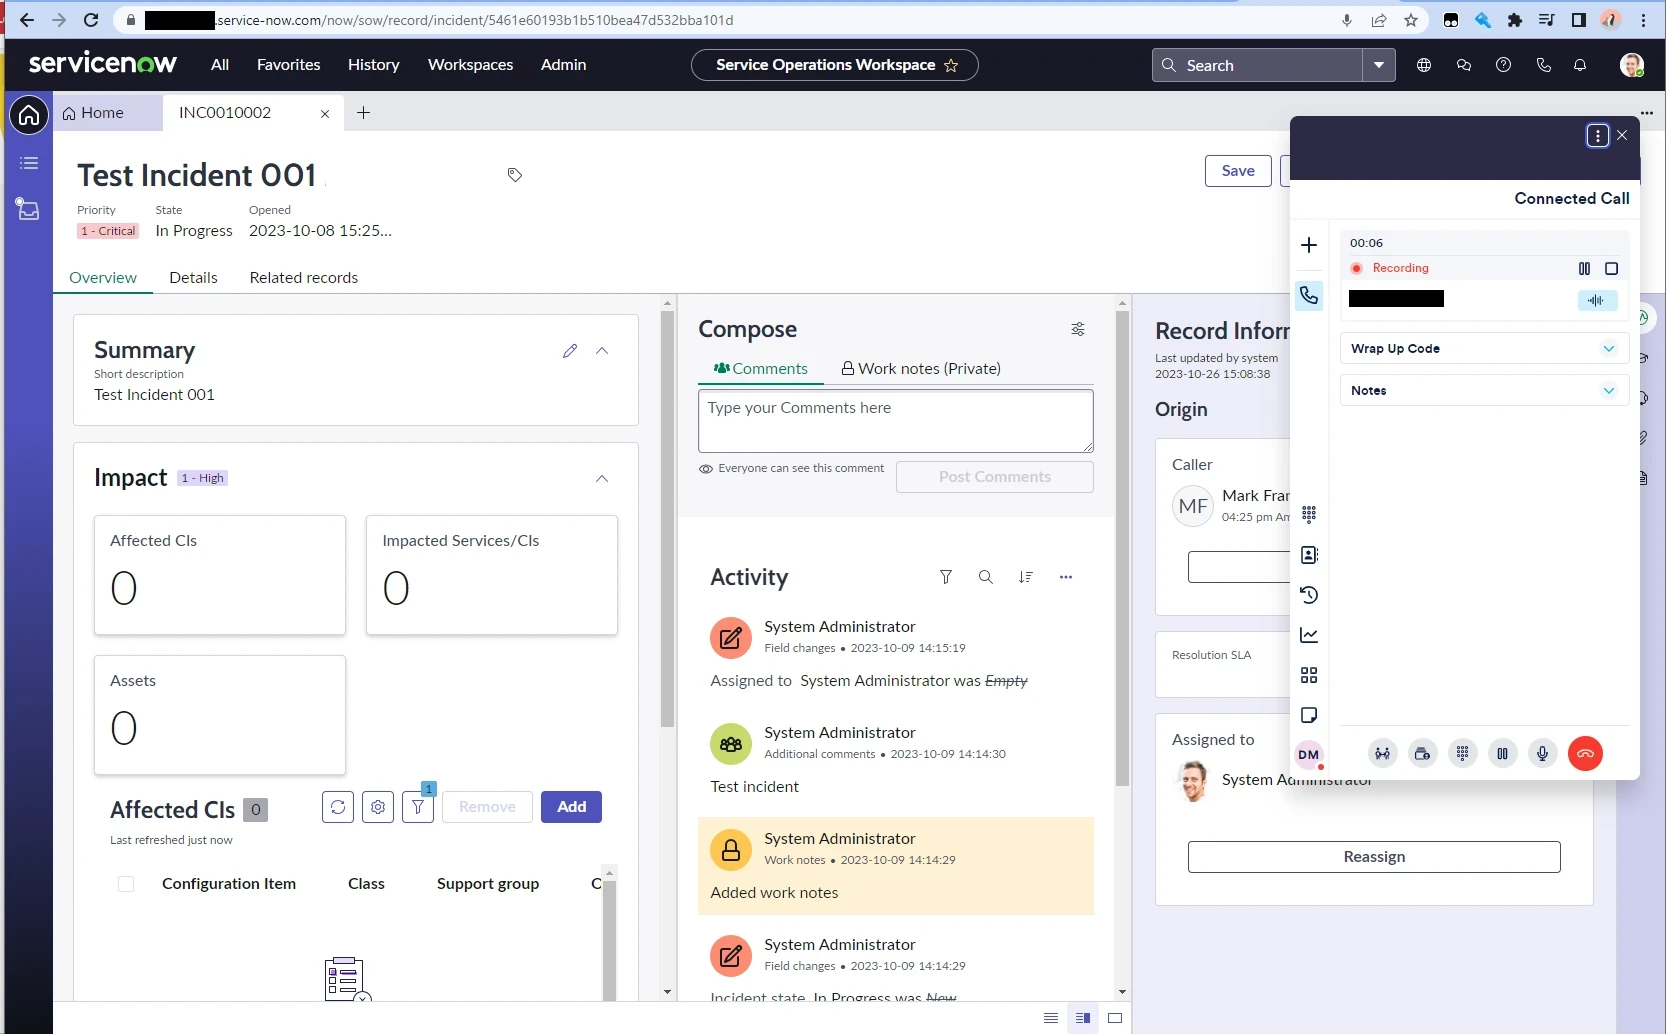
NEONNOW Embedded Softphone
The following screenshot shows the NEONNOW softphone embedded into Service Now.